
Below is the recent book that chronicles the known Union Civil War soldiers' quilts. If you are interested in quilt history, you will have heard of the authors Pam Weeks and Don Beld. Don also heads a group that makes quilts to honor fallen soldiers in our current wars.

My friend Debbie and I had a two-person retreat last weekend, while her husband was at a conference. We had a lovely time, sewing and visiting. Before I went, I had to decide what project to bring. The potholder idea popped up in my head again.
Most of my projects were at the quilting stage, and I didn't want to drag my quilting treadle to Madison. It probably wouldn't fit in the Mustang anyway. I knew I wanted to take a hand crank sewing machine, just because I hadn't done that for a while. My first thought was my Singer model 12, which would be appropriate for the time period of the fabrics and the design. The only problem with the model 12 (and with most hand cranks) is winding the bobbin. I enjoy sewing with the hand cranks, but winding bobbins is a pain. And if we were going to be sewing all weekend, I would need a lot of bobbins. I have a model 12 treadle, and I don't mind winding the bobbins on it, but I haven't used it for a while and it isn't running very smoothly yet.
My next thought--what about a hand crank that doesn't need a bobbin? What about my little Willcox and Gibbs?
I bought her several years ago on Ebay. The hand crank actually came from a guy in England. I got her up and running right away, but I had never made a project with her. Plus this was a chain stitch machine. Can you even make quilt blocks with a chain stitch machine? Would the seams pull out?
I thought about it for a while. Willcox and Gibbs sold sewing machines for over 100 years in this basic design. Most people made clothes with them. If the clothes didn't come apart, why would the quilt blocks? The seams would actually be protected inside the quilt, rather than rubbing against other clothes or skin.
In the end, I decided to live dangerously. Not only did I use the Willcox and Gibbs, I cut the pieces for the blocks from the old fabric I bought at the museum, plus other old fabrics in my collection. And I used some of my collection of old thread to sew with--the little wooden spools fit very well on the machine. I combined lots of old stuff that I love--sewing machine, fabric, thread, and quilt style.
I can't believe how well it all worked. The machine was easy to carry, and it was wonderful not having to worry about running out of bobbin. I bonded with the machine as I made the blocks. I even learned how to thread it without running for my copy of Charles Law. It was so quiet, we had no trouble talking over it or hearing Downton Abbey on the DVD player. I was almost sorry when I finished making the blocks.
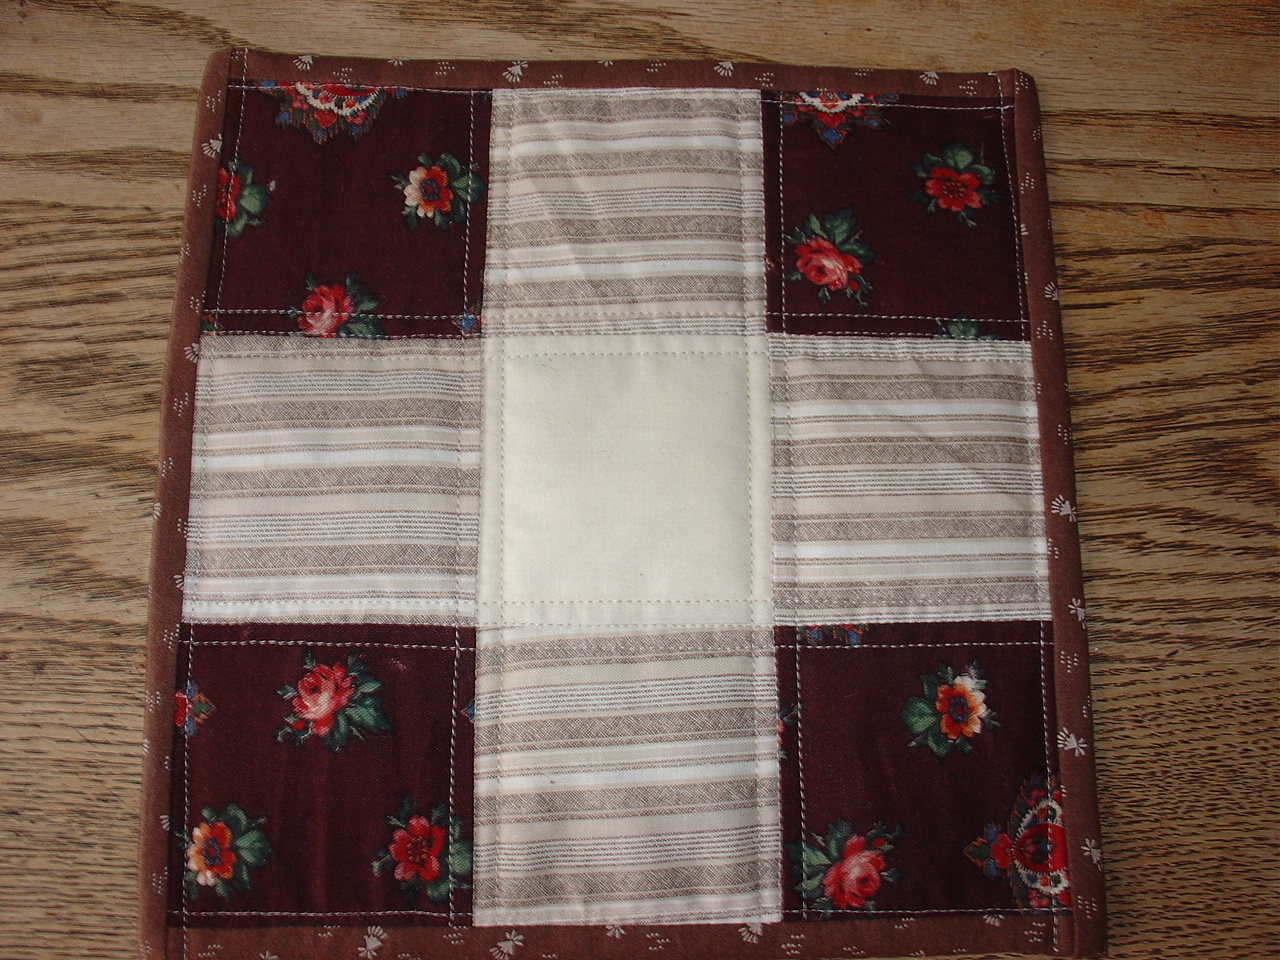
Here's what I've got done so far:


I'm quilting and binding the blocks on the Davis Vertical Feed treadle, which works like a built-in walking foot. So far I have 12 blocks completely finished, out of an eventual 48.

The slowest part is binding each square.

This is definitely an unusual project, but I am having lots of fun with it.
Happy Sewing!
P.S. Click on the number of comments to leave your own comment.
Great minds think alike!! Hehehe...I've been using my W&G for piecing a quilt and am truly convinced that is this is the way to go for straight stitch piecing. Nothing I like more than NOT having to fuss with a bobbin. The little W&G just goes, and goes and goes. We definately think alike because I use my Davis VF2 for binding as well. ;-) Nice blog!!
ReplyDeleteThanks, Treadle Toes! People power rules!
DeleteGreat couple of posts. I have been inspired to try the potholder technique. I think it will look nicer on the back than the usual way of joining QAYG quilts.
ReplyDeleteThanks so much for this amazing idea! Never heard of it until now. Can't wait to get started.
ReplyDelete