Friday, July 29, 2016

Daisy Quilt Finish

Hello!  I'm back this week, with a quilt finish made possible by my friend Joey.
I'm calling this quilt Summer Daisy.
I bought the petals on Ebay many years ago.  They were already cut out, and the edges were hand-basted, ready for applique.  I top-stitched them to background blocks, and added a stem made from purchased binding.
Some of the fabrics are really weird.  Check out the Bambi-like deer in the flower above.  The fabrics date to the 1950s and 1960s.
I finished this top literally years ago, and it was in my stack of shame when Joey last visited.  We pieced a back, and she took it home to quilt for me.
Isn't the quilting wonderful?  It was done by Joey on her long arm machine.
She did a kind of loop de loop in the sashing and border that really sets them off.  Thank you, Joey!

 I still have to sew the binding down.  I'll be doing that this week, while waiting for supper to cook, or during the baby's naps, if he takes any.  He's still too little to have a set schedule yet.
I also have a flimsy finish!  These are the nine patch blocks I made with vintage prints and solid colors (vintage or new).  I added a simple border of squares.
There are 99 blocks in the quilt, 9 across and 11 down.  I alternated between blocks with 5 print squares and blocks with 5 solid squares.
Many of these prints are from the 1930s.  We tend to think of the 30s fabrics as pastels, but there were lots of crayon box shades then, too, especially in solid colors.
All of this has put me in a vintage mood, so I started working on this.
I bought a bag of vintage scraps at the last Elkhorn flea market.
Here's what was in it!  Lots and lots of scraps, mostly from the 1930s.

I am going really Old School on this lot.  In the foreground of this picture, you may be able to see two red plexiglass templates.  One is an equilateral triangle, and one is a right triangle.  The templates are designed to be used with a rotary cutter, but they're not very big, and I don't really like using the cutter for these small shapes.  (Blood is just so messy, and I don't want to spend the evening in the Emergency Room.)  So I'm actually Drawing Around the Templates and Cutting the Shapes with Scissors.  Not very modern of me, of course.  (Neither is sewing with a treadle.  But I digress.)
When I first learned to quilt, this was the way it was done, although our templates were not made of such nice stuff, usually just cardboard like cereal boxes.
I'm making progress!  I've got a stack of each kind of triangle, plus a pile of tiny pieces I might use for something, and a pile of shreds that need to be thrown out.  I've been listening to speeches on television while I work, but I can imagine the original owner of these scraps tracing and cutting while Benny Goodman plays on the radio, or President Roosevelt comes on for a Fireside Chat.

We have had the best of weather today, a rain shower that watered the gardens and cleared the air, and lovely summer sunshine.  August starts next week, and summer will be on the way out.

I wish you the joy of summer today, and of course the joy of quilting.
I'm linking up with Crazy Mom Quilts today for Finish it Up Friday.


Friday, July 15, 2016

Vintage Mess (and other stuff)

I finished something!  I really didn't think it would happen this week.  I'm babysitting my 7 week old grandson, and tired is not even the word at the end of the day.  But--I made a new checkbook cover!
I really needed one.  Plus it needed to be snazzy and red, with sewing machines on it.
Here's the outside.  Fun fabric.
And best of all, it fits my checkbook and check register.  So what if I only write 10 checks a year?

In other stuff news,  here's a vintage mess.
Lots of my quilts start out this way--once upon a time there was a bag of vintage scrap pieces.  In this case, they were "squares", meaning they were not really square, of vintage prints.
The big bag is where I store my solid color scraps.  I can't believe it's gotten so full.  I think these pieces are breeding in the basement when no one is looking.  (But if that's the case, why aren't the reds and blues making more purples?  I need more purple!)
It is so much fun matching up prints and solids.
I finally had to dump out the bag on the floor of the sewing room, so I could root around for more colors.  I need more orange, more pink, and dang it more purple!
The mess is everywhere.  I had to go find more vintage scraps to cut up to go with the squares.
I'm cutting these blocks about ten at a time, and laying them out on the treadle.  It kind of reminds me of the Elves and the Shoemaker, except there are no elves piecing the blocks.  (So far.  I haven't tried leaving out plates of cookies yet.)
Wouldn't you know I'd start a new project just when I have dramatically less time.  Good thing these blocks are easy and quick to sew, whenever I have a free minute.
Here are the stacks of finished 9 patches.  The closer stack is made of blocks with 5 print and 4 solid squares, and the stack near the window is made of blocks with 5 solid and 4 print squares.  I had to trim those vintage print squares to 2.25 in. to even them up, so the blocks finish at 5.25 in.
I'm planning to set them side by side in the finished quilt.  I need 99 total, and I have about 63 done.  Not bad for a busy week.
I've been catching up on my quilt show viewing while feeding and burping the little one.  We especially like Fons and Porter's Love of Quilting. I watched one the other day with the project shown here on the cover of their magazine.  It reminded me of a quilt block I'd always wanted to make.
The photo above is from Granny Quilts, by Darlene Zimmerman.  It's not really much like the Fons and Porter quilt, except for being sort of a pinwheel.
Here's the cover of the book, just in case you want to know.
And here's my test block, done in (of course) vintage fabrics.  The directions were excellent.  Ms. Zimmerman uses my favorite rulers, the Easy Angle and the Companion Angle.  It makes an 8 in. block.  So here's another new project!  I may put this one on the back burner for a while.  It's great just knowing I have good directions.
So what direction are you going in this week?  I hope your days, and your quilts, are joyful.
I'm linking up with Crazy Mom Quilts today for Finish it up Friday.


Friday, July 8, 2016

Bearly Finished

Here's how I'm rolling today, with my Singer 66 and a tall glass of iced tea.  A great summer afternoon in the sewing room.  What could be better?
And here's this week's finish--the patriotic teddy bears quilt made from a panel.
Or actually 2 panels, and lots of red, white, and blue rectangles.  I made this top last week as a give away for charity.
As you can see, I quilted it with a wave like a flag waving in the wind.  I had two stencils, one large (for the teddy bear panel) and one smaller that fit in the rectangle rows.
Marking was a pain, because my chalk marker was too light to show up on the light fabrics, and my sketch and wash pencil was too dark on the dark fabrics.  Plus the chalk pencil kept breaking.  But you can't quilt marks you can't see, so I just stuck to it.
I did the quilting on July 3rd, and bound the quilt on July 4th.  So the quilt is born on the 4th of July (cue the music).
So, what's next?

This is what's next!  Adam, my adorable new grandson.  This was my first week babysitting Adam, who is six weeks old.  I'll be taking care of Adam and his older brother Gabe while their parents are working, so I may be finishing things a little slower.  And that's okay with me!
Gabe (shown here with his cousin Henry, who is making a silly face) is nearly 11, and is great to have around.  I've been his babysitter since he was born.

Today I'm making more blocks for a quilt I started a while back.  These are traditionally called Album blocks, but modern quilters are calling them Granny Squares.
This is a finished block.  It really is a lot like a crocheted granny square.  I am making them out of 2.5 in. squares--1 print square for the center, 4 print squares for the next "round", 8 print squares for the third "round", and 12 unbleached muslin squares for the outside.  I had 42 blocks made, but the blocks only measure 8.5 in. finished, so I decided I needed a few more to make a larger quilt.  I'm going up to 56 blocks, and I should finish them today.
The original 42 blocks were heavy on the red and blue prints, so I'm using other colors for these new blocks--pink, purple, green, brown, and turquoise.
There are lots of articles online and in magazines about how to choose your fabrics, usually involving a trip to the quilt store and a focus fabric.
Here's how I do it.
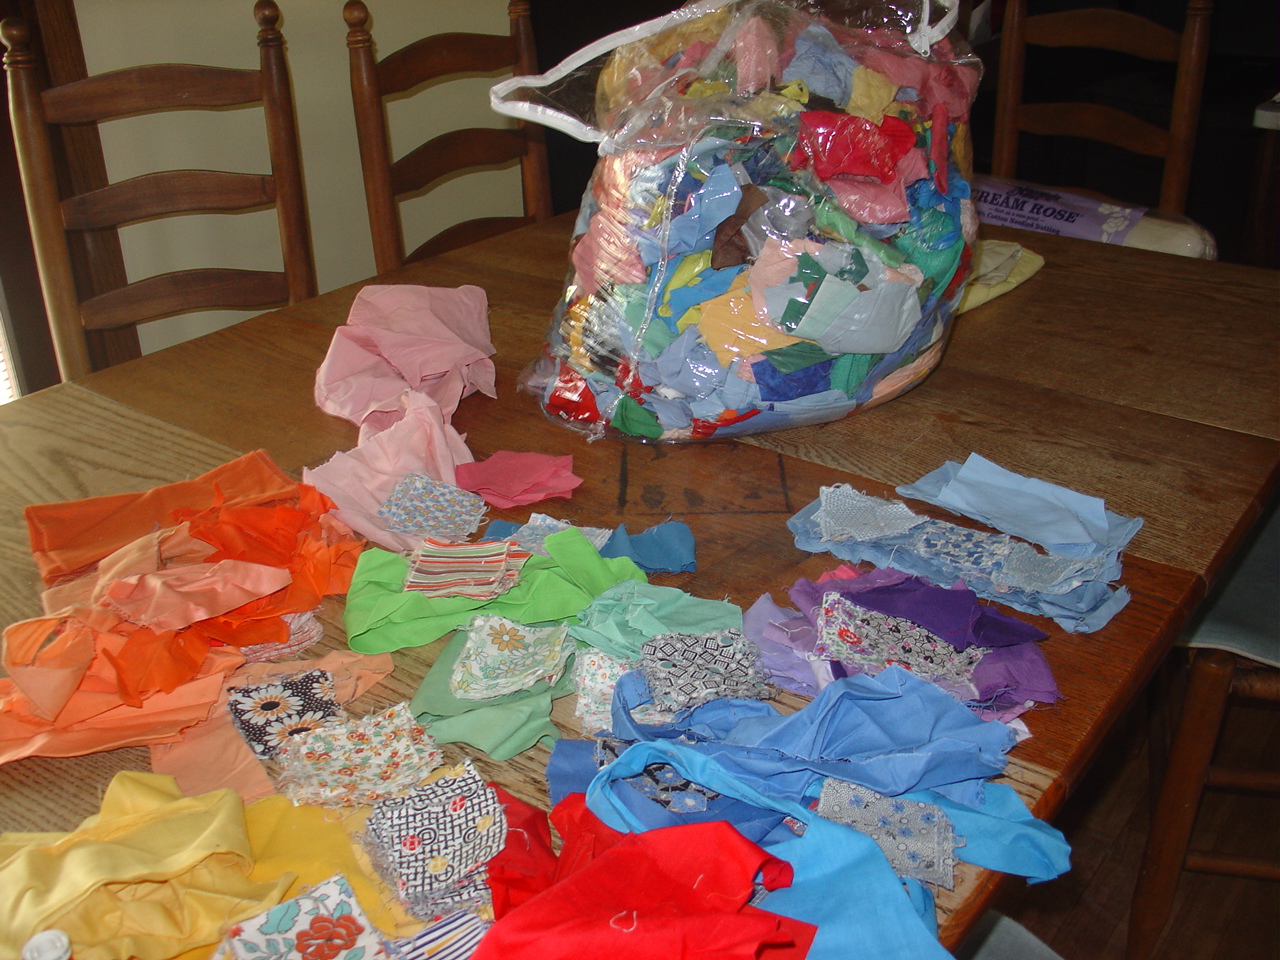
I need squares, so I'll sort through these leftovers and purchased squares in the basket and see what I can find.
Then I'll go through the drawer of 2.5 in. strips.  Hmm, some good stuff in there!
Next I'll dump out the "big scraps" bin of reproduction fabrics and cut some of these up.  There's an actual rule for what does in the bin--scraps bigger than 4.5 in. wide, but smaller than a half yard.  And since I made up the rule, I can break it if I want to.  This comes under my responsibilities as Queen of the Sewing Room.

The unbleached muslin for these new blocks comes from the scraps of the backing I used for the Treadle On Block Exchange Bowtie quilt.  I just love using stuff up.

So that's the agenda for today.  What are you working on?
I'm linking up with Crazy Mom Quilts today, and I can't wait to read what everybody else is doing.

I think I need another glass of iced tea.  And a cookie.  Definitely a cookie.

Wishing you the joys of summer, and family, and quilting.


Friday, July 1, 2016

Treadle On Block Exchange Finish

Hurray!  I finished a UFO!  This one has been waiting for TEN YEARS.
The blocks for this one were three dimensional bow ties that finish at 8 in. square.  (Here's a link to a tutorial for making all sizes:  3D Bowties)

This project started from a block exchange on the Treadle On internet group in 2006.  All participants made their blocks on people-powered machines (treadles and hand cranks).   We signed our names on the blocks, and also included the kind of sewing machine used, with the approximate date the machine was made.  This exchange was also called the Pre-1900 block exchange, because we all used machines that dated to before 1900.  To make it even more pre-1900, the directions asked us all to use reproduction fabrics.  (Not everybody did, but whatever.)
Each set had 36 blocks in it.  I had 33 blocks from other Treadleonions (that's what we call ourselves) and 3 that I had made.  One of the blocks was too small, so I made a new block to replace it, and then made 6 more to bring the total up to 42.
I added a bricks border, made from 2.5 x 4.5 in. rectangles I've had in my scraps for a while.  Most of these were reproduction fabrics, but I wasn't too strict about it.  The outer border is a warm brown print I bought on sale at J. J. Stitches in Sun Prairie.
This was another quilt as you go project.  When the quilt is set block to block, I usually quilt in sections rather than by the block.  This quilt was small enough to quilt in two sections, leaving me with only one seam to do by hand on the back.  I did ditch quilting around each block, and outline quilting around the seams.  It was important to quilt down the 3D centers, so they wouldn't catch on things.
In order to have enough slack (technical term) to stitch the sections together, you can't quilt right up to the joining edges of the sections.  I leave at least an inch unquilted.
Here's how I join the sections.  I pull the backing and batting away from the seam, and pin it.  Then I pin the seam, and stitch it on the machine.
Here's what it looks like on the front after I seamed the two sections together.
Here's the back, pinned for hand stitching.  I used a plain unbleached muslin for the back this time, since I already had it and it was the right size.
Next I quilted the area near the joining seam that hadn't yet been quilted.
Lastly, I quilted the borders, and bound with a warm orange plaid.
Woo hoo!  Now it's washed and drying on the clothesline on this beautiful day.

We're heading into a special holiday weekend, with Independence Day on Monday.  I was inspired by Colleen of Piecemaker Quilts to make this little top:
Here's the link to her much better quilt:  Let's Pretend

As you can see, the main part of this quilt is a panel of Patriotic Teddy Bears.  I got this at the sale at the museum, sort of as a bonus.  It was in a bundle of other fabrics.
The USA panel at the top has been in my basement box of wonders for a long time.
I might quilt this myself, or hand it off to the long armers at the guild.  It will go to a child when it's finished.
To all American quilters, Happy Fourth of July!  To all quilters everywhere, happy quilting!

I'm linking up with Crazy Mom Quilts this week.