Welcome to Treadlestitches!
Sorry about being gone last week. I went to a family reunion in New Jersey. More about that next week.
Did you guess this was a pinker?
First, a little bit about this fun little device. It's a Singer pinker, a clever gadget that cuts a pinked edge into fabric, leather, even paper. I put a picture of one up on last week's very abbreviated blog.
The fabric fits under the cutting wheel, and you turn the crank. Unfortunately mine doesn't have the original clamp that would hold it to the table, so when I use it I always wish I had one more hand.
It was popular in the 1930s, and is much easier to use than pinking shears in my opinion, even without a clamp to hold it to the table. For more information, click HERE.
Meanwhile, I was piecing my light blue scraps into my Rainbow Scrap Challenge projects. This one is Razzle Dazzle.As usual, it's a sort of organized chaos. So much fun to sew!
And lastly, the light blue crayon, shown here on my refrigerator. (It's really hard to find a place to photograph it!)
I only have a very small scrap of the penguin fabric, so I made sure to put it near the top.
I can't believe it's almost time to put the RSC quilts together! This year has gone by so fast.
And so has this month! Here we are at the last Saturday of September.
So that means it's time for antique quilts.
Recently I bought this little top from another collector who was "thinning the herd".Here it is laid out on a queen sized bed. Even with a border, it will be a small quilt when finished, suitable for a crib or for display.
The pattern is Ocean Waves, pieced by hand, with yellow solid squares. The fabrics date from the 1930s/1940s. There are literally thousands of half square triangles.
As you can see from the ruler, these hsts are less than an inch square! I cannot imagine cutting all these triangles by hand, let alone piecing them. Maybe that's why the quilt isn't any bigger--it was just too much work!
Here's the back, with all those tiny seams.
I plan to finish this top with vintage backing, cotton batting, and some simple machine quilting. But first, I have to figure out how I'm going to finish the edge.
For our second quilt, I chose another scrap quilt from the 1930s, but it is very different than the first one.
At first glance, it looks like just random scraps sewn together. It's actually more organized than that.
The rectangular scraps are sewn vertically into strips about 3 inches wide in every other row. The adjoining rows have the rectangles sewn horizontally in segments approximately 3 in. x 4 in., and then joined together across the quilt.
Here's the yardstick for a reference. I believe many of these scraps to be from feed and/or flour sacks. There are also dress prints, and even flannels.
All of the sewing here is by machine. It's not quilted, but tied with red wool yarn instead. In place of batting, there is a thin piece of flannel between the layers.
Check out the back! This is a true scrap quilt.
I bought this quilt at a flea market, and I must admit, I just sort of felt sorry for it. At the time, I was doing an annual bed peel at our quilt group's quilt show, and I needed examples of more "homely" quilts, ones that were made from whatever was on hand, to keep people warm and comfortable.
It wasn't until I got home with it that I started looking more closely at how it was made. Now I'm thinking this might be a fun idea for a new quilt. It would definitely use up scraps!
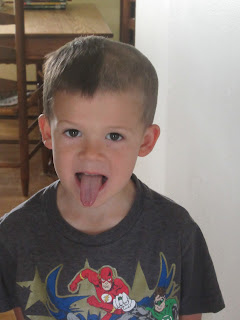
Here's another fun idea--playing with trains with my Little Guy.I hope you're having fun in the week ahead! For my money, quilting is the most fun of all.
All the best,
Sylvia@Treadlestitches
I can't wait to see what everybody's been up to this week!
Linking up with:
Alycia at Finished or Not Finished Friday
Angela at So Scrappy, Home of the Rainbow Scrap Challenge
Cynthia at Oh Scrap


