Showing posts with label hand crank sewing machine. Show all posts

Friday, November 10, 2017

All Wrapped Up

Look who's getting wrapped up in my work!  My little buddy is helping me show my "finish" for this week, the first of four Christmas quilts.  It's only a flimsy so far.
Here it is on the bed, complete with baby model.
I started this quilt just before the Ties that Bind retreat two weeks ago, and made the rest of the blocks at the retreat.  I set the blocks together and added borders during my grandson's naps this week.
Now for a closeup.  The pattern is Sticks and Stones, by Bonnie Hunter, available HERE for free.  I made a total of 56 blocks, half with red squares, the other half with green.  My version is slightly bigger than Bonnie's.
I'll take better pictures when it's quilted.
This is the box of cut pieces I took to the retreat.  Three future quilts are hiding in here.


This was my station at the retreat.  I used the Jones hand crank to make the 4 pointed star blocks.  I got all 42 done at the retreat, and am working on setting them together.
I'm excited to have at least this much done, especially since things have really changed in my life.  My daughter got a full time job, so now I have a full time babysitting gig with a 17 month old.  Going from part time to full time is a challenge, but very much worth it.  We're finding new fun things to do, like taking pictures of grandma's quilt and rearranging the blocks in the star quilt.  He has an absolutely maniacal laugh, and I can't help laughing too, even when he's taking off down the hall with a row of quilt blocks.
Guess what else happened--I WON a lovely stack of fat quarters from Brooke at Silly Mama Quilts!  The Fed Ex man brought them just as I was packing up the car for the retreat.  Here they are, laid out by my featherweight.
Now what am I going to make out of these lovelies?
Can't wait to find out.
Have a fun filled week.
Cheers,
Sylvia@Treadlestitches
I'm linking up as usual with Crazy Mom Quilts and Busy Hands Quilts.


Monday, February 23, 2015

Variations

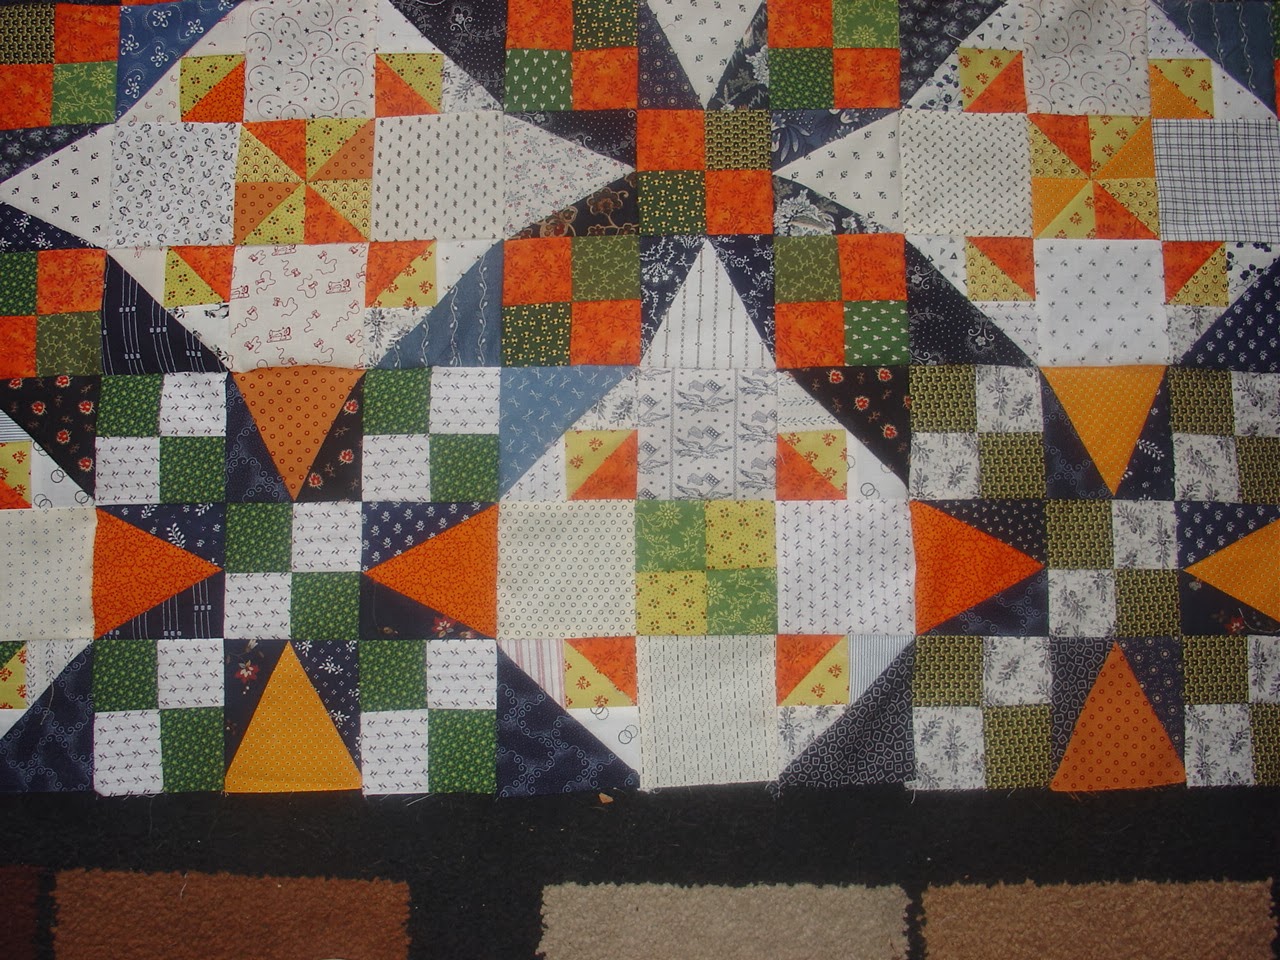
This is a quilt we recently added to the Quilt Index. The owners think it was made by Margaret Wisher, possibly in Dubuque, Iowa.
Something about this quilt inspired me.  The red is still so vivid, although the triangles, stem, and leaves have faded from the original green to tan.  We see this fading often in quilts made in this time period.  The green synthetic dye is sadly unstable.  The quilt dates to around 1875.
It's really unusual to see this kind of block set on the straight, rather than on point.
When we documented it, we could not find an exact pattern match among the thousands of quilt patterns in our reference books.  It's similar to one called English Ivy (Brackman #1330), but it's not exactly the same.  It's a variation.
Variation is a useful term in documenting quilts.  Quilt makers are endlessly inventive.  Sometimes variations happen because we're trying to replicate something we saw somewhere, and it comes out differently than we expected.  Or we start out to copy a pattern, and then think, what if I changed this or that?  We add seams, and leave them out.  We change the colors, or reverse background and foreground.  We change the size or the set.
This is my variation of this variation.  One of the other names for the English Ivy pattern is Clover Blossom.  I'm calling my variation Red Clover.

One of the things that drew me to this quilt was the ease of drafting the pattern.  The original English Ivy pattern is much more difficult, with several sizes of triangles.  This version is just squares and half-square triangles, with a bit of machine applique.

I mostly left the colors the same, although I used print fabrics instead of solid colors.  I did change the small squares in the corners.
This is what the block would have looked like if I put the green squares on the corners, like the original, instead of background squares.  I just think it looks kind of clunky.
I also left out the leaves, just for simplicity's sake.
My version is a 12 in. square (finished) block.  The original blocks measured around 9 in. square, which I didn't know until I had drafted my version and made the first block.
I made 12 blocks, which will make a relatively small quilt.  Here's how I'm going to set it:
I'm using a three strip sashing of solid red, green print, and solid red.  The cornerstones are nine patch blocks.
This is an old, classic set.  I'm pretty happy with it, especially the vividness of the red.  I've been so drawn to red lately.  Wonder if it's because it's still so wintery outside, with white snow everywhere and bare branches on the trees?

Here are the directions, if you would like to make my version of this block.

Red Clover Quilt
12 in. block (finished)
To make one block:
You will need 2 half square triangles made from red print and background fabric, that measure 4 in. square finished.  I made these using the Easy Angle.  I placed a strip of background fabric face down on a strip of red print fabric, each 4.5 in. wide, and cut the triangles with the Easy Angle.
You will also need 13 half square triangles made from green print and background fabric, that measure 2 in. finished.  I made these by placing a strip of background fabric face down on a strip of green print fabric, each 2.5 in. wide, and cut the triangles with the Easy Angle.
You can make the triangle squares any way you like, as long as they end up measuring the same.
That takes care of the triangles!
You also need:
From background fabric, cut:
1 square 6.5 in. x 6.5 in.
2 squares 2.5 in. x 2.5 in.
From red print fabric, cut
1 square, 4.5 in. x 4.5 in.
From green print fabric, cut
1 rectangle, 2 in. wide x 10.5 in. long (this is the stem).
It looks like quite a pile, but it goes together easily.
First, sew all your triangles.  This is the most time consuming part of the block, and it really doesn't take that long.  Just chain them through, and press toward the dark.
Next, take the stem piece, fold it right sides together, and stitch.  Press the seam to the back of the stem, so it cannot be seen.  You can use applique bias bars, a thin piece of cardboard, or just moosh it.  I mooshed it.
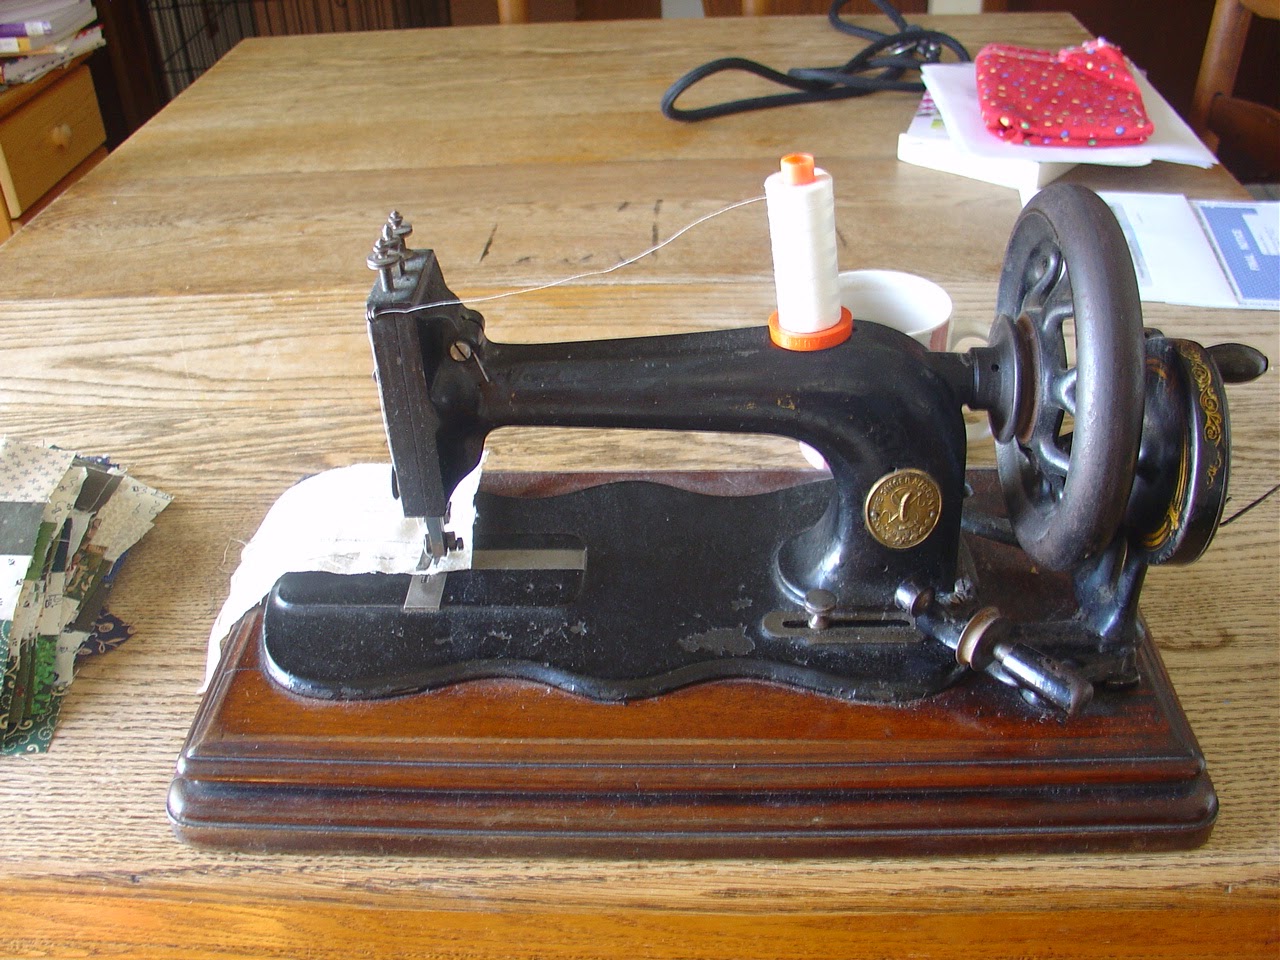
Now pin the stem diagonally across the 6.5 in. background square, and top stitch on both sides, using green thread.  I'm using my chain stitcher here, so I don't have to keep changing thread on my treadle.  It also helps that I didn't have to wind a bobbin.  This is a good project for using two machines, one threaded with green and one with neutral for piecing.  ( I knew I collected all those machines for a reason!)

Now lay out the block.  A lot of it is already done.
I made this block in quarters.  The lower right quarter, with the stem, is already done.
Here I'm sewing the upper right quarter.  I sew the two triangle squares on the right together, then add them to the large triangle square.  I then sew the triangles on top to each other, and add the background square.  The last seam joins these sections.
The lower left quarter is sewn the same way.
Be careful!  These sections are not identical.  (This is why I lay the blocks out next to the machine.)
The upper left section is sewn in pretty much the same way.

Once you've got these sections sewn, you just join them together.
I used a variety of different reds and greens, to make it sort of scrappy. 
The sashing strips are cut 1.5 in. wide and 12.5 in. long.  The nine patch corner squares are made from 1.5 in. squares, and the nine patch finishes at 3 in. square.  I suppose you could strip piece them, but I find that it wastes fabric, so I just cut the squares.
I'm hoping to work on this quilt today, to get all the sashing and cornerstones made and decide on an outside border.  I finished the leaders and enders 4 patch blocks yesterday, so I guess today I'll work on a charity quilt as a leaders and enders project.  It's amazing what we can get done this way.

Keep warm, and keep sewing!


Monday, January 26, 2015

Leftovers

I don't like to waste things.  Maybe that's why I like scrap quilts.  Even though I'm adding at least some new fabric, I am using up the pieces left over from other quilts.
The blocks in this quilt are made from leftovers from part 3 of the Grand Illusion Mystery Quilt by Bonnie Hunter. 
We were supposed to make 120 units that look like this--one blue, 4 greens, 3 neutrals. 
I kind of got stuck on this part.  The piecing was easy, but I was making each part on a different people-powered machine, and for this one I chose my oldest treadle, a Singer model 12.
This is a picture I took while making these blocks.  Bonnie's directions had us sew sets of 4 strips together and cut them into sections.  It worked better for me to make 2-strip sets and cut pairs to sew together.
This machine was made in 1876, and is nicknamed Lorena.  She needed a little more oil, and sewed just fine, but she was a little balky about winding bobbins.  You use your left thumb or forefinger to apply tension when winding the bobbin, and your right hand to press the bobbin winder (that stickety-out thing on the right of the picture) against the hand wheel.  If the machine isn't running very smoothly, the wheel won't turn freely.

So I was working on this when the clue for part 4 came out, and I left this part and went on to the next.  When we got the big reveal, I decided I wouldn't use these sections in the mystery quilt, but instead replaced them with plain sashing.
So what to do with the leftovers?  I had 60 sets made.  So I turned them into 30 blocks, like this:
The squares in this block measure 1.5 in. finished, and the block itself finishes at 6 in. square. 
 According to Barbara Brackman's Encyclopedia of Pieced Quilt Patterns, this is a variation of block 1102a, which is called Mosaic #20. 
By the way, this particular block is a leftover of the leftovers.  The flag square has a tuck in it--oops!  This may be destined to become a pot holder.
Lorena, the model 12 treadle, lives in my basement.  About the time I was working on these blocks, we got a real cold snap, with lots of below zero temperatures.  It was just too cold to work in the basement, so I brought my model 12 hand crank upstairs and finished the blocks on it.  This is a real Frankenstein of a hand crank, with the parts of at least 3 machines.  (I call her Frankencrankin.)

I made 20 more blocks, for a total of 50.


Here's how I set the blocks together.
It's a little wrinkled from being folded.  I positioned the blocks with the blue corners touching.
I love this setting fabric!  It comes from my favorite quilt shop in the world, J. J. Stitches in Sun Prairie, Wisconsin, and was designed by the shop owner, Julie Hendricksen.
Now I have to figure out the border, and then get going on the quilting.  The quilt is a small twin size, so it should be too hard to quilt on my home machine.

One of the reasons I simply had to have my model 12 treadle was the folding top.  Want to see?
Here's what she looks like, all closed up and locked (the key is in the lock here).
When you unlock the top, the front folds back and the sides fold down. 
The sides are ready to fold back, and the front is leaning against the wall here.  It eventually folds completely down behind the machine.  It locks against the other section so it stays in place.

And here's how it usually looks, with the top folded flat to become a sewing surface.  Isn't this cool?

Sad to say, I don't use Lorena to sew very often.  I can't buy new needles for her, although I have a small supply of new old stock.  It's amazing how well she sews after nearly 140 years.

Good news for me--leftover lasagna and French bread for lunch!
What's under your needle this week?


Wednesday, January 29, 2014

Catching Up

I once had a co-worker who was fond of the saying "The faster I go, the behind-er I get".  I understand how she felt.  It's been quite a while since I posted, so now here I am, catching up.

First, the Celtic Solstice Mystery Quilt, by Quiltville's Bonnie Hunter.  When last I wrote, I was still dithering about what to do to make it longer, so it would be a rectangle instead of a square.  Here's what I did:

I took some of the parts I had made for the pieced border (the triangles with the orange background) and made new blocks.  I was all out of orange, (except for one short 2 in. strip), so I made 4 patches of green print and shirting fabrics.  The blue star points help carry the circular design out to the edge.  For the alternate block, I used the very last of the orange with yellow to make as many half square triangle squares as I could, and sewed them into the corner units.  Then I used green and yellow to make the rest of the ones I needed.  The centers are 4 patches made from green and yellow prints.
In this photo you can see the original blocks and the new blocks.  I added a row of the new blocks at the top and at the bottom.
Here is the quilt laid out.  It is in two pieces, because I may quilt it that way.  I am still dithering about the borders.  Blue?  Green?  Both?  Maybe some yellow?  Just not orange, remember, I'm out.
Click here to get back to the Celtic Solstice Link Up Finale
Link Up Finale

In other news, I finished a charity top for our guild.  A wonderful person will quilt it on her long arm machine, and it will go to someone who needs it.
It's a dancing nine patch, from Bonnie Hunter's free pattern.  Here's a link to it:  Dancing Nine Patch
I changed it a little.  The original pattern calls for 2 in. squares.  I used 2.5 in. strips for the blocks and 2 in. strips for the green joining strips.
When my friend Joey came to visit a few months ago, she brought me a huge batch of 2.5 in. strips.  She had cut them using her Accuquilt strip cutter.  Can you guess what they were cut from?
These were pillow panels from the 1990s!  Check out the colors--dusty pink, Williamsburg blue, forest green, plus lots of pin dots and extra fun prints of cats and Amish quilts.  As decorating fabrics, these have gone out of style, but they are still good colors, and the fabrics are 100% cotton.  I added the forest green strips in between the blocks, which are cut from a Jinny Beyer fabric I bought at a flea market.
The border is a blue and green print from the local chain fabric store.

Would you believe I just finished making 168 quilt blocks?  It's true--but I have to admit they're only 4 in. finished.
They're called Shaded 4 Patch.  Sometimes they're called Mary's Triangles.  They are easy and fun to make.  The book I'm using for the pattern is one I've had for a long time, called Triangle Tricks, by Karen C. Soltys.  Below is a link to a tutorial made in a similar way.
Shaded Four Patch Tutorial

How did I have time to make all these blocks?  I went on my favorite retreat, to my friend Debbie's house.  This is our second annual January retreat and it could not have been better.
We set up tables in her living room.  Her husband was at a conference, so there was nobody to inconvenience with all our stuff.  I brought LOTS, including two sewing machines.  Clara, the little Singer hand crank pictured at the top of this post, was on her shakedown cruise.  I've had her a long time, but hadn't been able to sew with her due to a broken faceplate.  I finally replaced it with the right size, and she sewed like a champ.  The machine shown above is Emmy Lou (a Harris--I tend toward obvious names), and I brought her for a back up.
More of our stuff.  Debbie is using the antique stars in a new creation.
Debbie's stuff.  She is modern and adventurous, but loves the old quilts, too.  So she makes the most amazing blends of repro/vintage inspired fabrics with bright new stuff.  I can't show what she's currently working on, just take my word for it, it's knock your socks off terrific.
Did I mention we bought some fabric?  Here's Debbie, trying out some ideas.
Debbie also gave me a WHOLE BAG of scraps to work up into charity quilts or add to my own.  I can hardly wait to start cutting it up.
But wait, there's more!  A whole BOX of plaid strips, strings, and yardage, plus a few other goodies tucked in.  Treasure!
In spite of the horribly cold weather outside, we had a wonderful warm long weekend, working on our projects together.  We chatted, we knitted, we watched Downton Abbey.

We were catching up.

Keep warm, and keep quilting.