Monday, September 23, 2013

Around My Kitchen Table

I had a wonderful weekend.  It started on Friday, with a visit from a friend.  She brought a lovely old hand crank sewing machine, which had been cleaned and oiled beautifully by her husband.  In short order we got it sewing and winding bobbins.  It made a wonderful stitch.  Not bad for something over a hundred years old.
I sewed along with my Jones handcrank (made in the 1920s, I think), making 4 patches from feedsack squares.
I started out using up scraps from my last feedsack project, the flying squares quilt.  In that quilt, all four squares were different.  In this quilt, I'm using two each of two prints.  It was fun figuring out the combinations.  Some are pretty and some are, well, not.
Here's the block the 4 patches will be part of.  It's a pinwheel block, #1121 in Barbara Brackman's Encyclopedia of Pieced Quilt Patterns.  I changed it a little, to make fewer seams.  Doing so made it another block that needs a partial seam.  If you'd like the pattern, leave a comment, and I'll write it up.

The most fun was just spending the day sewing together, catching up and chatting.  We worked in the kitchen, because I'm not really set up to work in the basement with anybody else.  I need to change that, I think.  Although it was very convenient being near the food and beverages.

That evening we ate supper at the kitchen table and visited together.  Then my husband and grandson watched a movie and my friend and I just talked.  And laughed.

On Saturday we had a family birthday party for my youngest daughter.  We brought in lots of chairs and packed around the table, and I bet they heard the laughing in Milwaukee.  We did this at lunch and again at dinner, with a changing cast of characters.  After dinner we played a charades game.  More laughing, more fun, more sharing, around the kitchen table.

Sunday was a quieter day.  Since I already had everything I needed for sewing handy, I set up again on the kitchen table, and finished the 4 patches.  Then I started working on a charity quilt.  My friend had given me a huge batch of 2.5 in. strips, cut from pillow panels.  She had sewn lots of the strips into sets of 3, so it was easy for me to press, cut, and assemble 9 patch blocks.  I'm wondering how many quilts I can make out of these strips.

I learned so much this weekend.  My friend's insight into how to solve some of my quilting problems has made me think.  I learned more about her life and the place quilting has in it.  I learned that I can happily let go of stuff I've kept for years if it goes to a good place.  And I'm trying not to worry so much about having the house "perfect" before I invite anyone over.  Getting older is teaching me that life is NOW.

So thanks for coming over this weekend, family and friends.  You are more than welcome here.  I love to see you around my kitchen table.

Isn't this a great quilt top?  Thanks, Joey!


Tuesday, September 17, 2013

Flying Feedsack Squares--Block by Block Quilting Tutorial

I am having so much fun making this feedsack quilt.  I finished all 42 blocks on Thursday, and Friday I started washing feed and flour sacks for the backing.  Here they are on the clothesline.

I decided to quilt this one block by block.  It's my favorite way to quilt.  It may not be very efficient, but I actually like the process, and it goes pretty quickly.  Many people don't like all the hand work necessary, but I actually enjoy it.  For this project I will have six seams on the back to sew down by hand.  Each seam will be the width of the quilt.
 I cut squares of cotton batting, one for each block.  I keep a (large) bag of batting scraps and these squares were cut from the scraps.  Did you know you can rotary cut batting?  I use a different rotary cutter for this, so I won't dull the blade for cutting fabric.


 I cut the batting squares slightly smaller than the quilt blocks, since I really don't need the batting in the seam.
 Next I ironed the clean flour sacks, and cut them into rectangles for the backing.  I cut them 10.5 in. wide and 11.5 in. tall.  This gives me more fabric to work with on the back when I'm doing the hand sewing.


 Here are all 3 pieces, block, backing and batting.  For the first block of a row, I just layer the pieces together and quilt.  It's like making a pot holder.
When I add the second block, I sew a five layer seam--the top, batting, and backing of the first block plus the second block (on top, right sides together) and the backing for the second block (on the bottom, right side up).   (Note, no batting for the second block yet).  Here it is lined up and ready to sew.
 Sewing the seam on my Davis VF treadle.
 I press the seam at this point.
 Then I open it up like a page in a book and add the batting square.
 Then I smooth it over and press it again.  You could baste at this point, but I don't.  The cotton batting stays put as I quilt.  Plus I like to live dangerously.  And I hate to baste.
What I'm doing here is often called outline quilting.  I'm sewing along the seams, using my presser foot for a guide.  I do all the seams in one direction, and then all the seams in the other direction.  I've worked out a system for this block so I don't have to break the thread until the block is quilted.
WARNING:  Don't quilt close to the top and bottom of the block.  This is where you'll join the rows, and you need to have at least half an inch of space so you can pull the backing out of the way.  See below.
(You can quilt close to the SIDES of the block, because you'll be sewing a 5 layer seam and you won't need to pull the backing out of the way.)
 I've got 2 rows done so far.  The yellow post it notes are my row markers.
 When I sew the rows together, I pull the backing and batting out of the way, and sew a 2 layer seam, matching the seams between the blocks.
 Above, the seam is sewn.  Now I'll trim it carefully, pin, and hand stitch it down.
 Here I've started pinning the seam.
After the seam is sewn down on the back, I'll do more machine quilting where the rows come together.

Only 5 more rows to go!  I like doing this so much, it's hard to stop.  I'll add borders when I have more rows together.

Have a lovely quilty day.

Monday, September 9, 2013

Feed Sack Challenge

 I love feed sacks!  I've been collecting vintage feed sacks for at least 25 years.  The first ones I bought were in a cardboard box in an antique store in Waynesville, Ohio.  They cost 50 cents each.  Seriously.  And for some reason I didn't buy all of them.
At first, I wasn't sure how to work them into my quilts.  Lots of the patterns and prints were not what I would call pretty.  So for a long time I just saved them.
When I started finishing old quilt blocks into quilts, the feed sacks came in handy to make extra blocks.  I also used them for sashing, borders, and backing.  They fit in perfectly with 1930s and 1940s quilts.
 I started buying more of them, at flea markets and antique stores.  Some of them actually were pretty.  Others had fun novelty prints, like animals, children, fruits, trees, etc.  And, to be honest, some of them were actually ugly.  But in a sort of interesting way.
Before long I had 4 big bins full of feed sacks. I loved to get them out and look at them.  But they weren't very handy, especially for making scrap quilts, which of course are my favorites.
So I started selling them.  I sold a few whole sacks on Ebay, and then I started cutting up the sacks and selling pieces, like 6 in. or 8 in. squares.  At first I only cut up the sacks that were torn or stained.  I would rotary cut strips for the squares, and then cut a few strips in other sizes for me, for piecing.
Having these strips already cut has made it so much easier to use the feed sacks.  It's a lot like the system I use for my other scraps, which I adapted from Bonnie Hunter (see www.quiltville.com)
The small bin in the picture above has my collection of feed sack strips, in sizes from 2 in. to 4.5 in.  These change with time, depending on what I'm working on.

For my current project, I'm challenging myself to use only feed sacks for the whole quilt--top, border, backing, binding.  In the past I've added solid cottons, but not this time.  The background is white sacking, mostly from flour or sugar sacks.
As a further challenge, I decided to use a newspaper pattern from the era when feed sacks were at their height in American quilts, the 1930s and 1940s.
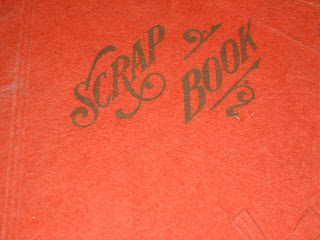
I got the pattern from this great old scrap book.


The original owner of the scrap book pasted the newspaper patterns into the book.  The one I'm using is called Flying Squares.  It's a traditional pattern, first published in the Ladies Art Company catalog no later than 1928.
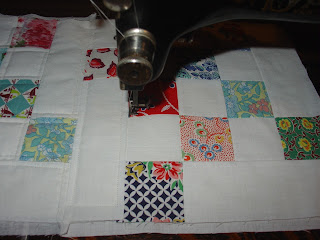
I'm piecing the blocks on my faithful White Domestic treadle sewing machine.  All I need is a housedress and Glenn Miller on the radio.
Here's what it looks like made up in my feed sacks:

Because this is a traditional pattern, I can give you the directions for it without violating anybody's copyright.  You can make it in feed sacks, of course, or in your favorite scraps.

Flying Squares: (makes a 10 in. block)
Cutting
Cut 8 squares 2.5 x 2.5 of feed sack material (or any other scraps).  All 8 should be different.
Cut 5 squares 2.5 x 2.5 of white flour sack material (or any other background).
Cut 4 rectangles 2.5 x 6.5 of white flour sack material (or any other background).
Sewing
Make a 9 patch block with 4 of the printed squares and 5 of the background squares, as shown below.  Press toward the printed squares.  Press the long seams toward the center of the block.

 Add the remaining 4 print squares to the ends of the background rectangles, as shown below.  Press toward the print squares.
 Arrange the block as shown below.  This block requires a partial seam.  I sew the top section to the nine patch first, with a very short partial seam, usually only an inch or so.  Then I add the section to the right of the nine patch, and proceed around the square.  When all the other seams are sewn, I finish the partial seam, which finishes the block.  Press these seams toward the outside of the block.
 Careful sewing and pressing makes the back nice and neat and makes the block lie flat.
As of today, I have 24 of these made.  I think I need 42 for a good sized quilt.  Sew back to work!

May all your days be pieceful.