Showing posts with label machine quilting. Show all posts

Saturday, February 23, 2019

Quilting Like Mad

Has anybody else got an OMG deadline you haven't yet met?  ACK!  I've got til Thursday to finish this little redwork quilt for the One Monthly Goal February challenge (click HERE for details), so I'm hand quilting until my fingers bleed, or at least hurt. 
Two of the borders are done, so I do have an actual chance to finish if I keep after it.  I'm using this rope design.  I chose it because a) I had it already; b) I don't see how I could use this stencil for machine quilting; and c) it's an old fashioned design for an old fashioned quilt.
I've been working on this quilt during my Little Buddy's naptime, and sometimes in the evening when watching TV.  The best programs for hand quilting, in my opinion, are on PBS.  No commercials.  We record nearly everything we watch, and skip the commercials when we play it back, which means grabbing the remote every few minutes to buzz through all the people trying to sell us luxury cars, medicine with truly terrifying side effects, financial services we don't need, and delicious-looking food we shouldn't eat.  Time spent buzzing is time not spent stitching.
And of course, I have more than one project going on!  Having (finally!) decided on a backing, bought it, washed, and pieced it, I am at last machine quilting my Wagon Trail quilt, one of last year's Rainbow Scrap Challenge quilts.  Above is the design I chose for the open spaces.
I'm using Golden Threads paper to get the design on the quilt.  I mark a square of the paper with the design, using a permanent pen, pin it to the top with safety pins, and then twist and turn (and possibly swear a little), quilting this on my domestic machine with the built in walking foot.  I'm liking the look of it, but I am very glad I'm doing this in two sections.  As a complete quilt I would not be able to manage this design at all.
So that's the quilty stuff I'm up to!  Also, this:
I got this book from the library--Modern Quilt Magic, by Victoria Findlay Wolfe.  (Click HERE to go to her author page at Amazon.)  It was fun to read and to look through the colorful quilt pictures.  She is an inspiring artist, and I actually got to meet her once.  I hear from acquaintances that she is an excellent teacher.
When not reading or quilting this week, I was having fun with my Little Buddy.
This is my youngest grandson on the giant pile of snow at the side of our driveway.  I have a similar photo of his mother doing the same thing.
Little Buddy loves the snow!  (Can you tell?)
This week, I'm wishing you this kind of joy, in the simple things.  Like a four foot snow drift.  (But just the joy, not the snow.)
Cheers for reading,
Sylvia@Treadlestitches

Linking up with:
Myra at Busy Hands Quilts
Angela at So Scrappy
Sarah at Can I Get A Whoop Whoop
Cynthia at Oh Scrap


Friday, November 17, 2017

Thanks for Sharing

Today's finish has been a long time coming.  Hurray, it's a UFO no longer!

The blocks were made by members of my guild.  They were my birthday blocks in 2003.
We had a program you could sign up for at the beginning of the year.  During the year, we made blocks each month for members who had a birthday that month.  The member decided on the pattern and colors.
Since my birthday is in December, and I asked for green blocks, I got several Christmas fabrics mixed in the Buckeye Beauties.  I always thought I'd make more blocks and make a Christmas quilt, but somehow it never happened.
Until now!  I put the top together at our retreat last month, and quilted it last weekend.
It is just 16 blocks, set together with a red Christmas print border.  I'm so glad most people signed and dated their blocks.
The quilting is simple, just radiating diagonal lines, plus some machine serpentine stitch in the border.
The binding is not really a Christmas print, but the colors are okay.
Here's the back, which to me looks like old timey wallpaper.  I absolutely love this kind of fabric.
At last, a real finish.
In other news, I'm making progress with some of the blocks I finished at the retreat.
The Star Struck stars are set together.  You probably can't tell from this photo, but this top is in two pieces, one with 3 rows and one with 4 rows.  That's because I'm quilting it that way.
I'm well along on the larger section.
Don't you just love running your hands over the finished part of a quilt?
I had an unexpected free day today (my little guy is home with his daddy, so no babysitting), so I finished the blocks for the rail fence quilt on the treadle this morning.
When I was working on this at the retreat I thought I had a panel at home that would go with the blocks.  It turns out the panel I had is mostly blue, so I made this star block instead.
Our wonderful weekend retreat is the gift that just keeps on giving.

The retreat I went on with guild members was three weeks ago now, and last Wednesday night was our first guild meeting since both groups got back.  One of our members spoke about how great it was for her to be with other quilters, and I thought about how much we share when we get together.
Sure, we share irons and cutting mats and space, but we also share encouragement, expertise, ideas, excitement, stories, and laughter.  Not to mention food!
So thanks, quilters, for sharing, at retreats and shows and online and everywhere else.  Positive energy is contagious, and excitement is good for us!
Cheers,
Sylvia@Treadlestitches
Link ups as usual with Busy Hands Quilts and Crazy Mom Quilts.

Friday, June 3, 2016

Farewell to Downton Abbey

Like just about everybody else in almost the whole world, I loved Downton Abbey.  My friend Debbie introduced me to it at a mini-retreat we had at her house a few years ago, and I was hooked.  So of course it was sad to see the series end last February.  But it's a good excuse to make a quilt!

Here it is, laid out flat.  It's quilted!  Not bound yet, but I'm still dithering about a color.  Right now I'm thinking red.
I knew the end was coming, so for Christmas I ordered myself a packet of the Downton Abbey fabrics.  It was nearly half price--what a deal.  I had lots of fun piecing the blocks. 
I chose the pattern from The Ladies Art Company catalog of 1928.  The time period was almost right for the dates the show portrayed (1912 to 1926).  The block I chose was called Sisters Choice.  I've always liked that block, plus the name really went with what Downton Abbey was about.  The show centers around the choices sisters Mary, Edith, and Sybil make, good and bad, and how that affects everyone around them.
I added seams in 4 places to the block above to make it easier to piece, and I made my blocks 10 in. square, so each segment finished at 2 in.

Here's the first block.  I was using the Singer 9W then.  I later switched to a different treadle machine when the 9W developed some minor problems.
All the blocks are different, although fabrics are repeated.  In addition to the official Downton Abbey prints, I scrounged up fabrics from everywhere to fit the color scheme and the time period.  The print above is from my thirties scraps.  The prints we think of as 1930s were actually begun in the 1920s, so I used them.
Of course I included Liberty of London fabrics!  The Crawley girls would definitely have shopped there. 
Here's another Liberty print.  I love them so much I can hardly bear to cut them.
I don't often do a pieced border, and it was a little scary, but it turned out okay, I think.
Here's the back, a thirties style print from Connected Threads.
This is a quilt-as-you-go quilt.  Once I had the blocks pieced, I added sashings to all but six of the blocks (the ones on the ends of the rows) and layered them with batting and backing into the stack you see above.  The backing is cut about an inch larger all around than the block section.
After a few disasters (such as the Terrible Quilt from 2 post ago), I learned how to quilt by the block and end up with a decent quilt.  Warning--it involves hand sewing!  But not a huge amount.  For machine quilting, I use my Pfaff electric sewing machine with a built-in walking foot.

Here's how I make my quilt-as-you-go quilts:
For the first block in each row, I just quilt it.  Because I'm going to "sew and flip" the seams surrounding this block, I can quilt right up to the edge if I want to.
Here's the back, all quilted.  I use old fashioned 100% cotton batting, so I quilt closely.  I just like that look anyway.
When the quilting is done, I very carefully trim away the excess batting and backing.
Here I'm ready to add the next block section. 
I stitch the second block section to the first quilted piece through all 4 layers.
I use a quarter inch seam, just like always.  Because there are sashings, there are no seams to match.
Next I add the backing, sewing over the same seam.  You could add both of these pieces at the same time, but I'm just trying to be careful.
Now I lay the batting piece on top of the backing.  Notice--I'm NOT catching the batting piece in the seam.  I find that makes bulky seams.  Since I am going to do lots of quilting, I am not worried about the batting shifting. 
Now I take the whole thing to the ironing board.  Here's where having 100% cotton batting helps.  I press the newly attached sections away from the seam with the iron.  (No poly, no melting!)  I do this on the front and on the back.  I want the piece to be smooth and flat, and ready for quilting.
Now I quilt the next block.  I probably should have quilted the sashing first, but at this point I hadn't decided what to quilt in the sashings so I left it for later.  In the end I just did a "railroad tracks" quilting, a quarter inch from the seams.
Here's the second block trimmed, and the third block ready to add.
Once the rows are done, I do a more traditional quilt-as-you-go joining.  I add the long sashing piece on the front of the first row and the backing for the sashing on the back of the first row, just like joining the sections above.  Then I add the front sashing ONLY to the next row.  I lay in a strip of batting, and pin the backing over the seam.  Here's where I hand stitch.  I SHOULD HAVE TAKEN PICTURES OF THIS STEP, SORRY.
The only hand stitching I do is to sew down the backing of each sashing strip.  In this quilt, there were 5 of these (6 rows of blocks).  Each of these seams is the width of the quilt.
After the sashing was joined between the rows, I quilted it (just the simple railroad tracks again). 

Just for fun, I timed myself.  I took me approximately 9 minutes to quilt each block.  There were 5 blocks in each row, so 45 minutes quilting, plus some time trimming and pressing.  I could easily quilt a row in an hour.  I didn't time how long it took to do the hand sewing.  Mostly, I just had it on the kitchen table and worked on it while supper cooked, etc.

The borders are joined sew-and-flip style.  To get this right, I ran down to my basement bookcase and got this book:
Machine Quilting in Sections, by Marti Michell.  I found this to be extremely helpful when adding multiple borders.  Basically, I added the first border plus all the batting and backing needed for all the borders together in one step.  Then I added the next two borders.

So now for the binding, and then the label!

I still miss Downton Abbey on Sunday nights.  Sure, some of the story lines were silly (Mr. Bates AND Mrs. Bates suspected of murders???), but for the most part it was extremely well done, historically accurate, and compelling television.  I don't think a quilt like mine would ever have graced a bed upstairs, but it could have been made by one of the servants from the scraps of everyone's clothing.  Maybe Mrs. Hughes, or Anna, or Baxter could have sewn it.  Hmm, Baxter seems to know her way around a sewing machine.

I wish you the joy of quilting this week.


Friday, January 22, 2016

Key West Butterflies

Does it count as a finished quilt if I don't have the binding sewn down yet? 
This is my butterflies quilt.  I finished the quilting, made the binding, and machine sewed it on yesterday, and will be sewing it down by hand this weekend.

(I'm linking up with Crazy Mom Quilts today.  There's a link back at the end of the post.)

I call it Key West Butterflies because I appliqued a lot of these on a trip to Florida in 2014.  (I did a post about it called Back from Margaritaville)

Each butterfly is surrounded by a row of squares, cut from vintage fabrics.  Half of the butterflies are appliqued on white squares, and half are on blue.  They fly in different directions.


I think this orange one is my favorite.
I bought the butterflies on Ebay years ago.  They were just the butterfly shape, which had been cut out and embroidered, and the edges were basted under.  There were no backing squares.   Most of the fabrics in the butterflies are from the 1940s through the 1960s.
Here's the back!  Each of the 20 squares was quilted separately on the machine.  I used vintage fabrics for the backs and old fashioned cotton batting.

Most of the fabrics on the back are just vintage cottons, but a couple are from feedsacks.

This pink print with the enormous blueberries (?) was a skirt I bought in an antique store.

It's about time I finished this!  It has been languishing for months.
I'm looking forward to watching some PBS mysteries while I sew the binding down, and then get a label sewn on.
I'm having such a good start to this new year.  I hope you are too!

Back to Crazy Mom


Tuesday, January 19, 2016

With A Little Help From My Friends

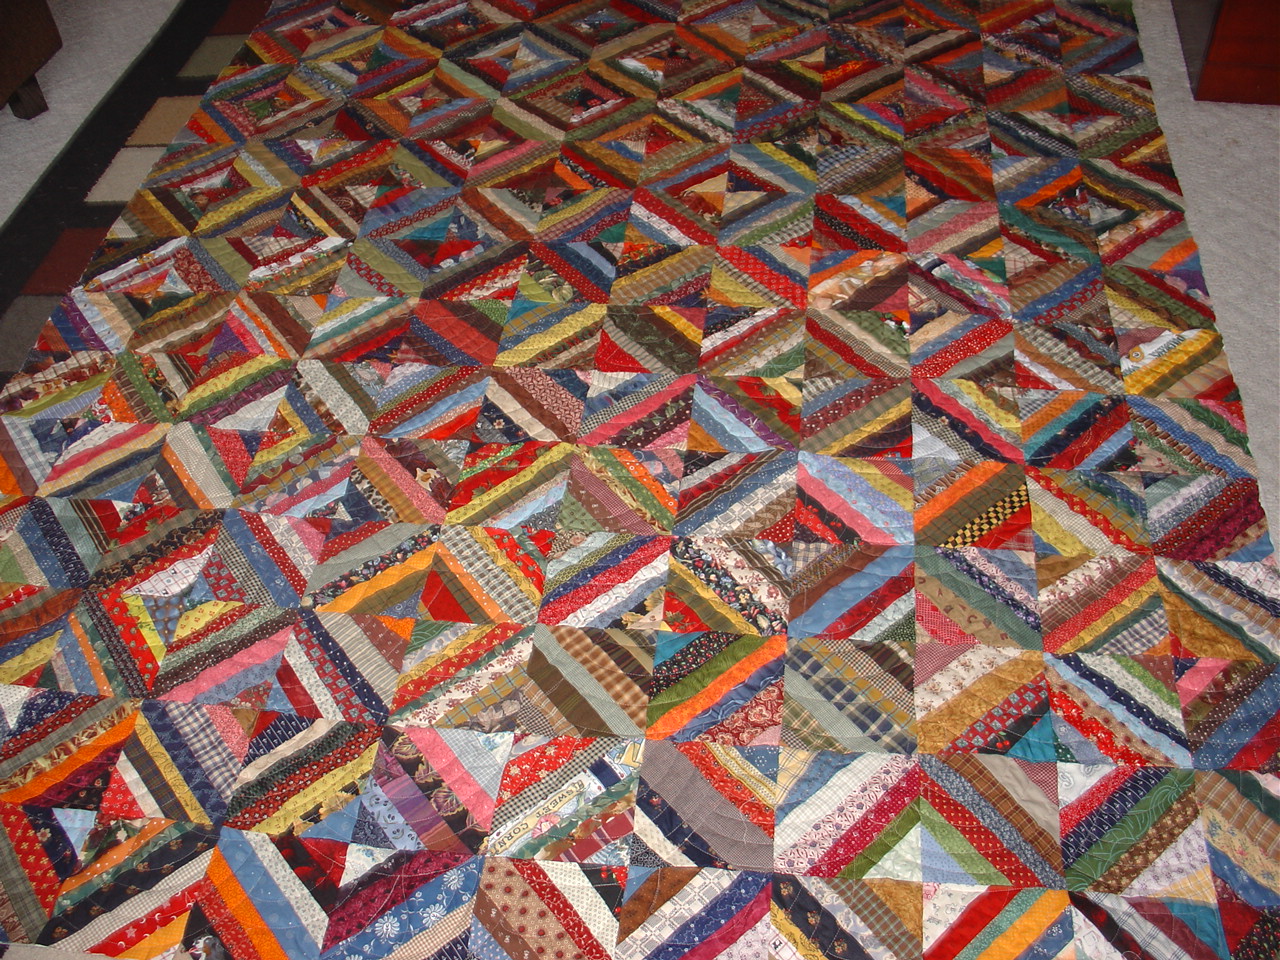
This is my string quilt.  I made the top over a year ago (as described in this post).  It has bits and pieces of so many memories--quilts made and used, quilts given away, shopping trips with friends, scraps of fabric and time.   There are even 3 blocks in the quilt that were made by my friend Debbie for her own quilt.  She gave me the extras and lots of plaid scraps.
My cat and I are looking at it here.  I LOVE it!  (Mr. Biddy is also giving it his seal of approval.)
Here's the back of the quilt, made from orphan blocks and random fabrics.  My friend Joey and I made up the backing together, and Joey did the quilting.  Can you see it in this picture?  She did a Baptist fan over the whole top.  She does this freehand on her long arm.  It is amazing, and exactly what I was envisioning for this quilt.

I have since bound and labeled the quilt.  I can't stop running my hands across it.
Here's the label.  It's part of my New Years Resolution, to label the quilts I make this year.


Ties that Bind Quilters may remember this quilt.  Louanne S. led us in a mystery quilt, with one clue per month, in 2014.
I chose the spools fabric first (it was a Connecting Threads print), and then chose the other fabrics based on the colors in the print.  I really liked this quilt, even though these are not my usual colors.
But it didn't come to life until Joey quilted it!
Look at these beautiful feathers, done with variegated thread!
And check out how it turns the corner!  It is just so wonderful!
Both of these quilts would still be just tops, hanging in my sewing room closet, if it wasn't for Joey.  This is the first time anyone else has quilted anything for me, and I could not be happier.
I bound it in a bright green, and sewed on the label.  The quilting looks even better from the back!


Yesterday was a busy day, but it was also Martin Luther King Day, so I made time to work on a little quilt for charity.  (I think I'm going to try calling them "giving quilts" this year.)
I quilted and bound this baby quilt, all on the sewing machine.  The top was hanging in the closet, waiting for me.
I have made quilts in this pattern lots of times.  It's sort of my go-to pattern when I just want to sew something.  I call it Evelyn's Quilt, since I made it first for my granddaughter Evelyn. 
Click here to go to the free pattern.
I quilted a diagonal grid as well as a horizontal one.  My quilting is SAD compared to Joey's.
Here's the back of the quilt, a Winnie the Pooh print I got at a sale for $1.00 per yard.  I think I have enough to back at least one more quilt.

The redwork quilt sits on my kitchen table, where I can quilt whenever I have a few minutes between cooking and laundry, etc.  The masking tape is working out for quilting lines without having to mark them.
I'm hand quilting diagonal lines through each square.  When those are done I'll tackle the sashing and border.  The lines are 1 3/8 in. apart.

This is one of the best of the squares--a mule and two dogs.  The embroidery is mostly chain stitch.  Blue lines are visible on some of the blocks.  Either the original quilter bought the blocks ready-stamped or stamped her own with a transfer pattern.
I like this one, even though it is very simple.  I believe it was traced from a rooster cookie cutter.  I'll have to look for one of these the next time we go antiquing.

My life has really been enhanced by my quilting friends, and I bet yours has, too.  Let's remember to appreciate them this week.

Stay warm!