Showing posts with label quilt as you go. Show all posts

Friday, March 20, 2026

Strings and Whirlygigs

Welcome to Treadlestitches!  Thanks for stopping by!

Does your guild encourage members to try new techniques?  Ours certainly does!  I try to participate when I can.  Learning new things is good for us.

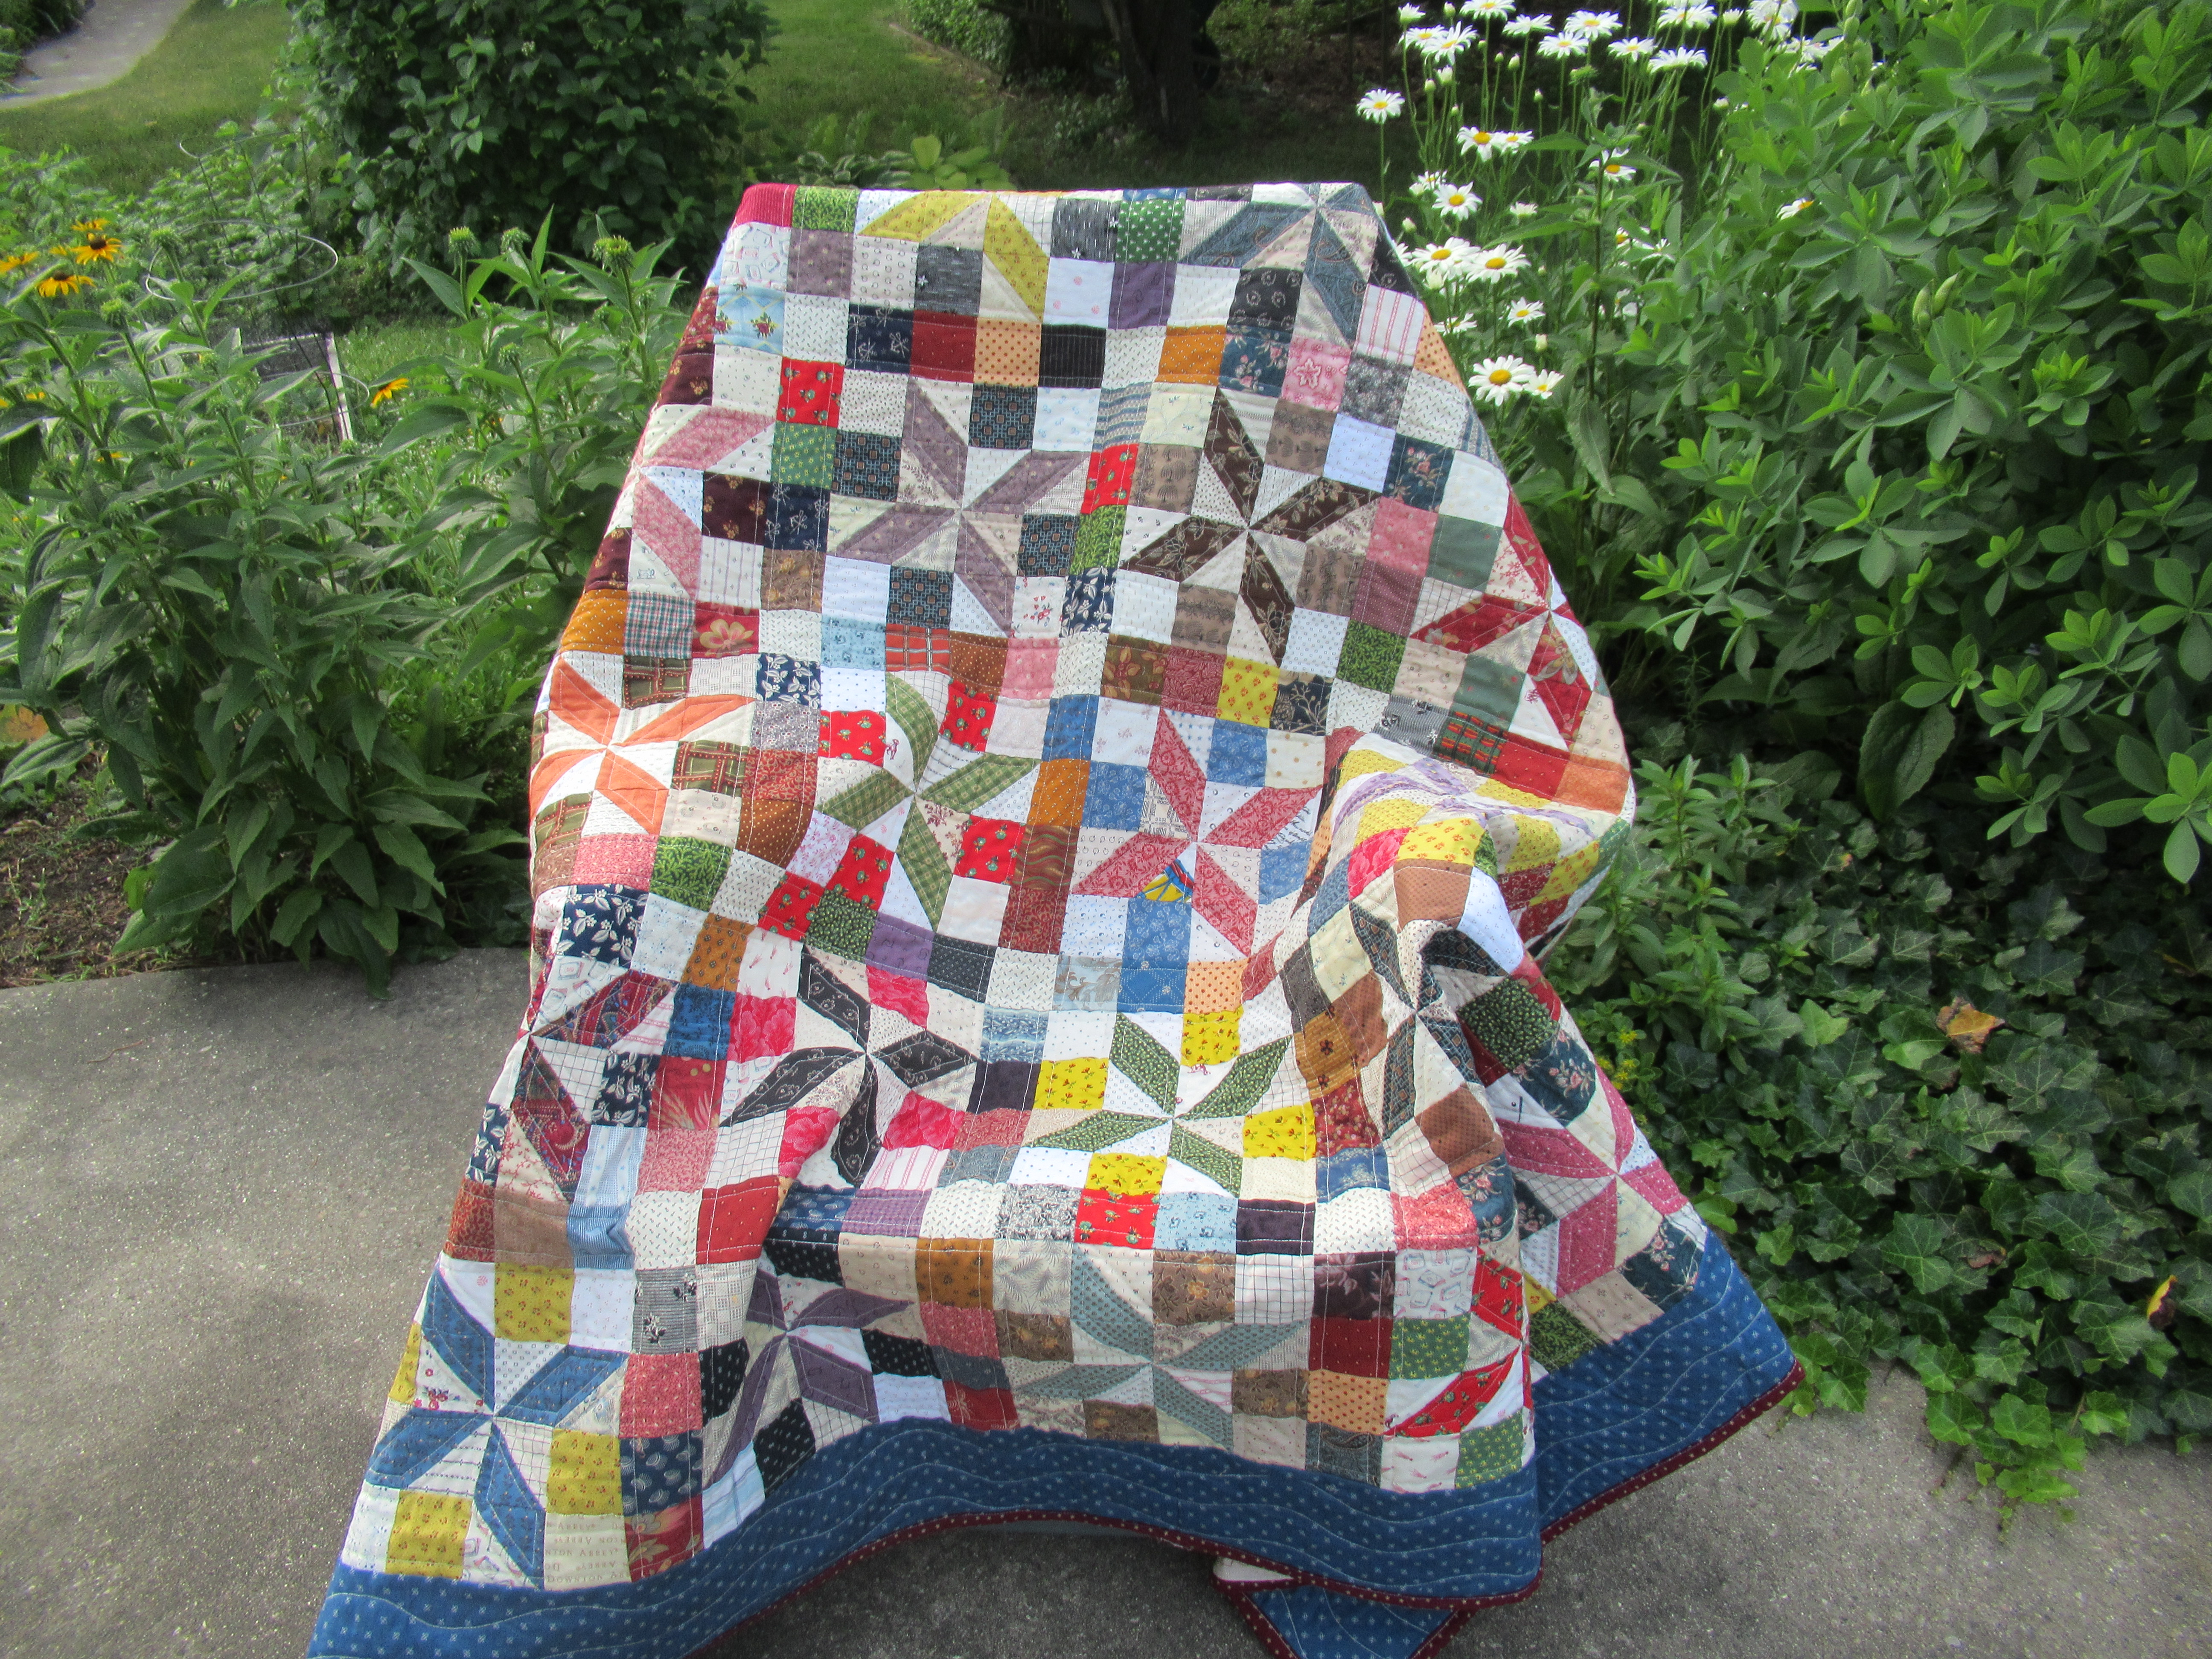
This month our guild had a challenge project using a particular method of quilt-as-you-go, where the quilting and piecing are done at the same time.  Sort of.  This is my finished project.

You could use any blocks, so I chose string blocks.  I pieced the strips onto a square of scrap batting, piecing and quilting in one step.  So far, easy and fun.


It got a little tougher at the next step.  I cut solid blue backing squares 2 in. bigger than the string squares, and spray basted the string squares to them.  Then comes the joining together part.  The backing squares are sewn together with a one-inch seam right next to the string blocks, and the seam allowances are folded over the front of the blocks, pressed under, and top stitched down.  I hope this makes sense. 

It was pretty easy to DO, but for me it wasn't easy to get everything to line up right, even with the help of an iron.  I was not very happy about how uneven it looked.


The fabrics in the blocks were bright and fun, and I was glad to use them up.  On the advice of the project leader, I bound the quilt with a separate binding, but you could do the edges the same as the block joins.


Here's what the back looks like.  Each one of those squares is a separate piece of fabric.


All in all, it wasn't my favorite method, but it was good to try something new.  And maybe I'm just too critical of my quilt, since it won third place in the judging!  I got a $15.00 gift card to a quilt shop!  The quilt will be donated locally.

Do you see the snow in the picture above?  I took that photo yesterday.  Today the snow is nearly gone, and runoff water is everywhere.


This ditch in the park still has ice at the edge though.

Today it's 57 degrees F and sunny, and it feels like spring if you don't look at the piles of snow here and there.  I saw two Sandhill Cranes this morning in the park, and three robins in our front yard.  None of them consented to pose for photos, sadly.

 
More red blocks for the Rainbow Scrap Challenge!  These are four of my whirlygigs.  I dug into the novelty scraps for these.  There are dogs and paw prints, teddy bears and hearts, bugs and ants, and dots and Dr. Seuss.


Two more, with Bucky Badger, ladybugs, and baseballs.  I was really supposed to make five, but got carried away.  Oops, extra!

This time I added a new step when making them, and it helped them come out straight.  It was suggested by Maggie Fellow of the Making A Lather blog.  After sewing the two pieces together for each of the four quarters of the block, Maggie squares them up.  OMG, this is the best idea!  Why didn't I think of that?  (Because I'm not a genius like her, of course.)  The original design says to square the whole block up, but honestly this works better.  Thanks, Maggie!  (Click HERE and scroll down for Maggie's directions.  Her blocks are called Rolling Windmills.)

In Progress

The Twinkle Twinkle Scrappy Star top is still in progress, and might be finished for next week's blog.  Stay tuned!


This little quilt kit is on deck after Twinkle.  Did you ever send away for a kit from Quilts for Kids back in the day?  They would send you everything you needed for a top.  Once it was done it was sent back to them to quilt and distribute to kids in hospitals.  I did several of those, both from Quilts for Kids and made up from my own fabric.  This is a similar kit I put together for myself.


In the kit are 15 Bright Hopes blocks I made for last year's RSC, plus 15 squares of a print that looks like kids' crayon drawings.  There are also four 1.5 in. strips for an inner border, and four 3.5 in. strips for the outer border of the same crayon drawing fabric.  Fun and easy to sew!  I can't wait to get started.


I'd show you the scraps for my leaders and enders project, but Lizzy is sitting in the box!  This project is going to take a while, especially since I now realize I need 36 blocks, not 30.  But, a little at a time, it will be sewn.

So what's going on in your world today?  I hope you are having time to do things you want to do.  Have a lovely week, everyone!  

Thanks for reading,

Sylvia@Treadlestitches
Linking up with:


Angela at So Scrappy

Cynthia at Oh Scrap


Saturday, January 28, 2023

Flannel-palooza, or Fluffy Side Up

 Welcome to Treadlestitches!

Today's blog is brought to you by Snicklefritz the cat, official quilt tester.  Three of these little flannel quilts will be going to the Community Baby Shower early next week.

I've been on a flannel kick lately, inspired by the winter and by an overabundance of the soft fluffy fabric. And what's better to make out of flannel than baby quilts?

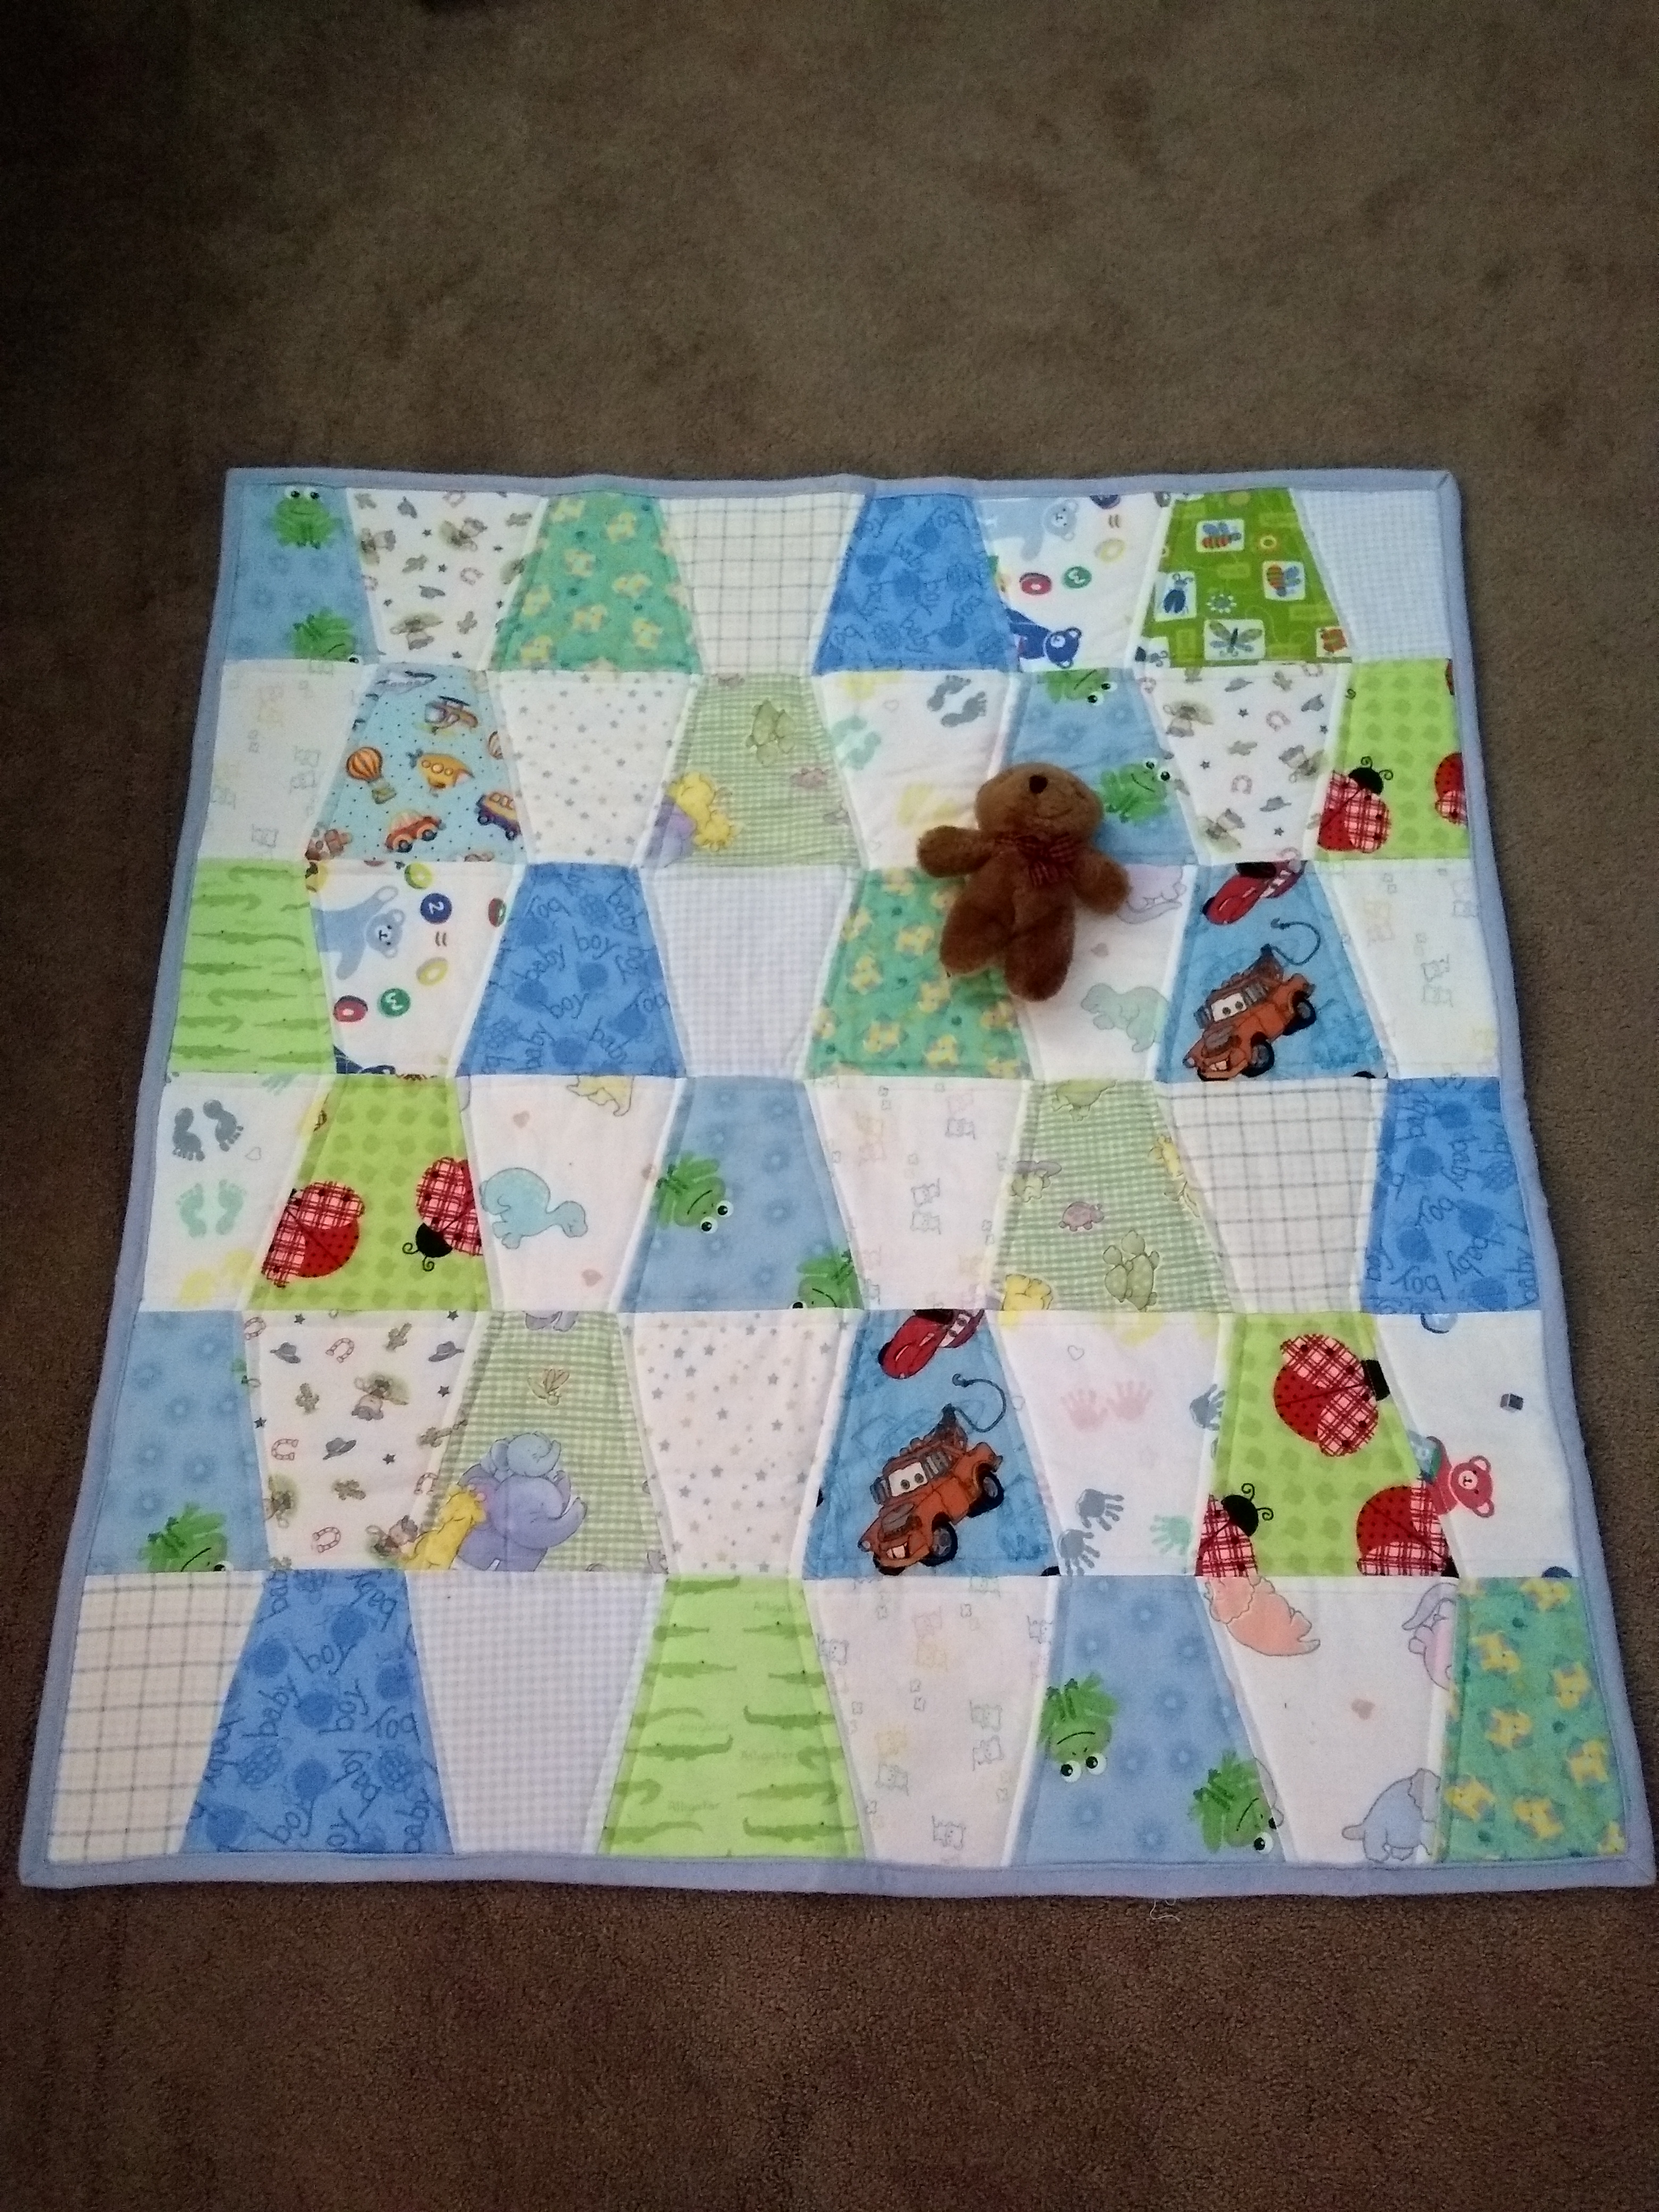
Two of the quilts were made with these Tumbler shapes, cut with the Accuquilt die cutting machine.  This scrappy one has blue and green prints for the darker pieces, and various lights.

There are lots of fun prints here, from frogs and bugs to dogs and crocodiles.  I think this is the last of that Baby Boy print.  

I'm hoping someone's little guy will find this quilt warm and cuddly.

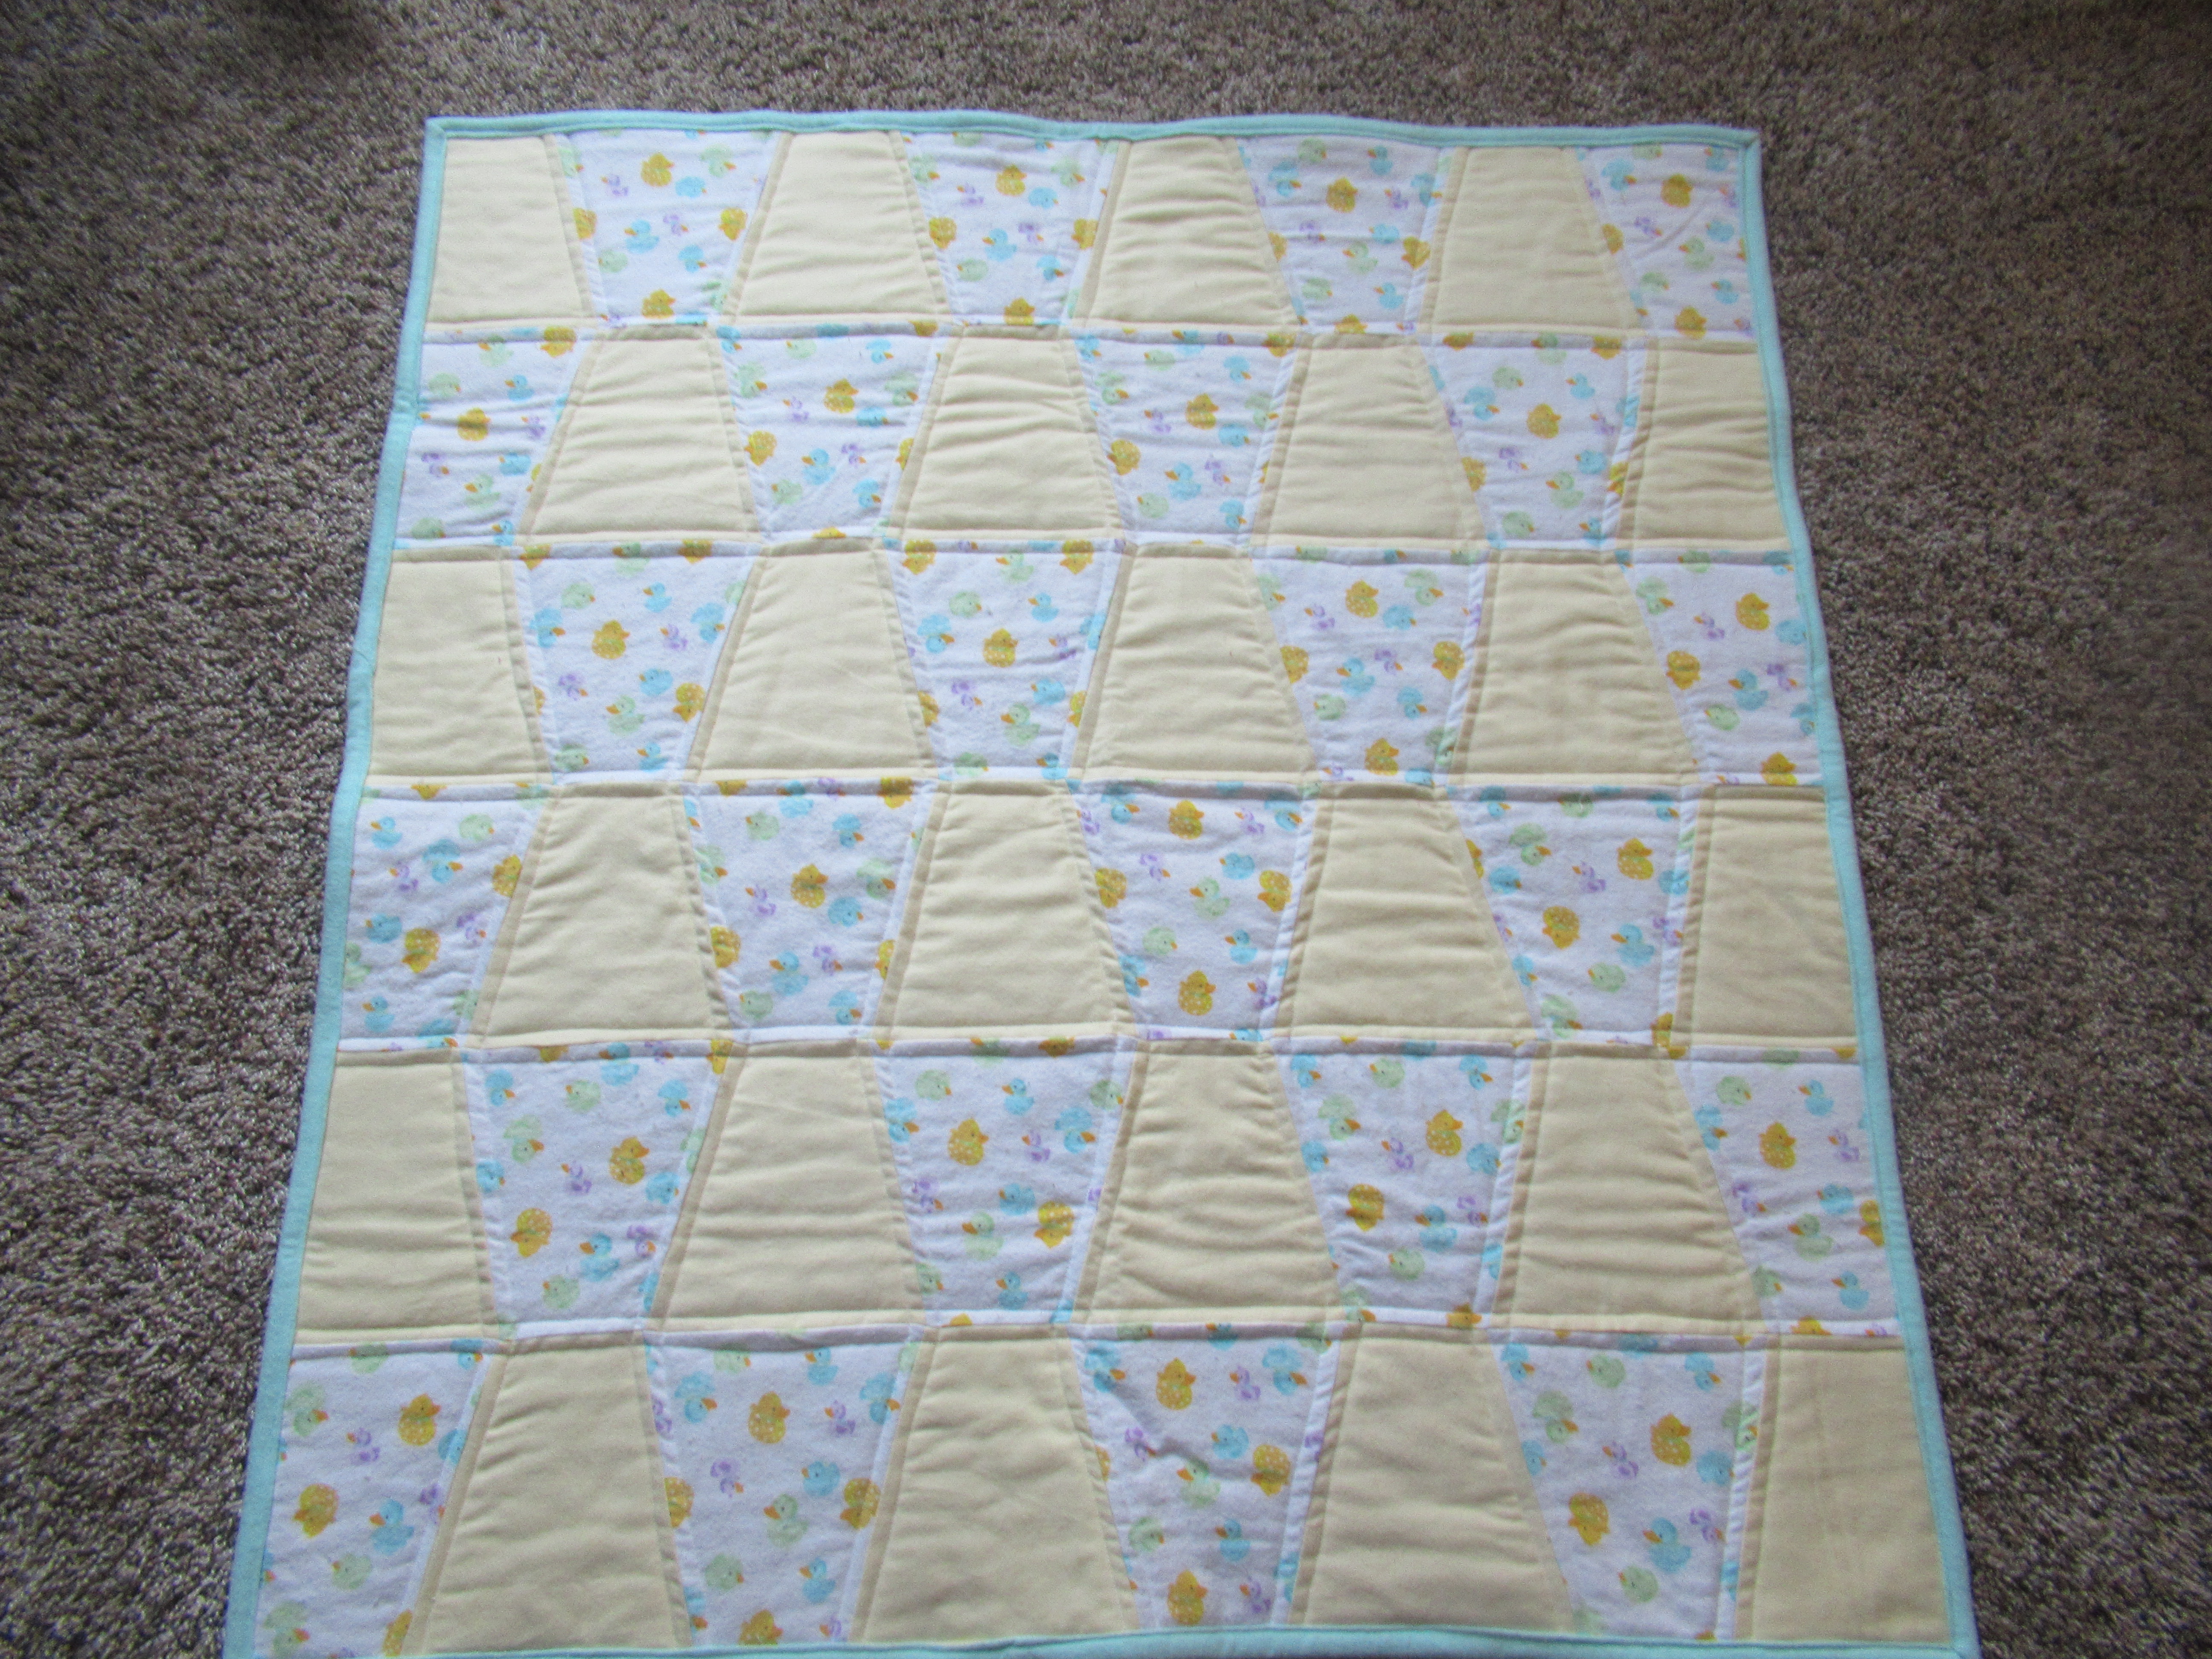
The second tumbler quilt is a classic two-color quilt in yellow with a green binding.

Duckies!  And a soft plain yellow.  It's easy to tell which side is the right side with printed flannel, but it's harder with solid colors.  Both sides are soft, of course, but there really is a difference.  I had to keep checking to make sure the fluffy side was on top.

Each of these quilts use 48 tumblers.  I cut 24 each of lights and darks for the scrappy one, and 24 each of duckies and solid yellow for the second one.

Once the rows were sewn together, I straightened the edge with a long ruler and a rotary cutter.  The quilts measure 33 in. x 35.5 in. finished.

More duckies on the back!  I got this fabric at the quilt group silent auction last fall.  It came from the stash of a very nice lady (Mary G.) who had passed away.

The third flannel quilt is a Trip Around the World, and it started like this, as a kit I cut from scraps.

I know some (most?) people strip piece this pattern, but I sew it from individual squares.  I keep track of the rows like this, pinning them to the makeshift design wall with paper row number labels.  It helps to keep me on track, especially since I don't usually sew for long blocks of time.

Plus there are furry distractions laying on the pieces!

In the end it came out okay.  The pieces are 5 in. squares (cut), and the quilt finished at 40.5 in. square.

And guess what the theme is---

That's right!  Even more duckies! 

The back is this gorgeous Hoffman print.  I don't remember where/when I acquired it, but I wish I had a whole bolt.

The Community Baby Shower contributions are due at the end of the month, which is Tuesday, believe it or not.  Since two of these quilts are meant for boys, I might try to make a pink one in the spirit of equality if I have time.  Plus the RSC color for February is pink!

In other news, here's my last dark blue Rainbow Scrap Challenge project for January.

I made these Capital T blocks a few years ago from reproduction 1800s fabrics.  The plan had always been to quilt them by the block, so now I'm finally getting going on it.

There will be some handwork, but I don't mind at all.

We're expecting snow here, so I'd better wind this up and get to the store before it starts.  I don't want to be stuck in the house like this guy!  (He wiggled out right away, of course.)

If we do get snowed in, we'll at least have plenty of chocolate brownies my Little Guy and I made yesterday.  Bet you can tell his favorite thing is licking the spoon!

I hope you have time for your favorite things (and people and animals!) today.  Happy Quilting!

Cheers for reading,

Sylvia@Treadlestitches

Linking up with:

Sarah at Can I Get A Whoop Whoop

Alycia at Finished or Not Friday

Angela at So Scrappy

Cynthia at Oh Scrap


Friday, July 8, 2022

A Finish, Purple Blocks, Berries, and a Little Thief

 Welcome to Treadlestitches!

I finished a quilt on Monday.  And it wasn't a baby quilt!  It was one of my Rainbow Scrap Challenge projects from 2021, a twin-sized reproduction quilt.

I got started late in February on these blocks using my 1800s reproduction scraps.  The pattern, called Poinsettia Star, comes from the fabulous Bonnie Hunter's book Scraps and Shirttails II, as part of her Carolina Christmas quilt.  The star shapes (aka petals) were in the color of the month, with an additional color as an accent in the squares, plus a lot of light prints for background.

Here's all the blocks, laid out on the floor.  I didn't make a top for this quilt.  Instead, I divided it into sections so I could finish it quilt-as-you-go, with no handwork.

If you'd like to know how I do that, I've written a tutorial using this quilt as an example.  A couple of years ago I tried my hand at writing something similar, and got bogged down in prose and too many pictures.  This time, I've simplified things.  If you'd like to see it, click HERE.

For backing, I used some of my collection of Toile de Jouy prints.  I specifically chose the ones with patriotic and historical American images.  I only had about a yard of each, and two of the pieces are the same print, just in different colors.

Flags, covered wagons, Lady Liberty and George Washington!

A great quilt to finish on July 4th.

So that's the last of the RSC quilts from 2021!  (Never mind the RSC quilts from earlier years.  I've got more work to do there!)

For this year, the lovely purple scraps have come out to play as the color of the month for July.

I don't seem to have very many purple novelty prints.  How dreadful!  Something must be done!

In other news, our raspberries are starting to get ripe.  The little boys and I have been picking them in the mornings.  It's not cold out, we're wearing sweatshirts to keep the mosquitos off.  They've been awful this year.  (The mosquitos, not the boys!)

Very few of the berries end up back in the house.  I wonder why?

It happened again!  Can you tell what this terribly blurry picture is?  I caught this striped culprit in the netting that goes over my little strawberry patch.  A couple of weeks ago I caught the same one or its relative in just the same way.  This time, I took a quick photo before cutting the little scoundrel loose.  Next year, I'm going to work on a better system to keep the sneaky rodents and birds out.

For now, we're going to make the most of all the pleasures of the season.

Have a happy week!

Thanks for reading,

Sylvia@Treadlestitches
Linking up with:

Alycia at Finished or Not Finished Friday

Angela at So Scrappy

Cynthia at Oh Scrap 


Friday, January 1, 2021

Quilt by the Block Tutorial: Quilts with Sashing, Part One

 Welcome to something new, a Treadlestitches tutorial on quilting by the block. 


 If you follow this blog, you know that I do a lot of quilt-as-you-go.  This just means I quilt my quilts in sections, rather than as one whole unit.  These techniques have been around a long time, at least a hundred years, and can be done by hand or by machine.  I choose to quilt my sections by machine.

The technique I'm showing here requires some hand work, as do most quilt as you go methods.  This particular tutorial shows how I quilt by the block on a quilt with sashing between the blocks.

Here's why I quilt this way.

1.  It's much easier to quilt something small than something big.  I don't have to worry about how much throat space my domestic sewing machine has (or doesn't have).

2.  I can easily turn the block while I'm quilting, to do any sort of design I like.  Many of my quilts are reproductions, and quilt as you go makes it possible to do old fashioned outline quilting or stitch in the ditch, or even fancy motifs.  (Not too fancy--I don't free motion quilt.  I'm using my Pfaff's built-in walking foot.)

3.  Quilting by the block is much easier on me physically than quilting a large quilt.

 So that's the why!  Now for the how.

Step One:  Make quilt blocks. (No problem!)  Size doesn't matter, but larger blocks will be a more efficient use of materials.  My blocks in this tutorial are 12 in. finished.

Step Two:  Decide on a sashing fabric, and a width for it.  My sashes in this example are 2 in wide finished.

Step Three:  Cutting.  

A.  Cut the sashings and cornerstones from your preferred fabrics, just as you would do for any other quilting method.  In this example, I cut my sashings 2.5 in. wide and 12.5 in. long.  The cornerstones are 2.5 in. squares.

B.  Cut the batting.  When I quilt these blocks, I will be quilting each block plus one sashing as one unit.  I cut the batting the finished size of the unit.  In this case, that's 12 in. x 14 in.  The exception is the last block in each row, which does not have a sashing.  I cut a 12 in. square of batting for that unit.

I don't want the batting to be caught in the seam, because of the thickness it causes.  This is why I cut it to the finished size of the unit.

Batting scraps are ideal for this method.  Long strips of batting will be needed for the sashing rows between the block rows, as well as the borders.  We will cut that later.

C.  Cut the backing.  More backing is needed for this method than is used if the quilt is quilted in one piece.

This is where my way differs a little from other instructions.  I cut the backing sections for most of the blocks 14.5 in. wide (exactly what you need for a 12 in. finished block and a 2 in. finished sashing), but I cut them 15.5 in. long.  This makes what I call a "shirt tail".

Here's the backing,  right side up.

 Backing pieces for the last block in each row are cut 12.5 in. wide and 15.5 in. long.

Step Four:  Sewing Sashings

In each of my rows, there are five blocks and four sashing strips.  Before I start quilting, I sew a sashing strip to each block in the row, except for the last block.  I do NOT join anything else together.  I end up with a pile that looks something like this:

I make the sashing and cornerstone rows just the same as I would do for any other quilt.

Step Five:  Layering

I lay the backing piece wrong side up, and place the batting piece on top of it.

It's hard to see in this photo, but the batting is narrower than the backing.  (Remember, I'm trying to keep the batting out of the seam.)  The extra backing below the batting is the "shirt tail".  This will become the backing for the sashing row later on.  (Don't worry about this now.)
 

The block plus sashing unit is ready to go on top, and the first block in the row is ready to quilt!

Step Six:  Quilting

Now for the fun part!  Quilt the first block in the row anyway you like.  You can baste it first if you like, with pins or spray.  Sometimes I just press it well and go straight to quilting.  Warning:  Do NOT baste any other quilt blocks in the row yet!!

Here's another warning:  You can quilt up to the edge of the BLOCKS, but do not quilt the right edge of the sashing, where my little scissors are pointing.  This must remain loose to attach the next unit.  

To attach the next block-sashing unit:

Here's what the first unit looks like, with the sashing edge pulled back.  You can see all 3 layers--sashing, batting, and backing.

I sew the sashing from Block #1 to Block #2, raw edge to raw edge.  I do not catch anything else in the seam.

I press the seam.  Just a reminder, the second block is not quilted yet.

Here's what it looks like on the back.  The next step is to sew the backing for Block #2 to the backing from Block #1.

Again, there are only two layers to this seam--the backing from Block #1 and the backing from Block #2.  (By the way, I'm sewing this seam on my treadle.  All the quilting is happening on the Pfaff.)

This is what it looks like opened up.  Block #2 is on the left, folded out of the way.  Now it's time to lay in the batting for Block #2.

Like this!

And then smooth over Block #2, which is now ready for basting and quilting.

This is what it looks like on the back.  I press both front and back to make sure everything is smooth and lying flat.
 

Now I can quilt the first sashing.  For this quilt, I'm running a line of serpentine stitch about a quarter inch from the seam, where my little scissors are pointing.  You can also see I've gotten ahead of myself and quilted the second block.

From here on out, you just repeat these steps.  

1.  Quilt the block, leaving the sashing unquilted.

2.  Attach the next block to the front only.

3.  Attach the backing for the next block to the back only.

4.  Press the seams.

5.  Lay in the batting.

6.  Baste (if desired).

7.  Quilt the block.

When you finish the row, all the blocks and sashings will be quilted, and there will have been no hand work at all.  (It's coming!  But not yet.)

Adding the Sashing Row

The last thing to do to complete the row is to add the sashing row to it.  In this example, I have six rows, but will only be adding sashing rows to five of them.

In this photo, I have laid the sashing and cornerstones row right sides down against the quilted row, and pinned it.  Note the "shirt tail" backing fabric on the far right.  It needs to lay there just like that.

I am sewing through 4 layers here--the 3 layers of the quilt plus 1 layer of sashing row.

After the row is sewn, I press the seam away from the blocks.  Did you notice the edge of the shirt tail extending beyond the sashing row?  It is larger on purpose.

Do Not Quilt the Sashing Row Yet!!!

Part Two of this tutorial will cover sewing the rows together (with some dreaded hand work) and adding borders.

Thank you for reading through this!  I hope it makes sense.  I am far from a pro at writing instructions!  If there is anything you have a question about, please ask in the comments and I'll address it. 

Happy Quilting!

Sylvia@Treadlestitches