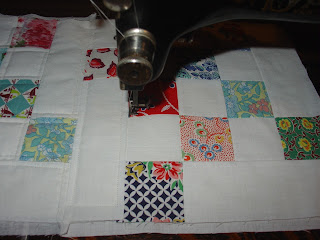
I decided to quilt this one block by block. It's my favorite way to quilt. It may not be very efficient, but I actually like the process, and it goes pretty quickly. Many people don't like all the hand work necessary, but I actually enjoy it. For this project I will have six seams on the back to sew down by hand. Each seam will be the width of the quilt.
I cut squares of cotton batting, one for each block. I keep a (large) bag of batting scraps and these squares were cut from the scraps. Did you know you can rotary cut batting? I use a different rotary cutter for this, so I won't dull the blade for cutting fabric.
I cut the batting squares slightly smaller than the quilt blocks, since I really don't need the batting in the seam.
Next I ironed the clean flour sacks, and cut them into rectangles for the backing. I cut them 10.5 in. wide and 11.5 in. tall. This gives me more fabric to work with on the back when I'm doing the hand sewing.
Here are all 3 pieces, block, backing and batting. For the first block of a row, I just layer the pieces together and quilt. It's like making a pot holder.
When I add the second block, I sew a five layer seam--the top, batting, and backing of the first block plus the second block (on top, right sides together) and the backing for the second block (on the bottom, right side up). (Note, no batting for the second block yet). Here it is lined up and ready to sew.
Sewing the seam on my Davis VF treadle.
I press the seam at this point.
Then I open it up like a page in a book and add the batting square.
Then I smooth it over and press it again. You could baste at this point, but I don't. The cotton batting stays put as I quilt. Plus I like to live dangerously. And I hate to baste.
What I'm doing here is often called outline quilting. I'm sewing along the seams, using my presser foot for a guide. I do all the seams in one direction, and then all the seams in the other direction. I've worked out a system for this block so I don't have to break the thread until the block is quilted.
WARNING: Don't quilt close to the top and bottom of the block. This is where you'll join the rows, and you need to have at least half an inch of space so you can pull the backing out of the way. See below.
(You can quilt close to the SIDES of the block, because you'll be sewing a 5 layer seam and you won't need to pull the backing out of the way.)
I've got 2 rows done so far. The yellow post it notes are my row markers.
When I sew the rows together, I pull the backing and batting out of the way, and sew a 2 layer seam, matching the seams between the blocks.
Above, the seam is sewn. Now I'll trim it carefully, pin, and hand stitch it down.
Here I've started pinning the seam.
After the seam is sewn down on the back, I'll do more machine quilting where the rows come together.
Only 5 more rows to go! I like doing this so much, it's hard to stop. I'll add borders when I have more rows together.
Have a lovely quilty day.


No comments:
Post a Comment
Thanks for reading! Post a comment--I want to know what you think!