Showing posts with label rainbow scrap challenge 2021. Show all posts

Saturday, September 23, 2023

Rainbow Triangles, and Straightening Up

 Welcome to Treadlestitches!

It's a Blast from the Past!  I started this little quilt in January of 2021 as a Rainbow Scrap Challenge quilt for that year.  Each month I made 20 half square triangles (3 in. finished) from the color of the month.  Recently I dug them out, sewed them into 6 in. blocks, and put the quilt top together.

My inspiration was this photo of a brave nurse in New York being one of the first people vaccinated against Covid.  I was inspired by her dedication, but also distracted by the logo of the hospital/health company on the wall behind her.

This is my version, different from the original photo but kind of the same idea.  Most of the fabrics I used were subtle prints, but a few bolder ones sneaked in.  (Looking at you, green with stars!)  The quilt will be donated locally.

The border and the binding are batiks.  The blue one came from the museum sale in June, and the green one was a larger scrap from the clearance table at a quilt shop.  I haven't used batiks a lot, but I'm loving the bright colored ones.

The back is this fun print.  I got two yards of it at the quilt show a couple of weeks ago.  I quilted a 3 in. grid (across and down) plus a diagonal grid on the long side of the triangles.

Snicky is taking his job as "poser" very seriously.  I can't lay a quilt down without him jumping on it (or diving under it).

Catching up on projects is part of what I'm doing with my "extra time" now that Little Guy is in preschool 3 mornings per week.  Right now, I'm using that time to think, plan, and organize.

I forgot to take a "before" photo when I straightened up this shelf unit. If you want to know what it was like, you'll just have to imagine clutter, a thick layer of dust, piles of books and magazines, and smaller boxes of fabric stacked on top of each other.  I have lots of fabric "inventory" now, after the recent sales, so I needed bigger boxes, and lids are great at keeping the dust out.

Reorganizing the tools was important.  The basket on the left holds all the rotary cutter stuff, like extra blades.  The tins next to it hold used blades and specialty pins.  Behind them is my pinker (the thing with the handle) and a wood block originally used to print fabric (not by me. Yet?).

Some of my antique finds are on the top shelf, along with a newer Singer tin that stores needles.  The  little flowered box holds tiny spools of thread.  I just think it's cute, I'm not planning on using the thread.

I want my sewing room to be pretty as well as functional.  It makes me happy to be here.

The Rainbow Scrap Challenge makes me happy, too!  

This week's blocks are the 16 patch ones.  Now that all the blocks are done, I need to decide how to put them together.  I plan on donating the finished quilt or quilts.  Should I make one twin sized quilt or two baby sized ones?  Are there places that would want a twin sized quilt with lots of crazy novelty prints?  I'm thinking it would be most appropriate for a child.  Any help you can give me will be greatly appreciated.

Here's a new project I'm working on:  Jelly Twist, from Cluck Cluck Sew.  I bought the pattern while visiting my mom in July.  I'm using a white background, and choosing from these rectangles for each block.  Easy, fun, and colorful, it's a good pattern with all the math done for 4 different sizes.

No photos of the kids this week, sorry.  It was a crazier than usual week, but all is well.  I hope all is well in your week, too!

Thanks for reading,

Sylvia@Treadlestitches

Linking up with:

Alycia at Finished or Not Finished Friday

Sarah at Can I Get A Whoop Whoop

Angela at So Scrappy

Cynthia at Oh Scrap


Friday, July 8, 2022

Quilt As You Go, No Handwork: A Tutorial

 Welcome to Treadlestitches!

I do most of my own quilting on a domestic machine.  Baby quilts are easy!  For larger quilts, I either quilt a simple grid, or use a quilt as you go technique.

I started these blocks in Feb. 2021, as part of the Rainbow Scrap Challenge.  The pattern comes from Bonnie Hunter's Carolina Christmas in her book Scraps and Shirttails II, and is called Poinsettia Star.  The poinsettia "petals" were in the color of the month.  In October, once the blocks were done, I had to figure out how I wanted to quilt them.

I didn't make a top first, because I was going to quilt in sections.  I laid all the blocks out in 7 rows of 6 blocks each.

I made sashing strips from squares to go between the blocks and rows, and then I laid out the sections.  The center 3 rows are divided into 3 small sections of six blocks each.  The top 2 rows, plus sashing, are a section, as are the bottom 2 rows.  (Please excuse the bad lighting!  The sun was very bright that day.)

Also, not shown in the photos, I cut backing and batting for each section.  These pieces are just pinned together to keep them straight, NOT BASTED YET.

In this technique, you work from the center out.  I layered the center section with batting and backing, spray basted it, and quilted it.  In some places, I quilted right up to the edge.

One of the reasons I wanted to use this method was because I wanted to do outline quilting, rather than a grid.  Outline quilting, that is, following the seams of the piecing, was often done on quilts long ago, and seems appropriate for a reproduction quilt.  I quilted inside and outside each of the "petals", and around the edges of the blocks. 

This is the completed first section.

Now what?  

The basic principle of this particular version of quilt as you go is this: 

If you add an unquilted piece to a quilted piece, you don't need to do any hand sewing.

Here's how this works.


I'm going to sew the unquilted section on the left to the quilted section on the right.  The unquilted section has now had the blue border attached to it.  Please note, the unquilted section does not yet have batting or backing attached.  The quilted section has been trimmed on the edge that will now be sewn.

I lay the unquilted section face down on the quilted section, and stitch a quarter inch seam.  It's helpful to have a built-in walking foot for this.

I press this seam toward the newly added section with a hot iron.  You want the seam to lay flat, with no puckers. 

Then I add the backing piece, right side down, to the backing of the center section, also with a quarter inch seam.  I press this seam also.

Here's what it looks like on the back.  As you can see, I'm using different toile prints for the backing. 

Now I add the batting between the two layers I just added.  I use basting spray to spray just the batting, and then smooth the pieces over it.  I do the back first, then the top, but it would work just as well the other way.

Now I'm ready to quilt the second section.  So I do!  I'm leaving the border to be quilted last, when all the sections are done.

Here's what it looks like on the back, after quilting.

So that's the technique:  For each section, add the top, add the backing, add the batting, quilt the new section.  And repeat.

Now for some time lapse photography (well sort of).

Section 3 added, middle 3 rows complete.

Section 4, the top 2 rows, added, then quilted.

And the last section, the bottom two rows added.

Once all the sections were together and quilted, I marked and quilted the borders.  I used a wavy stencil, and marked with a chalk pounce.  It reminds me of a waving flag.

 The binding is a red patriotic print, also sewn on completely by machine.

Because I'm quilting from the center out, the sections are easier to maneuver.  As the quilt grows, I'm always working on the outer edges.  It can get a little tight at times turning the quilt to outline the piecing, but it's still easier than doing the whole quilt at once (ask me how I know!). 

I definitely don't mind doing handwork, but it's nice not to have to worry about it.  It makes the process go faster.

I wouldn't use this method for every quilt, but it's handy to know, especially for medallion style quilts.

Is this helpful?  If you have questions, I'll be happy to answer.

Happy Quilting!

Sylvia@Treadlestitches


Saturday, January 1, 2022

Follow the Rainbow

 Welcome to Treadlestitches!  Happy New Year, everyone!  Can you believe it's 2022 already?

Like I always say, I love the Rainbow Scrap Challenge.  I got carried away this year making blocks from my kid-friendly scraps, but it's all for a good cause.  These small quilts will go to Project Linus to comfort children in tough situations.  It's a lot of work, but I regret nothing.

(Oops, too much sunlight!  That is usually not the problem around here, sorry!)  I made two baby quilt tops from the log cabin RSC blocks, and got this one quilted yesterday.

The blocks were made from 2 in. cut strips.  I used up most of these strips.  (That's the idea, right? Then why does it make me a little sad?)

I tried something different with the quilting on this one.  Using a stencil (remember those?) I drew lines on the front with a purple disappearing quilt marker and quilted right over the blocks.  As soon as I finished the quilting, I washed the quilt in cold water, and all the purple came out.
 

On the back is a cute carrot print I got at our guild's recent silent auction.  With these quilting lines, I can imagine a carrot field after the tractor went through.  I bound it with orange, of course.

Today I'm quilting the other log cabin.  This is a more pastel rainbow.  Carrots on the back here, too.

After these two are done, there are only two more, and they are layered and basted, ready to quilt.  That will make 20 baby quilts from Rainbow Scrap Challenge blocks.

So what are we going to sew for the RSC this year?

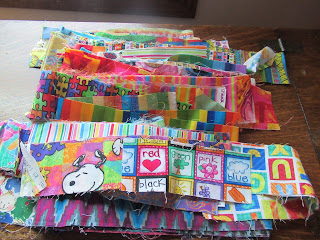
I have a lot of 3.5 in. squares, triangles, and strips in bright colors and novelty prints.  Not sure what I'll do yet, but these need a quilty home.

The RSC has helped me make lots of progress with most of my scraps, but these multi-color ones keep piling up.  I need to think of a project for them.

And back before Christmas, I bought some new Accuquilt dies.  I can't wait to try them out!

I don't do New Year's Resolutions, but I make an annual More or Less list for my quilting, which is kind of similar.  On it go 3 things I want to do More of, and 3 things I hope to do Less of.

More in 2022:

Cleaning the sewing room.  It's so easy to just sew when I have time off, but stuff piles up and the amount of thread on the floor is ridiculous.
Quilt As You Go.  Big quilts are often intimidating to quilt on my domestic machine, but QAYG works fine.  And I actually like doing it!
Organizing the stuff in the basement.  I tend to just pile stuff up there, too.  It's a horror show.  No pictures.

Less in 2022:

Buying fabric.  I know, everybody has this one on their list!  I have an insane amount of fabric.  I need to buy fabric for specific projects, not just because it's fun.  Exception:  second hand fabric.

Starting new projects just because I ran out of leaders and enders.  Have you ever heard of a sillier excuse for starting a new project?  I have lots of old projects that could get closer to being done if I used them for leaders and enders.

Watching TV without a handwork project. I actually like handwork, but you couldn't tell it by the quilts I finish.  This rule is suspended for suspenseful shows, but fully in force for baking shows and news.

So, Happy New Year!  It is a joy to look ahead and think about our hopes for this year, even given how difficult the last couple of years have been.  In the days and weeks ahead, we can look for ways to make things better for all of us.

Many, many thanks to Angela for the Rainbow Scrap Challenge (a bright spot every week!) and to all the quilters and bloggers that make this corner of the internet such a friendly place to be.

Happy Holidays from our little Santa and his elf!

Cheers for reading,

Sylvia@Treadlestitches

Linking up with:

Angela at So Scrappy
Cynthia at Oh Scrap


Friday, December 17, 2021

Ice Cream Cones, Bunny Girls, and a Few Scraps

 Welcome to Treadlestitches!  How was your week?

I should be cleaning and shopping to get ready for the family Christmas party (which I love), but there are baby quilts to quilt.  I'll get back to the cleaning and shopping later.

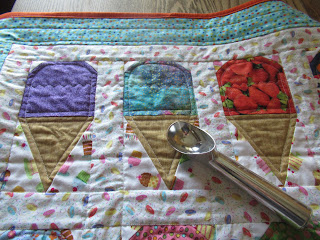
It's too cold for ice cream (or is it?) but never too cold for an ice cream cone quilt!  

This one got quilted and bound yesterday, due to an unexpected free morning.  It's a Rainbow Scrap Challenge quilt, baby-sized and ready to donate to Project Linus.  I made the blocks all year, from pink with sprinkles in January to lime green for October.
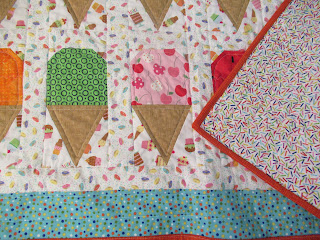
It took me a long time to decide how to set these rectangular blocks, and even more time to figure out how to quilt them.  I didn't find an ice cream print that I liked for the sashing, so I used a print with little donuts covered with colorful icing.  (The theme here is yummy stuff I should not eat much of.)  For quilting, I outlined the blocks and stitched in the ditch in the sashing seams.

Check out the back!  Here's why I chose it:

I think the back looks like these sprinkles!  Around here these long ones are called jimmies, I have no idea why.  Sprinkles are definitely good on ice cream, but we'll be using them tomorrow when my oldest daughter and her kids come over to make Christmas cookies. Can't wait!

There is another ice cream cone quilt coming (had to use all the blocks, of course!) but it isn't quilted yet.  Instead, I finished this one.

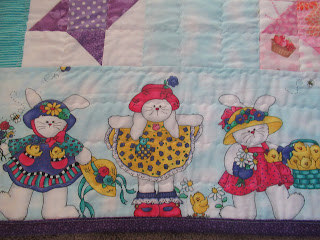
This is definitely a girl quilt!  More friendship stars, plus bunny girls in lovely dresses in the top and bottom borders.
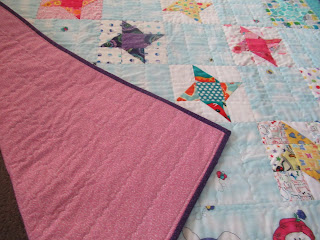
I've had this fabric for a while in my panels box.  I bought it at a flea market as a large remnant.  You may recognize it as Daisy Kingdom fabric.  It was originally designed to be made into a very fancy dress for a little girl, with the bunnies as a border near the hem.  The dresses were very popular in the 1980s and 1990s.  I never managed to make any for my daughters, but I'm absolutely sure my oldest wouldn't have worn one anyway.

The fabric between the star blocks would have been the body of the dress.  There are little butterflies and bees in the print.  The striped border was also part of the remnant.

Pink backing, and purple binding--totally girly!

Baby Buddy doesn't care if it's a girl quilt!  He still has fun running his trains on it.  (Don't worry, I always wash the quilts before I donate them.)

My little buddies are very happy to see each other at the end of the school day.  Baby Buddy comes running, attacks his brother, and they end up on the floor.  I hope they'll always be good friends.


 That's the quilts for this week.  What about the scraps?

I'm still working on the borders for the red string quilt.  This morning as usual, after the basic chores were done I headed upstairs to the sewing room with a cup of tea.  My cup this morning is one of several birthday presents from my awesome Mom!  The lettering says When Life Gives You Scraps, Make Quilts.  Good advice!  Thanks, Mom!

Have a good week, everyone.  And to all who celebrate, have a very Merry Christmas!

Check out these linky parties for inspiration!

Angela at Super Scrappy
Cynthia at Oh Scrap