Monday, December 28, 2015

Christmas Gifts

Would you choose these fabrics to make a quilt?  (A few years ago, I would have said "No!")

How about if I add this delicious print?  Now we're talking!

I couldn't post this before, because it was a Christmas gift for someone in my quilt guild.  The beautiful print was her fabric.  We do what we call "The Brown Bag Challenge" every year.  Usually at either the June or July meeting, everyone who wants to participate brings a brown paper bag with a fat quarter in it, plus a note with their name on it.  We mix up the bags, and everyone chooses one.  Then we make a gift using the fat quarter for the person who brought it.
I made a small spiky star quilt.  I used the Accuquilt dies for the points.  The special fabric is in the star centers, the cornerstones ...
and in the corners of the border.  The blocks are 9 in. finished, the sashing is 2 in. wide (finished), and the border is made of strips that are 1 in. x 3 in. (finished).  I did some really basic quilting on it.  We exchanged gifts on the 16th, and I think she liked it!
This always happens to me!  On the Monday before Christmas, I decided this bear we bought for our granddaughter needed some clothes.  So I pretty much spent the whole day making a dress, a shirt, jeans, and a nightgown.  I hope Evie likes it.  She seemed a little overwhelmed with all the craziness on Christmas eve.  I had lots of fun sewing these little things.  Eventually this bear will need a quilt.

One of the best Christmas gifts every year is Bonnie Hunter's mystery quilt.  It's something fun to look forward to during the holidays.  We're already up to Part 5 of Allietare.
I'm steadily working through part 5 on my trusty Singer treadle.
Here's what this week's units look like.  The colors are really striking.  My units range from "spot on" to OMG when it comes to the piecing.
I have to confess, I have not done part 4 yet!  It came along when I was busy with shopping and wrapping and cooking and cleaning.  When I get part 5 done, I'll go back and do part 4.
You can see my leader and ender project here.  I'm making adorable little 6 in. stars.  More about that next time.
One of the best parts of this mystery is sharing what we've done, and seeing what everyone else is doing.  There are some very talented people participating.  I love reading their stories.
Are you having fun this week?  What's under your needle?
 Back to the Allietare Link Up


Monday, December 14, 2015

Allietare, Part 3


 This was a fun clue!  Very easy, just 4 patches and a little cutting.  I can finally use the cat fabric.  I have had it in my stash for years.
I like lots of variety (can you tell?), so I put the "slices" next to the sewing machine and mixed and matched them to make the 4 patches.  I chose a wide range of golds, from more or less yellow to almost brown.
As usual, I sewed 10 at a time, and took the string of patches to the ironing board.  It's good for me to get up every so often.
I'm keeping track by pinning the 4 patches in groups of 10.  Even I can do that much math!
There, all done!

Let's see what we've got so far...
It's starting to look like something!  Can't wait for clue #4!

In other news, when Joey was here last weekend we worked on making stars.  She was going a mile a minute, and I was just poking along, picking and choosing the colors for each block.  We had a great time, and this week I finished the quilt top.


 Isn't this fun?  It's a Missouri Star Quilt Company pattern.  I can't remember the name, sorry.

 
I really like this block.  It has everything from Spongebob to duckies.
But this is my favorite block.  Joey made it, in an entirely different pattern, but with the same fabrics I was using. It fits right in.
This will be a charity quilt.  I'm  not sure if I will try to quilt it, or if I'll just give the top to our amazing long arm quilting crew.  It's a good size, 46 in. x 60 in.

It has been so much fun seeing all the other quilters' progress on Allietare!  People from all over the world are making this pattern and chatting about it.  And all of it is thanks to the generosity of Bonnie Hunter.
Thanks, Bonnie!

Back to Link Up Part 3


Monday, December 7, 2015

The Plot Thickens: Allietare Mystery Quilt, Part 2

It's Link Up Monday for the Allietare Mystery Quilt by Bonnie Hunter, Quilter Extraordinaire.  Here's where I am on the units we're doing this week.
All the pieces are cut, and I sewed the first few units start to finish, so I'd be clear on what we're making.  My finished units are the ones with the light fabric sewn to them, at the back of the photo.
I have to admit, I was a little confused at first.  I'm using the Companion Angle ruler to cut these "headless geese" shapes, but my ruler is old, and the markings are not the same as Bonnie's.  No worries, though, I figured it out.
When I cut these shapes with the Companion Angle ruler, I just flip the strip over for the second cut, instead of flipping the ruler (which is the normal way to do it).  It just seems awkward to cut these upside down.
Guess what's in the box!  It's not tea!
It's black and gray squares, part of our cutting homework for clue #2.  I've got them in the tea tin to keep them unwrinkled and ready to go when needed.


Here they are, laid out on the desk.  As you can see, I disobeyed the directions and cut two different colors of gray.  I ran out of the first gray, which of course was a perfect color.  I only had a yard of it to start with.  So I'm filling in with the plaid.  I hope it turns out okay.  I just wanted to use up the fabric I already had.

In other news, look what we did!  My friend Joey and I worked together to piece this quilt back from my orphan blocks and scrappy yardage.
Here's Joey, piecing away on her Singer 301.  We had a fabulous weekend, sewing and visiting.  We even fit in a trip to the Wisconsin Museum of Quilts & Fiber Arts, plus a barn sale.
We sewed the quilt back on Sunday, and Joey took it and my string quilt home to quilt on her long arm machine.  (Hey, Joey, is my quilt done yet? LOL)  She is also doing two more quilts for me.

Friends and quilts--what could be better?
I hope you enjoy your friends and quilts this week.

Back to Allietare Monday Link Up Clue #2


Monday, November 30, 2015

Train of Thought


It's Link Up Day for the new Bonnie Hunter mystery, Allietare, with colors based on her trip to Italy.  My trusty RAF Singer and I did clue number 1 over the long weekend.
Here is the stash I pulled to start with.  I also have drawers of scrap strips.  I'm not sure about my mustard colored fabric--is it the right color?  Do I have enough?  As always, with these mysteries, I'm trying to just use what I have on hand.
I sewed these little half square triangles in batches of ten.  I'm not the type to cut all of them at once, and then sew all of them, and then press all of them.  I like a little variety.  So I cut two strips worth, and then sewed ten at a time, pressed them, and put a pin in each batch of ten so I wouldn't have to keep counting them over and over.  I tend to lose my train of thought, especially in the sewing room.
All done!
So here's my homework in its basket, ready for the next clue, which comes out on Friday.

While I was working on this mystery, I realized something awful.  I have never finished a Bonnie Hunter mystery quilt.  Celtic Solstice is still in two pieces, with no border, and not quilted.  Grand Illusion's top is done, but that's all.  I hope I can do better this time.
Thinking about Celtic Solstice led me to the basement, where I have stored these little pieces.  They were left overs, because I decided not to make the pieced border.  Hmm.  What could I do with them?
What about stars?  I loved the stars in Celtic Solstice, and these are similar.  I made hsts for the corners (a breeze after making all those little ones).
The block centers came from this little bin.  This is where I keep 3.5 in. squares, cut from scraps. There are all sorts of colors in here, but it's about evenly divided between bright colors and reproduction fabrics.  I had plenty of indigo blue 3.5 in. squares for the centers of the stars.
So how to put the stars together?  What about a snowball block between them?  Maybe I could do some fancy quilting in the middle of it.
I think I like it.  I might like it better if I had a darker color for the snowball corners, possibly orange.  There is not even the tiniest scrap of any of these orange prints left in my stash.  I even used the strings for string blocks.
Meanwhile, back at the ranch, we're decorating for Christmas.  Our oldest grandson was here on Saturday night, and he helped us trim the tree and put up the decorations.  He especially liked setting up the Nativity scene, although he put the donkey up high with the angel, because he said the angel was lonely.
The quilt on the couch is one I made for my son many years ago.  It's twin-sized, not really big enough for him now, so it's still at our house.  I'm using it here on the couch, to cover up the bad places in the upholstery made by the dog.
This got me thinking about my youngest daughter's Christmas quilt.  I made a quilt for each of my 3 children when they were little, and Connie really used hers.  The poor quilt is absolutely wrecked.  I would not let her take it with her when she moved out, as it is literally a rag.  I did promise to make her another one.
Hmm.  Christmas fabric is 60% off this week.  And the grandkids don't have Christmas quilts, either.

Gotta go.  I have a train to catch.

Have a lovely week of sewing!

Back to Allietare Part 1 Link Up


Friday, November 20, 2015

The Tape is Rolling


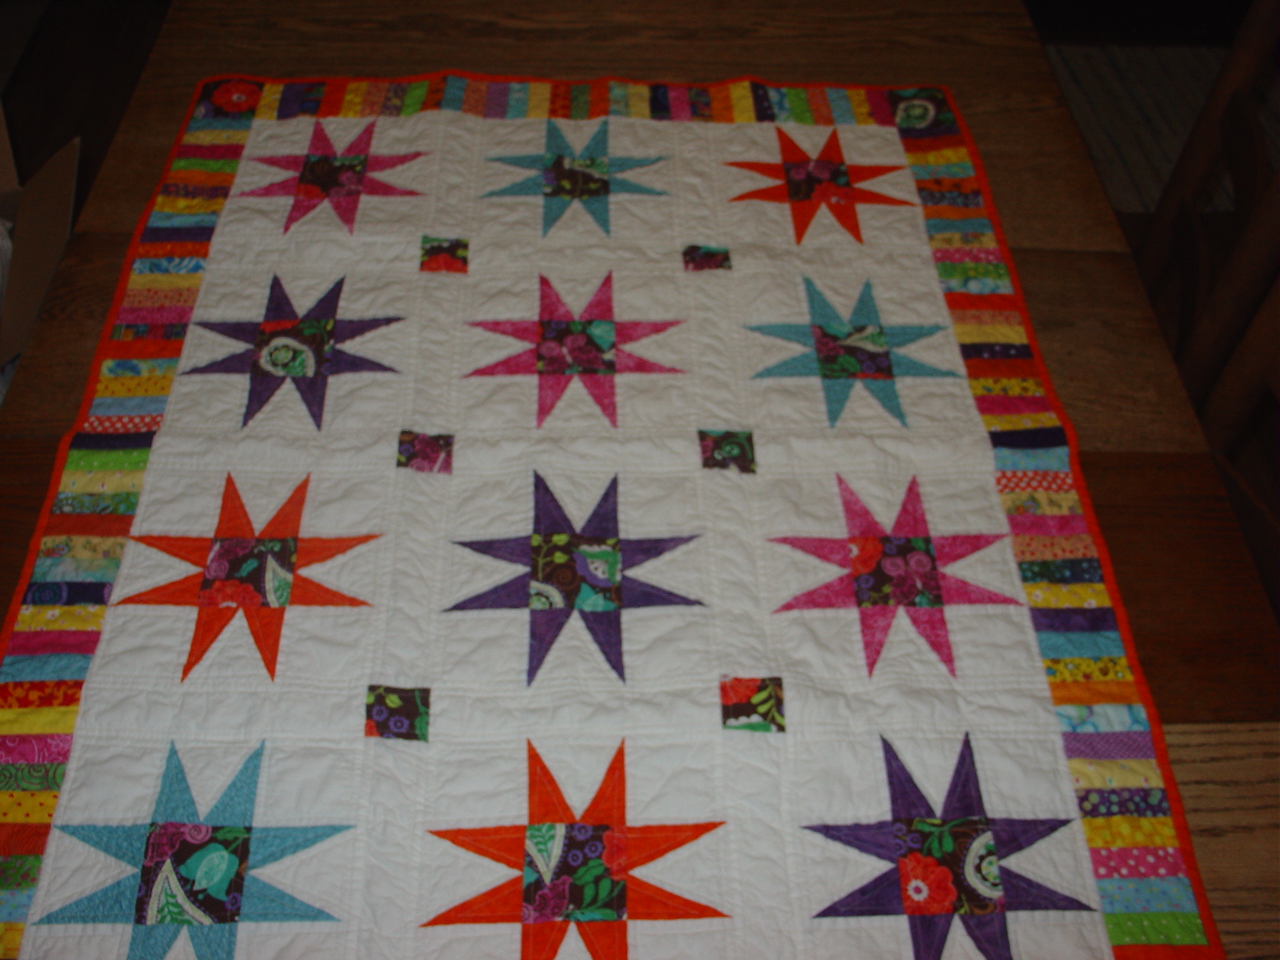
I've been on a quilting binge lately, finishing up some small tops that have been languishing in the closet.
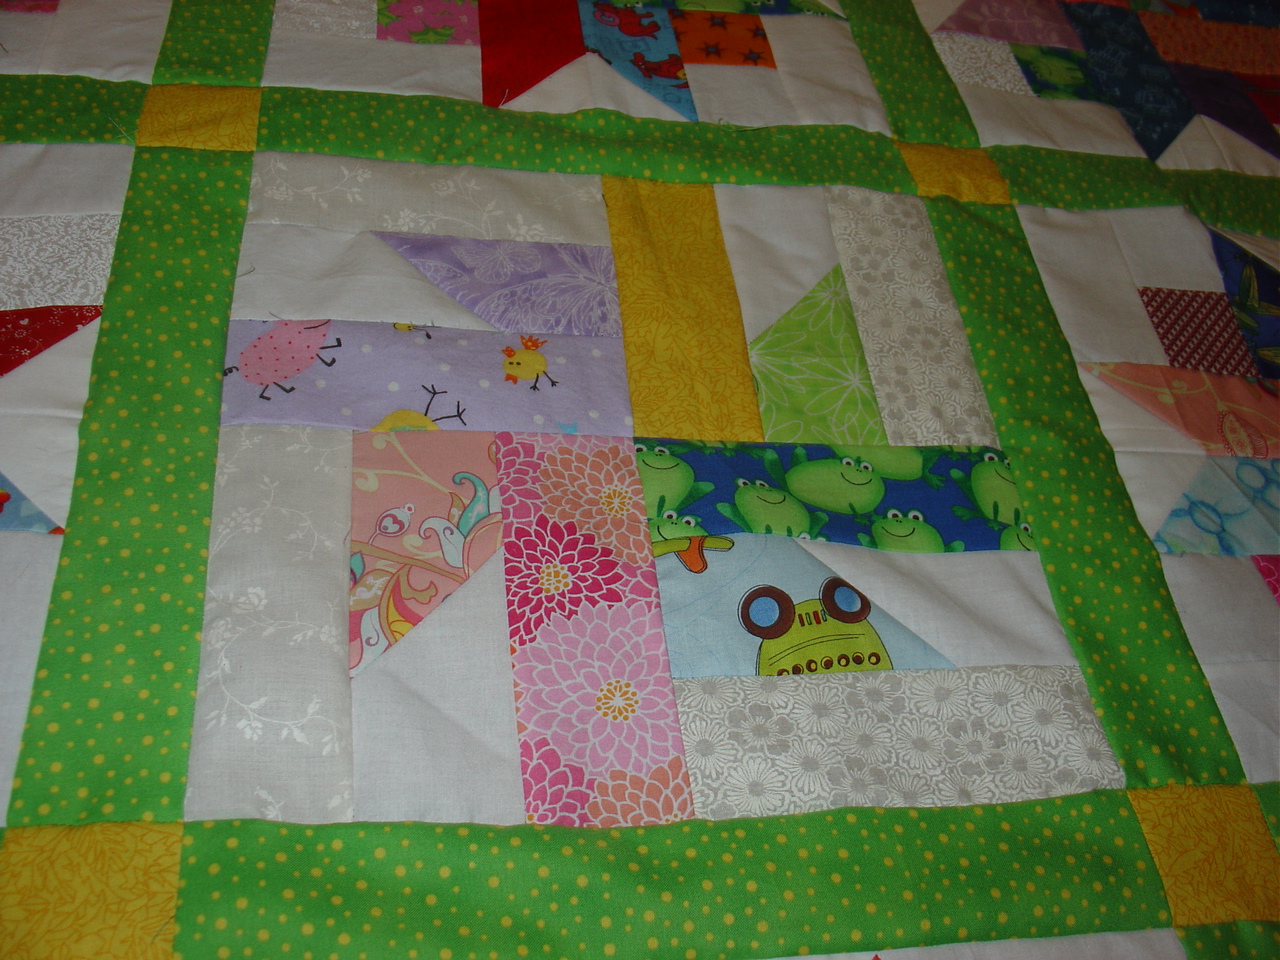
Here's a bug quilt, made with the simple 4 patch pattern from Quilts for Kids.
A close-up, and
the back.  I love the fabrics, but I'm not too thrilled with the quilting.  I use a machine with a built-in walking foot, and usually everything is fine, but this one seems kind of distorted.  I'm not exactly sure what I was doing wrong.  For now, I'm blaming the cheap batting.

 Next is the flannel snowman quilt, in the same pattern.  Above is the top,
And here's the finished quilt.  All three of the snowmen fabrics were donated to our quilt group.  I had the red floral in my stash.
This one turned out better.  I pinned a little more, and I used a different batting.
I used up almost every last little bit of these flannels. 
This one is an Accuquilt cut kit.  I made the kit from my flannels years ago.  We sold a couple of them, but this one was left over.
As usual, my cat has to inspect the quilt.  Hope it passes!  (I'm a little worried about the quilting in the border.  I don't think he's going to give me a blue ribbon.)
You can see why I always wash the quilts before I give them away.
All three of these quilts are part of our charity work at Ties that Bind Quilt Group.

When I went to work on the last of these quilts yesterday, I decided to try something else.  I can't say it's anything new, because I used to do this when hand quilting, but I haven't really done this when machine quilting.

First I pinned the heck out of this little top, and  quilted in the ditch between the blocks.  That made a 6 in. grid.  So far, so good.  Then I got out the masking tape, and did this:
I quilted on one side of each of these taped lines, and carried the line out into the border.
Here's a close-up.  Part of each line was quilting in the ditch, and part was following the edge of the tape.
It worked!  I have straight lines, and no marks on the quilt.
The borders are nice and flat, and the corners are pretty square.
Here's the finished quilt.  The cat was worn out from doing inspections, so he missed this one.  It will go to Quilts for Kids, to be given to a child in a hospital.

There are advantages and disadvantages to marking quilts with masking tape, especially for machine quilting.  This is my list.

Advantages:
1.  No marks on the quilt.
2.  Nice straight line to quilt next to.
3.  Masking tape is cheap, available everywhere, and comes in all different sizes.
4.  If you accidentally put it in the wrong place, you can easily pull it up and re-position it.
5.  It is really fun to pull off the tape and see a nice straight quilted line.

Disadvantages:
1.  It takes a while to get the tape on the quilt. (Just like when you mask areas before you paint.)
2.  You have to be careful not to sew on the tape, not even the very edge.  If you accidentally do, it will be a pain to take the tape off.
3.  The tape shouldn't sit on the quilt for very long, so you need to tape it and quilt it right away.
4.  The presser foot makes kind of a weird scrunchy noise when part of it is resting on the tape.
5.  A quilt can use up a lot of masking tape!

This is the tape I used on this baby quilt:
Time to buy some more tape!

The absolute worst problem I had with this method was this:  a couple of times the edge of the tape flipped up after the presser foot had passed it, and stuck to the back of the presser foot.  Part of the problem was using small sections of tape, which made this more likely.  Fixing this was easy.  I just stopped the machine with the needle down, detached the tape, stuck it back down, and went on.

I think I like this method.  I want to try it for cross-hatching on a big quilt.

Thanksgiving is next week!  I'm sure we all have a lot to be thankful for.  I know I do.

Happy stitching!

I'm linking to Crazy Mom Quilts today.
Back to Crazy Mom Quilts