Friday, November 18, 2016

Shop the Stash

I'm definitely not a good photographer, but I have the perfect model--my perfect youngest grandson.

Today's finishes are brought to you by my scrap and fabric stash.  Shopping the stash is perfect for this time of year.  You don't have to leave the house, it uses up stuff that's taking up space, and it's already paid for.  Win, win, win.
Today's finish is a quilt for the Volunteer Center.  It's a small twin size.  I pieced it several months ago, and turned it in to the charity quilts group at our guild, who quilted it.  I added the binding, so now it's actually ready to go to its new home.
Here's the back.  It's a print of quilt ladies doing their thing.  Quilt til you wilt!
I didn't buy anything specifically for this quilt, just used scraps and yardage on hand.  I love all the dots, and of course all the novelty fabrics.   Especially the frog print.
I turned it in for the last time at our meeting on Wednesday.  I'm sending lots of love and best wishes to whoever ends up with it.

In other news, I'm waiting (patiently?) for the new Bonnie Hunter mystery quilt to start the day after Thanksgiving.  That's only a week from today!  I don't know if I'll make the quilt this year, but I do love the colors.

Because I was thinking about the mystery quilts last month, I got out all the gold and shirting four patches I made for last year's mystery and didn't use.

I tend to make the same mistake with the mystery quilt every year.  I look over the list of colors, and decide to change it, usually to incorporate reproduction fabric scraps, which I literally have by the bushel full.  I follow the steps and make the sections, and then I don't like something about the colors when we get the reveal.  Totally my fault.  With Allietare (last year's mystery) I just couldn't stand the gold with the red, gray, and black.  So these four patches were left out.

At the retreat in October, I made them into Jacob's Ladder blocks.  I cut beaucoup (my grandmother would say boo-koo) triangles with the Accuquilt cutter in fall colors.  These just happened to be the same size I used to make the leaves in my fall leaf quilt, which is still sadly under construction.  (Actually, it's languishing, waiting for a new idea.)
Here's the flimsy, all done.  I also used the same size triangles for the chevron border.  There are thirty 9 in. blocks in the center, a 3 in. finished red border, a 6 in. finished pieced border, and a 4 in. finished outer border of brown and black plaid.
It fits pretty nicely on the twin bed.
This quilt was also made from scraps and yardage already in my stash.
I'm learning more about pieced borders as I go along.  Because I didn't really plan this out on paper, I ended up with two corners one way and two corners another way.  If I had made the inner red border 2 in. instead of 3, it would have fit better.  I'm not a huge fan of the narrow inner border idea, but I would have done it in this case.  Oh well.
Now I just have to quilt it.  And about 20 or 30 other tops.

I'm linking up with Crazy Mom Quilts, and also with Busy Hands Quilts.  Linky parties are so much fun.  I can't wait to see what everybody else has done this week.

Happy Thanksgiving, and Happy Quilting!
Sylvia at Treadlestitches


Friday, November 11, 2016

Sewing and Ripping

Hurray, an actual quilt finish for the week.  I wrote about this little quilt last June (see the post here) when I finished the piecing.  I don't know how long it might have stayed in my to-do pile, except for an approaching deadline for Christmas quilts for the local charity.  Deadlines can be really motivating.
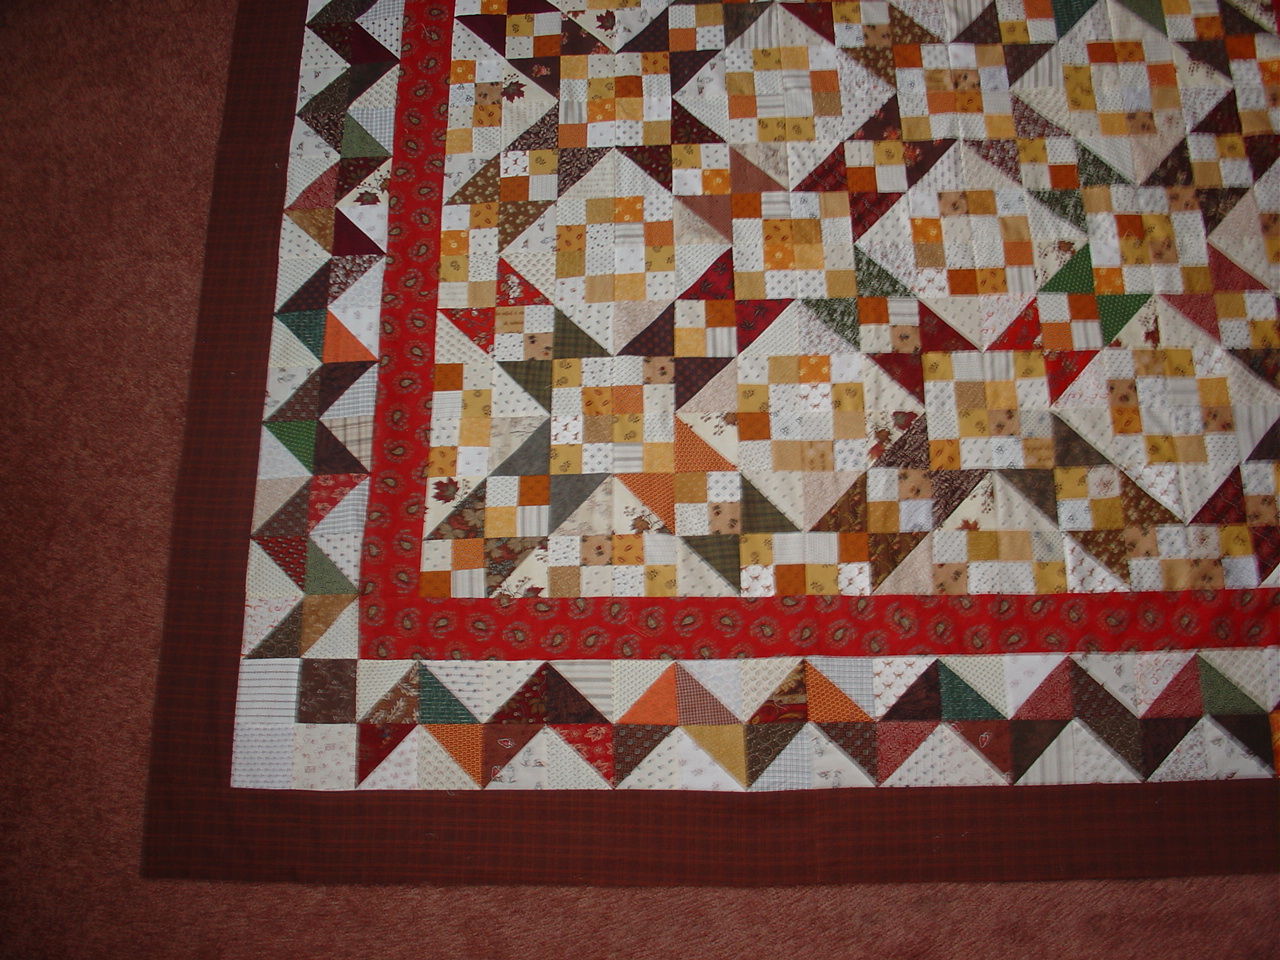
Here's another view, laid out on the floor.  This was a panel, and the top and bottom green borders were originally on the sides, which would have made a square quilt.  I like rectangular quilts, especially if people are going to use them, so that's why I changed it.  (Sometime I'll tell you about the traumatic experience of sleeping under a square quilt as a kid.)
I quilted wavy lines across the quilt from edge to edge, which I think you can see here.  I used a stencil, and marking was a real pain, due to all the different light and dark patches.  I used a chalk marker and a sketch and wash pencil, and I kept saying to myself, "If you can't see it, you can't quilt it".  It didn't occur to me until after I finished that I could have marked the back instead of the front and not had that problem. (sound of hand thunking forehead)
Here's my favorite block, a black sewing machine tied with a bow.
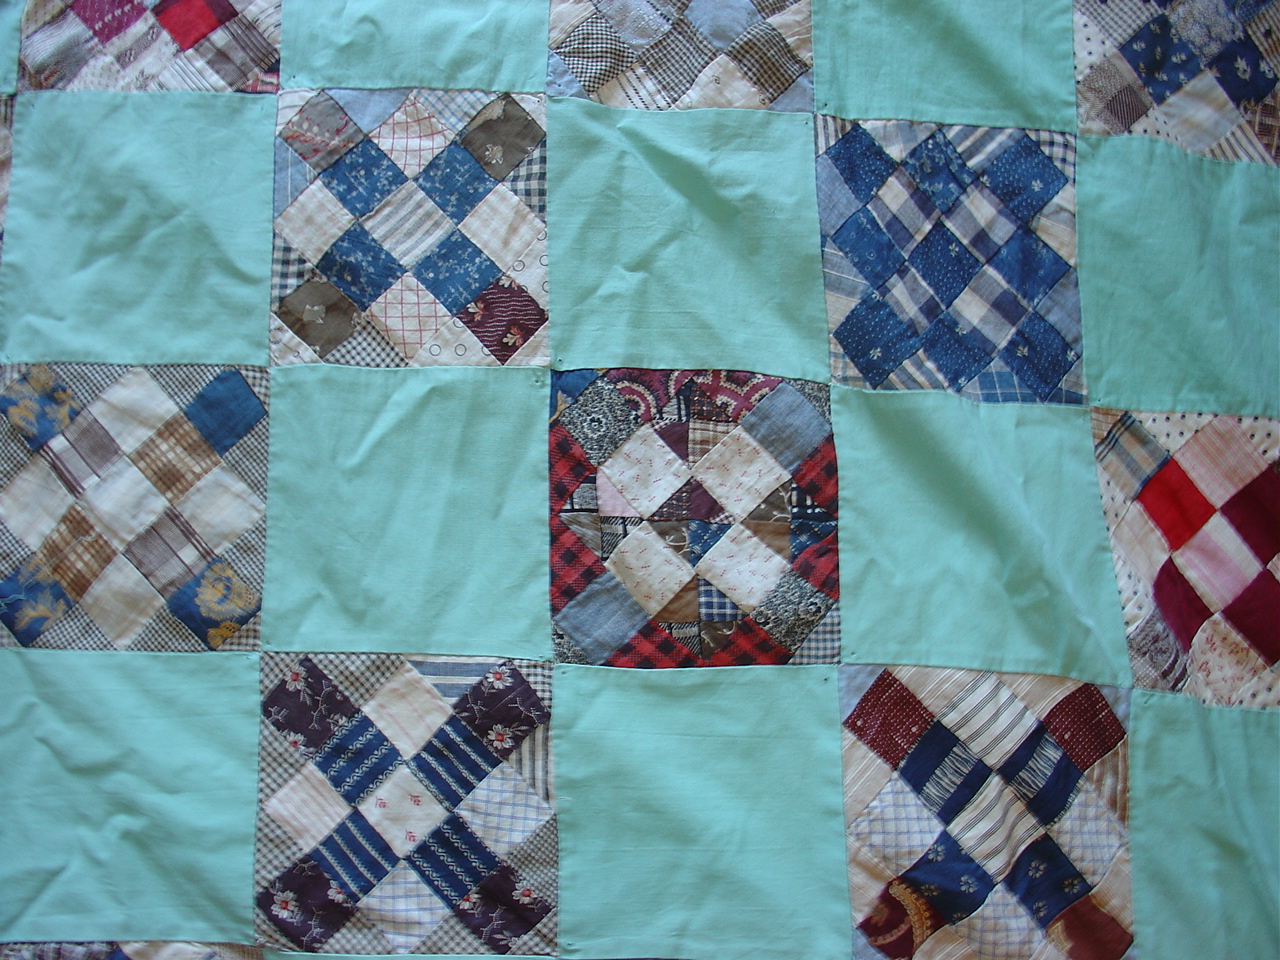
Naturally, while I'm short on time for everything and have a closet full of UFOs, I started another project.  This is a tied quilt I bought at an antique store several years ago.
If it looks odd to you, you have a good eye.  The blocks date from the 1880s or so, and the set is pure 1960s.
The blocks were pieced together with turquoise solid fabric, and tied with brown yarn.  The back of the quilt was brought over to the front as a binding.  There was no batting, just a large piece of unbleached muslin between the layers.
When I saw this quilt in the antique store, I just had to rescue these blocks.  This is my favorite way to study old fabrics--by holding them in my hand.  And there are so many different fabrics here.
So I took it all apart!  It took several days, but here's what I got out of it--61 usable blocks, 16 blocks with shredded fabric, lots of turquoise pieces to cut into squares, a large backing piece, a large piece of muslin to use for backing string blocks, and some border pieces I can cut into strips.
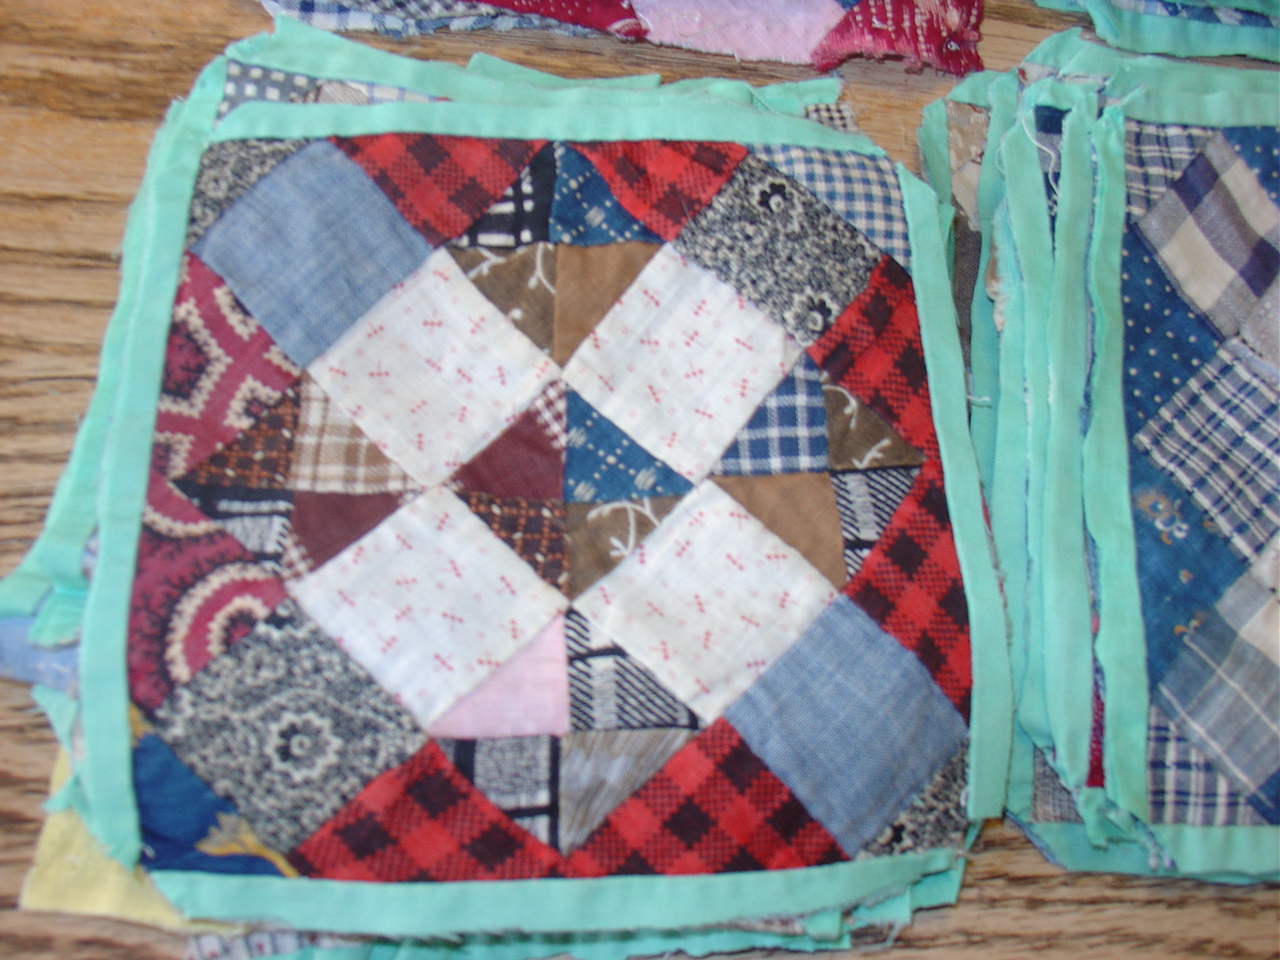
Here are some of the good blocks.  The turquoise edge will either be cut away or unpicked.
These are some of the blocks with bad fabric.  The browns just didn't hold up, mainly because of the dyes used back in the day.
Now I have to figure out what to do with these great blocks.
This one is my favorite.  Look at all the tiny pieces!

No progress yet on the leaf quilt.   I keep looking at it and thinking about it.  Sometimes I hear the Jeopardy theme in my head when I'm staring at it.

It has been a lovely fall week here, with lots of sunshine and temps in the 50s and 60s.  That might sound cool depending on where you live, but in Wisconsin in November it's downright balmy.

My dog and I are going to take a walk later.  Don't tell her, she doesn't know what "later" means and will be jumping at the back door, joyfully barking.

Do something nice for yourself today.  To me, sewing is the nicest thing of all.
Cheers,
Sylvia

P.S.  I'm linking up with Crazy Mom Quilts this week.  Check out all the great blogs linked there!


Sunday, November 6, 2016

Work for My Hands

There's a song I learned in church camp many years ago, that goes "Give me work for my hands, keep me busy, busy, busy, give me work for my hands I pray".  Well, hallelujah, I have work for my hands.  There's plenty to do around here.  My favorite "work" is of course sewing, which really doesn't seem like work at all.

In the photo above, you can see what I've been working on lately.  These are Scrappy Reader Pillows, made for two of my grandchildren for Christmas.  The kids don't read the blog, so I'm not worried about them finding out.  The coolest part of these pillows is the pocket, which can hold a book (or two).
Both kids are major Star Wars fans, so I used Star Wars fabrics for the front and backs of the pillow.  The pockets are patchwork, made from 2.5 in. squares from my stash.
I got the pattern from this book, Growing Up Modern, by Allison Harris (cluckclucksew.com).  It's easy and fast to make, and the directions are good.
I changed the pattern a tiny bit for this pillow.  The Star Wars fabric is so busy, I wanted a stronger separation from the patchwork, so I bound the edge of the pocket with a strip of solid red.  My granddaughter gets this one.  She absolutely loves Chewbacca.

It has been nearly a month since my last blog post, mainly because I've been so busy on the weekends when I usually had time to post.  I went on a quilt retreat, had a family birthday party, went to a baptism, my mom was here on a visit, and we had another big family party.  This fall has been filled with joyful events.
When I last posted, I was making leaf blocks, inspired by the beautiful trees this season.  Here's how I made the stems--I top-stitched them using my Willcox and Gibbs hand crank.  This way I didn't have to change thread colors while piecing or wind bobbins.  The Willcox and Gibbs is a chain stitch machine, so there is no bobbin.  Very handy.
By the time I went on the quilt retreat, I had all the leaf blocks pieced.  Here's how I'm setting them.  Each block has a strip of sashing on two adjacent sides only.  Then the blocks are laid out like this.  I got this idea from Bonnie Hunter.  One of her free quilt patterns is Dancing Nine Patch, which is set this way.
In this corner, you can see at least one example of each of the 5 different leaf blocks I made for this quilt.  I made the traditional maple leaf with a stem (there are 4 of them here), the same block without a stem (the brown one in the lower corner), the same block with a triangle square instead of a stem (the orange block on the far right), a similar block with a dark square in the corner and the triangles turned differently (the middle block in the bottom row in this photo), and a Sweet Gum Leaf block which is made like an Ohio Star (the red one on the right and the yellow one in the bottom row).  I got the pattern for Sweet Gum Leaf from Marcia Hohn's Quilters Cache.  It was in a 12 in. size, so I just adjusted it for the 9 in. size I'm using.
I have the rows of leaves pieced together now in two sections, waiting patiently for me to decide how I'm going to quilt it and what I'm going to do about a border.
I walk past the guest room as I'm putting away laundry, etc., and look in on it, hoping for some inspiration.

In the meantime, I'm working on a pieced border for another fall colors quilt.
And listening to some 1920s dance music on the radio.
Isn't this a wonderful life?
Enjoy your week!

I'm linking up with Quilting is More Fun Than Housework this week.  Take a look at all the great scrap posts linked there--so much fun.