Saturday, January 30, 2021

Last Call for Pink


Welcome to Treadlestitches, and to the last pink week of the Rainbow Scrap Challenge 2021.  This photo of a pink sunrise this week seemed appropriate.

How are you coming along on your pink projects?  We had five Saturdays this month, so I'm less behind than usual.

The rest of my projects have been blocks for baby quilts, made from bright colored scraps and novelty prints.  But I do have a few drawers (and baskets and boxes, etc.) of 1800s reproduction scraps, and I don't want them to be left out of the party.

I'm making Lemoyne star blocks, 2 each month, from the repro fabrics.  In the past, I've made these by hand because I had lots of trouble sewing inset angles by machine.  This time, it's all machine piecing.  I'm hoping practice will help me get sharp points (especially in the center!) and that the blocks will lay flat.  I'm not completely there yet, but maybe by the end of the year!

And as long as I was digging into the gorgeous pink repro scraps, I started another project.  (Well, of course I did.)  It's a Civil War history Block of the Month (BOM), by Barbara Brackman.  (Click HERE for the first post.)  The BOM is called Hands All Around:  Alcotts at War.  Each month, Barbara will give us a star block to piece, plus an in depth post on author Louisa May Alcott and her family during the Civil War.  Ms. Brackman has promised that the blocks will be simple, and easy enough for beginners, which anyone with a busy life can appreciate.

I'm going to try to combine this new project with the RSC.  My plan is to use the same background and the same blue print for the star points in each block, with the RSC color in the center.  We'll see if this is possible.  BTW, did I mention this BOM is free? 

So, this happened Tuesday.  Even though we only got about 7 inches of snow, it fell at just the wrong time, right at morning commute, so schools were closed.  Our high school grandson was just starting back in person instead of virtual, so he got a much-loved day off.  Little Buddy's preschool was closed, too.

Here's what the driveway and street look like now.  We had our first below zero temps this week, so of course nothing has melted.  We're supposed to get a big storm tonight, too.

It's a good thing there's plenty to do indoors.  Baby Buddy and I work puzzles as a team.  He takes the pieces out, and I put them back.

Warning!  Something scary is coming!

It's the Little Buddy-asaurus!  Run!

Little Buddy loves taking pictures with my camera.  He was really proud of this one.  "You can even see my feet!" he said to me.  I guess when my feet accidentally get into a quilt picture I should just roll with it.  His feet are cuter than mine, though.

I didn't get a lot of sewing done this week, but at least I finished enough of these little blocks for a baby quilt.  The clothespins clip together sets of ten.  I'm using 72 blocks, set 8 across and 9 down.

So that's what I'll be working on today.  What's going on in your world? 

Have a lovely week, and stay safe!

Cheers for reading,

Sylvia@Treadlestitches

Join us at the linky parties!
 
I'm linking up with:
Angela at So Scrappy, home of the Rainbow Scrap Challenge
Cynthia at Oh Scrap


Saturday, January 23, 2021

Fresh Off the Treadle

Welcome to Treadlestitches!

I just cannot stop making pink projects!  And to think for years I thought I hated pink.  The Rainbow Scrap Challenge has helped me see that every color in the rainbow is a good color.  Above are my log cabin blocks, made from 2 in. wide scraps.  I made the last one early this morning.

Also this morning, we attended Baby Buddy's baptism (that's the young pastor holding him).  The poor little baby cried even before his head got wet, but he calmed down when it was over.  His cousins even had him laughing.  It was just the family at the church, wearing masks to keep each other safe. 

I think (!) this is my last bright pink project, just half square triangles in pink and white.  I was inspired by this photo of the first American (a nurse!) receiving the Covid-19 vaccine in New York.

Can you see the logo on the wall above for Northwell Health?  It just really caught my eye, especially as part of such an historic occasion.  I'm not sure exactly what I'm going to do with the design, but I definitely need half square triangles.

So, if you're following along at home, that's NINE bright pink projects.  Thank goodness I have a notebook to keep track of them.  (I always buy notebooks at the Back to School sales.)  Maybe I won't have as many math errors this year, if I keep an accurate count of how many blocks I've made.  I also won't have to look for the patterns and measurements every month when a new color is announced.

Those log cabin blocks tried to get in every picture today!  Good thing I didn't take them to the church!  In this picture, I'm enjoying a hot cup of tea in an enormous new pink mug.  There are six different colors of mugs in the set.

This is the box the set of mugs came in.  Are you thinking what I'm thinking?

Scrap storage!  This is a new home for many of my reproduction fabric scraps--5 in. squares in dark and light, 3.5 in. squares, and 2.5 in. x 4.5 in. bricks.  I had to take the divider out to get everything to fit, but it works really well.  Nice and tidy, and ready to go.

This is not tidy at all!  These little squares and rectangles are spread out on my treadle so I can pick the "perfect" ones to make these blocks:

The blocks are small, only 4.5 in. finished, so if my math is right (ha!) I will need at least 64 of them if I want to make a 36 in. square, or 80 of them for a quilt 36 in. x 45 in.   That should keep the treadle pedal pumping.

This picture is a happy surprise I found on my camera.  My Little Buddy borrowed the camera last week, and took lots of photos of toy dinosaurs, plus this selfie of himself with Bella the dog on the couch in the background.  He's an amazing kid.

I hope you have an amazing week, doing things you love to do.  Be well, and stay safe!

Sylvia@Treadlestitches

Linking up with:

Angela at So Scrappy
Cynthia at Oh Scrap


Saturday, January 16, 2021

Rainbows

 Welcome to Treadlestitches!

Lately, I've been thinking about rainbows a lot.  It could be because it looks like this outside.

It's been a pretty mild winter so far in this part of Wisconsin, but the snow lingers on.  The view above is NOT a black and white photo.

Thankfully, there is lots of color indoors.

Like Little Buddy's markers for drawing and coloring,

and a colorful emoji puzzle.  (I had to explain to Little Buddy what emojis are.  He calls them "mojis".)

This was the perfect time to work on my Rainbow Quilt In A Box, which I mentioned a couple of weeks ago.  

Over the last year or so, I have been cutting 2.5 in. x 4.5 in. rectangles from bright scraps, and saving them in this box.  I cut the pieces when I was cutting for other projects, and especially when I could use up a strip.

Back in April, I made the quilt below with some of the rectangles from a free pattern called Brick House shared by Jo Kramer of Jo's Country Junction.  (Click HERE for the pattern.)

(Oh, that's what spring looks like!)

Of course I had leftover pieces.  This week, I put them together like this.

It's a baby quilt, approx. 40 in. x 42 in., and will go to Quilts for Kids.  I don't really have a pattern for it, it's just a classic bricks quilt.

I had to make a chart to keep things organized and to know how many rectangles and squares I needed for each color.  There are two kinds of rows.  The odd rows just have 10 rectangles.  The even rows start and end with a square, and have 9 rectangles.  I made a total of 21 rows.

The rainbow binding came from  my 2 in. strips bag.  The back is this fun print of skates and skateboards and scooters and bicycles and even balloons.  (I love novelty fabrics, can you tell?)

I always learn something when I make a quilt.  This one taught me a couple of things.

1.  Contrast is important!  Some of these rows blur into each other because the colors are very similar.

2.  Having a chart really helps.

3.  I need more dark purple and aqua.  (I think I know how to fix that!)

Baby Buddy posed for me (sort of).  His toys bring a lot of color into the house.  He and his brothers bring the sunshine.

In other news, a baking experiment actually turned out okay!  I used some of my homemade mincemeat as the filling for cinnamon rolls.  Even the pickier grandson (I won't say which one) loved them.

We've got a long winter ahead of us.  In the weeks and months ahead, we're going to need our strength, our common sense, and our connections to each other.

I'm going to keep looking for the rainbows.  Have a good week, and stay safe!

Linking up with:

Angela at So Scrappy
Cynthia at Oh Scrap
 

Saturday, January 9, 2021

Pink!

 Welcome to Treadlestitches!

It's been a very strange start to 2021.  Thank goodness for the Rainbow Scrap Challenge, to help us keep our hopes up and focus on something besides the horrors in the news.

I have often whined about not liking pink.  So where did all these pink scraps come from?  No matter, they have to get used up, and sewing these blocks is so much fun.

These are 6 in. finished blocks:  friendship star, plus blocks (aka ninepatch), and crumb hearts.  There is a temptation to call them "broken" hearts because of all the little pieces, but I'd rather think of them as Patchwork hearts, full of all kinds of things to love.

But wait, there's more!

These little blocks have a 2.5 in. cut square for the center and 2.5 x 4.5 in. rectangles around it.  The secret to making them like this is using a partial seam for the first seam.  Easy, and uses up 2.5 in. strips and squares.

Now for the 8 in. finished blocks!

I'm making Happy Blocks, with 4.5 in. cut centers and 2.5 in. cut strips around them.  (Click HERE for the tutorial.)  I'm cutting the centers from fun prints, mostly my favorite novelties.  The stars have 4 patch centers made from 2.5 in. squares, with the star points and backgrounds cut from 2.5 in. strips.

Also, this.

Ice cream cones!  I was inspired to make these by reading the Making a Lather blog, by Maggie Fellow.  (She makes so many great scrap quilts!) I looked at several patterns on the internet, and finally just decided to figure it out myself.  The cone part is cut with the Tri-Rex rulers, and the top is a 4.5 in. cut square with little background corners to sort of round out the ice cream.  The background is a dessert print, with cake and cupcakes and ice cream.  I will see how many blocks I can get out of it before I have to switch to another background.

Quilters, I know what you're thinking, and you're right.  This is a lot of projects!  But I do have a plan.  

One of my greatest joys is making quilts for babies and children.  They are donated to good causes, like kids in foster care or hospitals, or to families welcoming a child with Down's Syndrome.  This year, I'm making blocks for those quilts as I participate in the Rainbow Scrap Challenge.  When we come to the end of the year, I will have enough blocks to make a nice stack of quilts to give away.  (There won't be pink blocks in every quilt though, since many charities request gender-neutral quilts.)

And about pink--I'm finding that I actually like it!

I think I know where some of the pink scraps came from.  For years, it was my granddaughter's favorite color, and I made her a few things with it.  Miss E. is a joy, and it was so good to see her at our social distanced holiday party last weekend.  In the photo above, she's wearing a mask, and playing with slime she got for Christmas.  Little Buddy thinks slime is the greatest thing ever.  Little Buddy, who is 4, and Baby Buddy (now 10 months) were the only ones not wearing masks for the lunch-and-presents party.

I hope you're feeling "in the pink" today, and ready to take on the challenges of this new year. Let's keep planning, keep hoping, keep looking ahead to a better future.

And let's eat ice cream!

Cheers for reading this!

Sylvia@Treadlestitches

Linking up with:

Angela at So Scrappy
Cynthia at Oh Scrap 


Friday, January 1, 2021

Happy New Year!

 Welcome to Treadlestitches!  Happy 2021!

The Quilt as You Go tutorial, Part One, is up!  You can access it HERE.  Let me know what you think!


Are you ready for a new year of quilting?  I'm looking ahead to weeks and months of happy sewing, starting with this Rainbow Quilt in a Box.  I'll show you what this is once I starting actually working on it.  Can't wait!

But first, I had to do this.

The little tag says "new blades".  A new year of cutting up scraps deserves a fresh blade, right?  (Yes, I do change it more often than once a year!)

I use this canning jar lid lifter to safely move the sharp old blade out and the extremely sharp new blade from the package to the cutter.  This tool is basically a magnet on a stick.  Of all the quilting innovations in the last 50 years, the rotary cutter is my absolute favorite, but we do have to be careful with it.

A new year is a good reason to try new things!  Yesterday, I made a jar of mincemeat from an old recipe that fell out of my cookbook.  There's no meat in it, just apples, apricots, and raisins with honey and spices, and a tiny bit of brandy.

And making mincemeat led to making some little mince pies.  Jo Kramer of Jo's Country Junction showed how she made cute little pies with canning jar lids and rings for the little pie pans.I followed Jo's recipe HERE and just made mine with mincemeat.  A successful experiment!  I do have a lot of mincemeat left, though.  I guess that means more pies!


 Guess who's trying to learn to walk!  Here he is, my Baby Buddy.  He is getting around so quickly now, and pulling up on everything.  Look out, cat!

Baby Buddy's big brother, Little Buddy and I played in the snow on Wednesday.  He pretended to be a T-Rex, his very favorite dinosaur, and I was the paleontologist following his tracks.

Being outside was fun, but he could hardly wait for a cup of hot chocolate when we came back in.

Some pink sewing will be happening soon  for the 2021 Rainbow Scrap Challenge.  I'm finding I like the color pink better than I used to.  Who knew?

While we don't know what the new year will bring, I'm heading into 2021 with appreciation for all the blessings in life, and hope for what's to come.  And lots of ideas for quilts to make!

Again, Happy New Year!

Cheers for reading this,

Sylvia@Treadlestitches

Linking up with:

Angela at So Scrappy, Home of the Rainbow Scrap Challenge
Cynthia at Oh Scrap 


Quilt by the Block Tutorial: Quilts with Sashing, Part One

 Welcome to something new, a Treadlestitches tutorial on quilting by the block. 


 If you follow this blog, you know that I do a lot of quilt-as-you-go.  This just means I quilt my quilts in sections, rather than as one whole unit.  These techniques have been around a long time, at least a hundred years, and can be done by hand or by machine.  I choose to quilt my sections by machine.

The technique I'm showing here requires some hand work, as do most quilt as you go methods.  This particular tutorial shows how I quilt by the block on a quilt with sashing between the blocks.

Here's why I quilt this way.

1.  It's much easier to quilt something small than something big.  I don't have to worry about how much throat space my domestic sewing machine has (or doesn't have).

2.  I can easily turn the block while I'm quilting, to do any sort of design I like.  Many of my quilts are reproductions, and quilt as you go makes it possible to do old fashioned outline quilting or stitch in the ditch, or even fancy motifs.  (Not too fancy--I don't free motion quilt.  I'm using my Pfaff's built-in walking foot.)

3.  Quilting by the block is much easier on me physically than quilting a large quilt.

 So that's the why!  Now for the how.

Step One:  Make quilt blocks. (No problem!)  Size doesn't matter, but larger blocks will be a more efficient use of materials.  My blocks in this tutorial are 12 in. finished.

Step Two:  Decide on a sashing fabric, and a width for it.  My sashes in this example are 2 in wide finished.

Step Three:  Cutting.  

A.  Cut the sashings and cornerstones from your preferred fabrics, just as you would do for any other quilting method.  In this example, I cut my sashings 2.5 in. wide and 12.5 in. long.  The cornerstones are 2.5 in. squares.

B.  Cut the batting.  When I quilt these blocks, I will be quilting each block plus one sashing as one unit.  I cut the batting the finished size of the unit.  In this case, that's 12 in. x 14 in.  The exception is the last block in each row, which does not have a sashing.  I cut a 12 in. square of batting for that unit.

I don't want the batting to be caught in the seam, because of the thickness it causes.  This is why I cut it to the finished size of the unit.

Batting scraps are ideal for this method.  Long strips of batting will be needed for the sashing rows between the block rows, as well as the borders.  We will cut that later.

C.  Cut the backing.  More backing is needed for this method than is used if the quilt is quilted in one piece.

This is where my way differs a little from other instructions.  I cut the backing sections for most of the blocks 14.5 in. wide (exactly what you need for a 12 in. finished block and a 2 in. finished sashing), but I cut them 15.5 in. long.  This makes what I call a "shirt tail".

Here's the backing,  right side up.

 Backing pieces for the last block in each row are cut 12.5 in. wide and 15.5 in. long.

Step Four:  Sewing Sashings

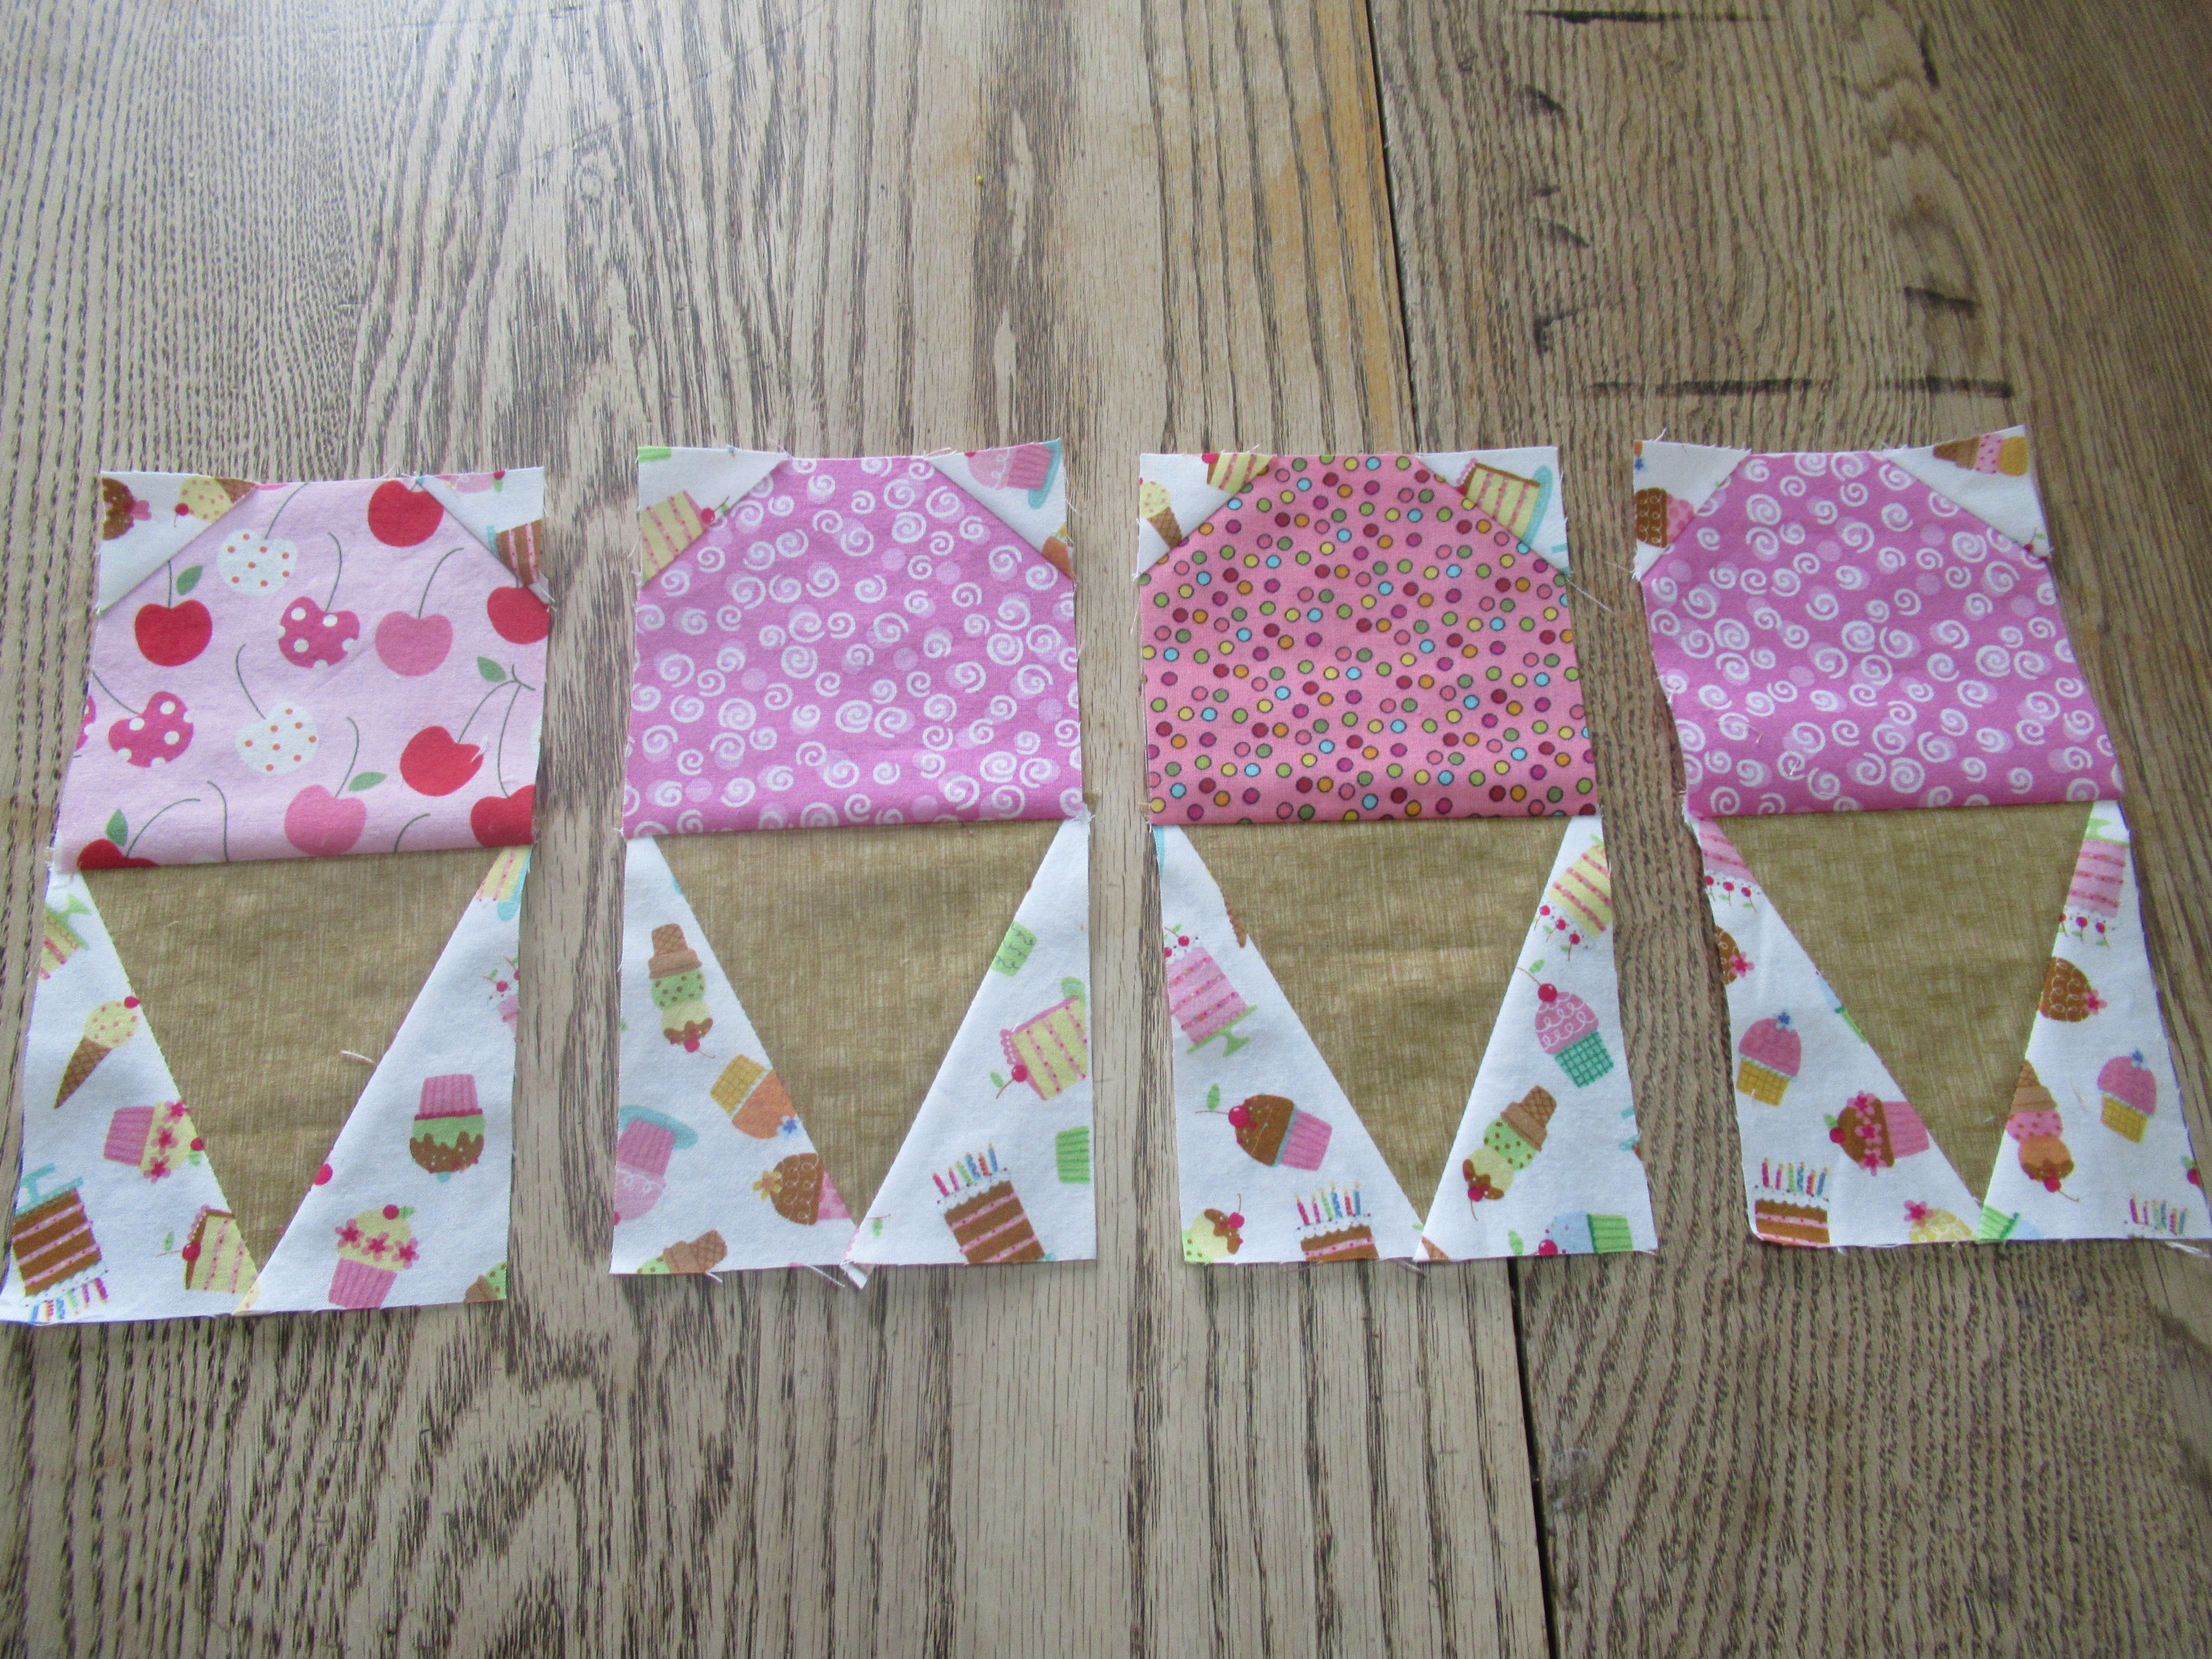
In each of my rows, there are five blocks and four sashing strips.  Before I start quilting, I sew a sashing strip to each block in the row, except for the last block.  I do NOT join anything else together.  I end up with a pile that looks something like this:

I make the sashing and cornerstone rows just the same as I would do for any other quilt.

Step Five:  Layering

I lay the backing piece wrong side up, and place the batting piece on top of it.

It's hard to see in this photo, but the batting is narrower than the backing.  (Remember, I'm trying to keep the batting out of the seam.)  The extra backing below the batting is the "shirt tail".  This will become the backing for the sashing row later on.  (Don't worry about this now.)
 

The block plus sashing unit is ready to go on top, and the first block in the row is ready to quilt!

Step Six:  Quilting

Now for the fun part!  Quilt the first block in the row anyway you like.  You can baste it first if you like, with pins or spray.  Sometimes I just press it well and go straight to quilting.  Warning:  Do NOT baste any other quilt blocks in the row yet!!

Here's another warning:  You can quilt up to the edge of the BLOCKS, but do not quilt the right edge of the sashing, where my little scissors are pointing.  This must remain loose to attach the next unit.  

To attach the next block-sashing unit:

Here's what the first unit looks like, with the sashing edge pulled back.  You can see all 3 layers--sashing, batting, and backing.

I sew the sashing from Block #1 to Block #2, raw edge to raw edge.  I do not catch anything else in the seam.

I press the seam.  Just a reminder, the second block is not quilted yet.

Here's what it looks like on the back.  The next step is to sew the backing for Block #2 to the backing from Block #1.

Again, there are only two layers to this seam--the backing from Block #1 and the backing from Block #2.  (By the way, I'm sewing this seam on my treadle.  All the quilting is happening on the Pfaff.)

This is what it looks like opened up.  Block #2 is on the left, folded out of the way.  Now it's time to lay in the batting for Block #2.

Like this!

And then smooth over Block #2, which is now ready for basting and quilting.

This is what it looks like on the back.  I press both front and back to make sure everything is smooth and lying flat.
 

Now I can quilt the first sashing.  For this quilt, I'm running a line of serpentine stitch about a quarter inch from the seam, where my little scissors are pointing.  You can also see I've gotten ahead of myself and quilted the second block.

From here on out, you just repeat these steps.  

1.  Quilt the block, leaving the sashing unquilted.

2.  Attach the next block to the front only.

3.  Attach the backing for the next block to the back only.

4.  Press the seams.

5.  Lay in the batting.

6.  Baste (if desired).

7.  Quilt the block.

When you finish the row, all the blocks and sashings will be quilted, and there will have been no hand work at all.  (It's coming!  But not yet.)

Adding the Sashing Row

The last thing to do to complete the row is to add the sashing row to it.  In this example, I have six rows, but will only be adding sashing rows to five of them.

In this photo, I have laid the sashing and cornerstones row right sides down against the quilted row, and pinned it.  Note the "shirt tail" backing fabric on the far right.  It needs to lay there just like that.

I am sewing through 4 layers here--the 3 layers of the quilt plus 1 layer of sashing row.

After the row is sewn, I press the seam away from the blocks.  Did you notice the edge of the shirt tail extending beyond the sashing row?  It is larger on purpose.

Do Not Quilt the Sashing Row Yet!!!

Part Two of this tutorial will cover sewing the rows together (with some dreaded hand work) and adding borders.

Thank you for reading through this!  I hope it makes sense.  I am far from a pro at writing instructions!  If there is anything you have a question about, please ask in the comments and I'll address it. 

Happy Quilting!

Sylvia@Treadlestitches