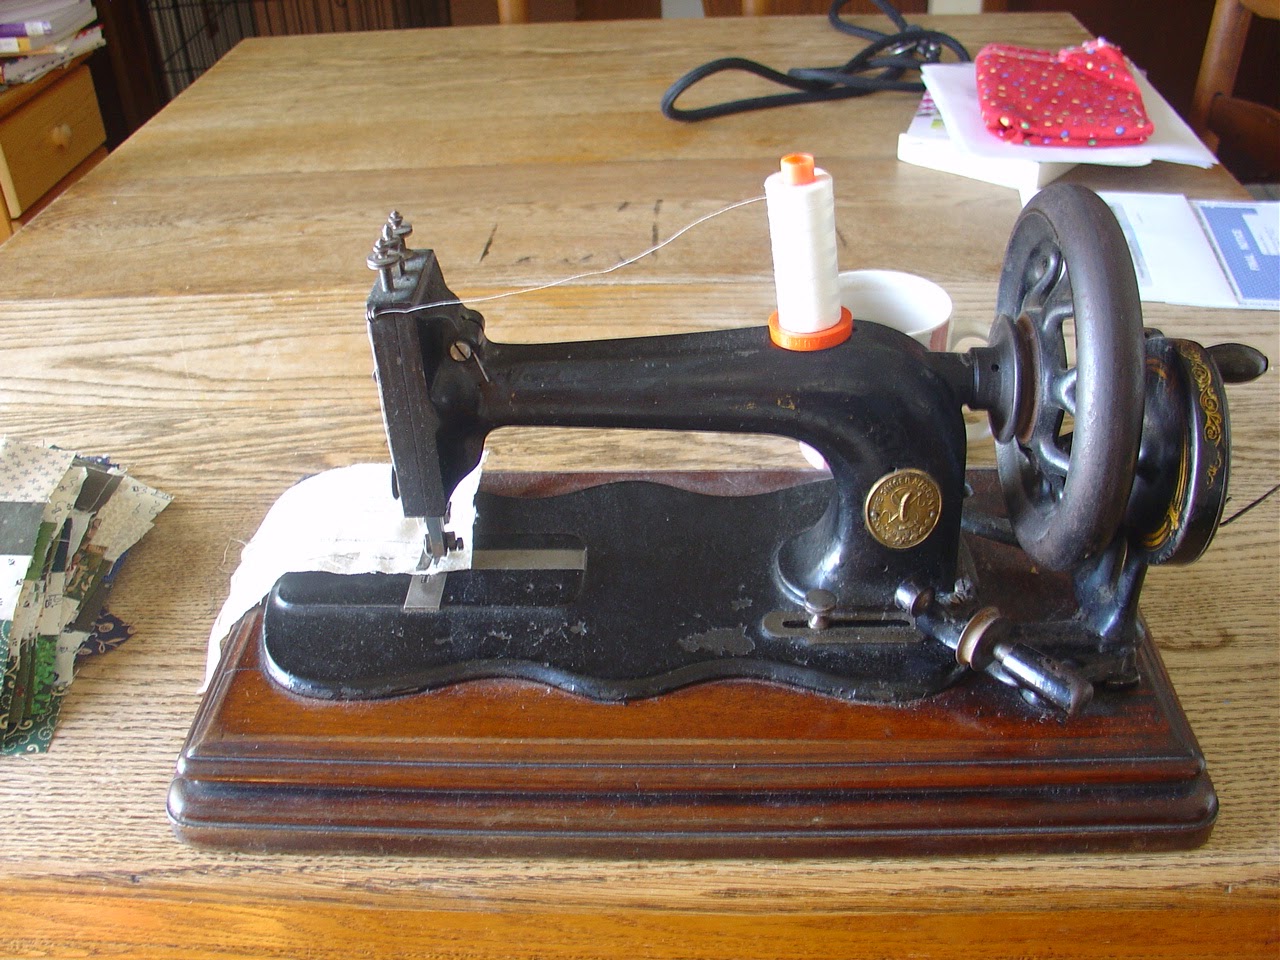
Yesterday I took my show on the road, to the Wisconsin Museum of Quilts & Fiber Arts. These lovely ladies went with me, to help with my lecture about the Scandalous History of the Sewing Machine.
I took my prettiest and most unusual handcranks. Naturally that included the German machines with mother of pearl inlays ...
and of course my Willcox and Gibbs. I had a wonderful time, visiting with the participants and sharing my love for the old machines.
I also got to use this beautiful Singer treadle owned by the museum. It's a model 27, with the pheasant decals, in an amazing cabinet. She dates to 1902-1903, and sews like a dream.
Speaking of sewing, I have managed to get some done this week. I'm still working on baby quilts, using the fabric from the baby shower.
Here's another one finished! This one has adorable Jungle Babies print. It was tough to find the right colors to go with it, until I tried brown. This one seems to work.
I had a nice big piece of blue with white polka dots, so that went on the back. The binding is the same fabric as the brown squares.
It was all ready to go to a charity when my daughter (who loves this fabric) asked if she could have it for her baby. How could I say no? I'm happy to make as many as she would like.
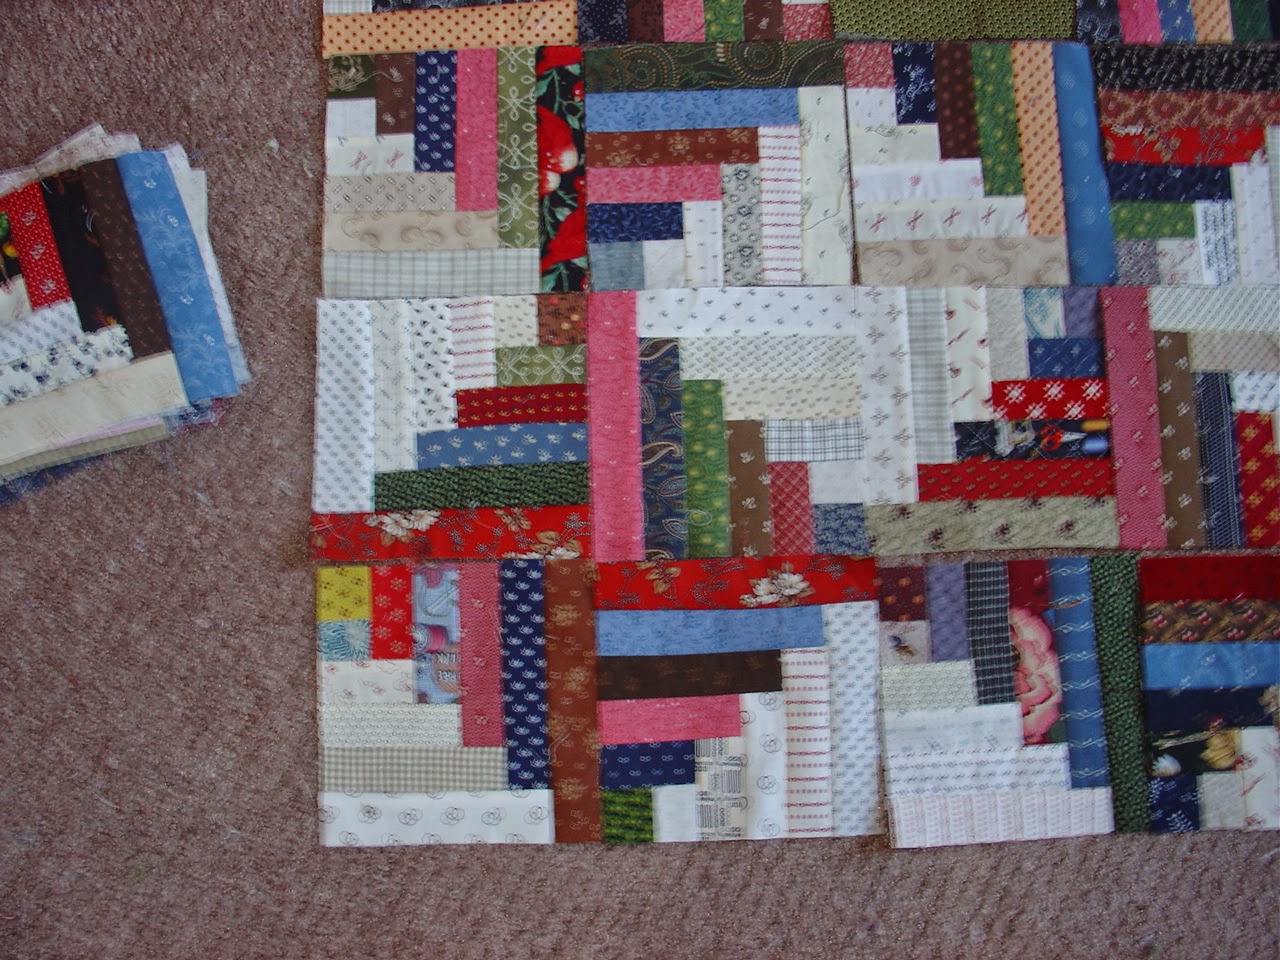
I have 4 more tops to quilt that can go to the charities (see the photo above), and there is still LOTS more fabric.
So I guess I'd better get to work!
Have a lovely week.
Showing posts with label vintage sewing machines. Show all posts
Saturday, May 14, 2016
Tuesday, February 2, 2016
Living in the Past
One of our most famous quilt historians is Barbara Brackman. Her Encyclopedia of Pieced Quilt Patterns is used as the definitive reference for most of the quilt documentation projects which are digitized at the Quilt Index. She also has a terrific blog. Here's the link: Barbara Brackman's Material Culture
I had been neglecting my blog reading for a while, and just stumbled across something wonderful last November. It was Barbara Brackman's Stars in A Time Warp Quiltalong. It started in January of 2015, and featured a post per week on different fabrics and prints in quilt history.
It was like taking an in-depth class, for free! Each week participants made 6 in. star blocks using reproduction fabrics of the type featured in the blog post.
Since I started late, I could progress through the lessons at my own pace. I rooted through all my scraps and yardage, looking for just the right pieces. I unearthed fabric from the basement, digging for treasure. My sewing room looked like a bomb went off.
And here is the result:
This is quilt #1. It's a medallion set, with most of the fabrics reproducing the earlier part of the 19th Century. The center is the bird block at the top of this post. The bird is a reproduction of a chintz made by John Hewson of Philadelphia.
It's not a big quilt, which would have been more typical of this time period, but it fits a twin bed.
It was so much fun choosing the fabrics! The center of the star above came from a scrap of curtain fabric I bought at a flea market.
Many of these fabrics have been in my repro stash for years.
This border is from 2000!
So that's the first quilt. Here's the second one:
It was hard to get it all in one photo. There are borders on all four sides, BTW.
Most of these reproduction fabrics copy the last half of the 19th Century. I tried to use 4 fabrics in each block for the sake of variety.
The center of the blue block above is a toile with scenes from the life of Abraham Lincoln. The fabric in the corners of the Lincoln star shows clasped hands and says The Union For Ever.
Stars in A Time Warp is still up! Here's the link: Stars in A Time Warp
So how am I going to quilt them? I think I want quilting designs that work with the time periods. Got any ideas? I'd love to know what you'd do. Leave a suggestion in the comments.
In other news, there's a "new" old sewing machine in my sewing room.
This is my Singer 9W. She's been on a shelf in the basement for a few years, waiting for her turn to get back to work.
I had of course cleaned and oiled her and got her sewing when I first bought her, but this is her real shake-down cruise.
The Singer 9W is a sort of hybrid between a Wheeler and Wilson and a Singer. In fact, she mostly takes after the Wheeler and Wilson side. Singer took over the Wheeler and Wilson factories after they went out of business in 1905, and produced the 9W until around 1913. So my machine is at least 100 years old.
The good news is, she works very well! She has a nice consistent stitch, and so far not a smidge of tension troubles. However, there are some things that I'm having to get used to. For instance, the hand wheel turns AWAY from you, like a White, not like a Singer. And the bobbins are very interesting.
The Singer 9W takes a round, flat bobbin. This shows it in place.
This is what it looks like when you take the bobbin out. It's hard to see here (not a good photo), but the bobbin goes in on a little lever, which you close when the bobbin is in place.
Winding the bobbins is a tad primitive. You guide the thread onto the bobbin with your fingers, moving it gently back and forth to fill the bobbin evenly. It reminds me of the Singer model 12 in this aspect.
In the photo above, you can see two bobbins on the machine bed. The nearer one is an old bobbin, original to the machine. I have 2 old bobbins, plus some newer ones originally made for a Featherweight. Some of the Featherweight bobbins work, and some don't, because they are just a tiny bit too big to go in the machine.
I'm a 21st Century woman, and I really wouldn't have it any other way. I like being able to vote, having better health care, occasional airplane travel, radio, television, telephones, indoor plumbing, oh, yes, and the internet. But it's fun to wander through the past and discover how things used to be. And if it involves sewing and quilts, sign me up!
Happy Quilting!
Tuesday, April 14, 2015
Falling in Love Again
This was not supposed to happen. I am a treadle-onion, one who loves and uses antique and vintage sewing machines, mostly people-powered. I see them, and my heart goes pitty pat. I buy them and clean them and oil them and thread them and sew with them.
Like this one. It even has my name on it! I sent all the way to England for it. What could be better than this? Why would you need anything else?
Well, maybe a sweet little Willcox and Gibbs chainstitcher.
Or a nice old Minnesota A in a parlor cabinet.
I really thought I had everything in a sewing machine I could ever want--until I met my Pfaff. (sound of harps and angels singing).
Now, mind you, she does have her faults. She's noisy. Instead of the tickety, tickety sound of a treadle, there's a humming motor. And she is absolutely not portable. (For portability, a featherweight is best every time.) As to appearances, she's strictly utilitarian. No decals, no brass badge, no bent wood case.
She didn't seem to have much personality. So I tried to think of her as just a tool, like a rotary cutter or a seam ripper. I pieced on my favorite machines, and did the quilting with the Pfaff.
I wasn't supposed to fall in love with her. But, like Marlene Dietrich, I cahn't help it.
Time after time, she quilts. No drama, no problems, no temperament. The built in walking foot combines with my pin basting and makes the quilting actually easy.
I am almost embarrassed to write this next part (and I should be!). All along I have been following the instructions I got from the guy who sold me the Pfaff. I clean and oil the rotary hook area after every other bobbin change. I unplug the machine when I'm not using it so she won't have a power surge. BUT--last night was the first time I changed the needle since I bought the machine! (face plant) I just didn't even think of it. I have quilted LOTS of quilts with this same needle. And this wonderful piece of German engineering just kept making beautiful stitches.
So that seals it. I'm in love. And now of course I've got an earworm of Marlene Dietrich that just won't go away.
At least my cat is enjoying the Minnesota A.
In other news, I finished making the half log cabin blocks from 1.5 in. strips. This is a stack of 120 of them.
And here's what's left in the drawer! At least I can close it now.
I saw this in a shop window on Michigan Avenue in Chicago last week. It was hard (okay, impossible) to get a good photo in the bright sunlight, but I'm sure you can see it's a Singer Redeye treadle.
Here's another photo, this time with the reflections of my grandson and me.
I hope you're enjoying good weather this week. We certainly are!
Make time for sewing. It's worth it.
Like this one. It even has my name on it! I sent all the way to England for it. What could be better than this? Why would you need anything else?
Well, maybe a sweet little Willcox and Gibbs chainstitcher.
Or a nice old Minnesota A in a parlor cabinet.
I really thought I had everything in a sewing machine I could ever want--until I met my Pfaff. (sound of harps and angels singing).
She didn't seem to have much personality. So I tried to think of her as just a tool, like a rotary cutter or a seam ripper. I pieced on my favorite machines, and did the quilting with the Pfaff.
I wasn't supposed to fall in love with her. But, like Marlene Dietrich, I cahn't help it.
Time after time, she quilts. No drama, no problems, no temperament. The built in walking foot combines with my pin basting and makes the quilting actually easy.
I am almost embarrassed to write this next part (and I should be!). All along I have been following the instructions I got from the guy who sold me the Pfaff. I clean and oil the rotary hook area after every other bobbin change. I unplug the machine when I'm not using it so she won't have a power surge. BUT--last night was the first time I changed the needle since I bought the machine! (face plant) I just didn't even think of it. I have quilted LOTS of quilts with this same needle. And this wonderful piece of German engineering just kept making beautiful stitches.
So that seals it. I'm in love. And now of course I've got an earworm of Marlene Dietrich that just won't go away.
At least my cat is enjoying the Minnesota A.
In other news, I finished making the half log cabin blocks from 1.5 in. strips. This is a stack of 120 of them.
And here's what's left in the drawer! At least I can close it now.
I saw this in a shop window on Michigan Avenue in Chicago last week. It was hard (okay, impossible) to get a good photo in the bright sunlight, but I'm sure you can see it's a Singer Redeye treadle.
Here's another photo, this time with the reflections of my grandson and me.
I hope you're enjoying good weather this week. We certainly are!
Make time for sewing. It's worth it.
Tuesday, March 31, 2015
Half Log Cabin Quilt Block Tutorial
So much strippy fun this week! I'm making half log cabin quilt blocks, from 1.5 in. strips. I started these as leaders and enders, but they have a way of breaking out and becoming the main project.
In the last blog post, I showed a picture of the overflowing drawer these strips usually live in. Since then, I have divided them into dark and light strips, and put them in baskets. The strips on the desk are shorter ones, to use first.
Think I'll have enough strips? When I took this picture, I had already made 75 blocks.
This is what the blocks look like. There are 5 light strips and 6 dark strips. The blocks measure 6.5 in. if you sew them perfectly. Mine are not all perfect, so I'm trimming them all to 6.25 in. to match the smallest ones.
Here's the layout I decided on--Sunshine and Shadows. There is not much seam matching in this layout, and I've always wanted to make one like this.
This is a closeup. I will probably move these around a lot before I finally settle on which block goes where. Just looking at this photo makes me want to switch some of them. Right now I see a lot of pink in the blocks, which kind of surprised me.
I consulted a couple of books before deciding how to sew these. My method is a lot like how I sew string blocks, and is a fun way to work if you like scraps.
Okay, here we go.
Step 1: Sew two 1.5 in squares together. One square is light, and the other is dark. Easy peasy.
You can sew strip sets if you want to have several blocks with the same centers. I didn't, so I cut squares. Press toward the darker square. Press after each addition.
Step 2: Add a dark strip to the side of this unit. Put the pieced unit face down on the dark strip, with the light square at the top, and sew. Press toward the new strip.
Trim the strip even with the pieced unit. I use (gasp) scissors and eyeball it. You could use a rotary cutter if you like. You will be doing this with each strip added from now on.
Step 3. Now add a light strip to the pieced section. Lay it out like this, put the pieced section down on top of the strip, and stitch. Press and trim.
You will be repeating these steps over and over. Be careful, and keep the seam ripper handy--it is very easy to get mixed up.
Step 4: Add another dark strip.
Here's how the block should look each time you add a dark strip. Notice where the first dark square is. (It's the one with the dots.)
Step 5: Adding a light strip. Notice where the beginning square is here? The blocks should always be in this position when adding a light strip.
Naturally, I'm chain sewing the blocks, but I like to have ten or so of them going at a time, at different stages. I don't want any of my blocks to be exactly the same, so I don't add them to the same strips of light and dark. I take the blocks to the iron after each round, and I add in new ones to replace ones I've finished.
When I trim a strip, if there is only enough left for a 1.5 in. square, I put those pieces in this little basket on the treadle cabinet. Then I can pull pieces from here to cut for the center squares. (If the trimmed piece is smaller than a 1.5 in. square, I actually throw it away!)
Here's our block, all finished. I have pressed it, and trimmed it to size.
And here's the back, with the seams all pressed toward each new strip as added.
You could just keep going, if you wanted larger blocks. I kind of like these little ones. I think I'll need at least 120 of them for a twin sized quilt.
In other news, UFO#4 is pin basted and ready to quilt. If I could just stop sewing these half log cabin blocks...
Spring is trying to break through today, and the dog and I need a walk.
Have a wonderful week!
In the last blog post, I showed a picture of the overflowing drawer these strips usually live in. Since then, I have divided them into dark and light strips, and put them in baskets. The strips on the desk are shorter ones, to use first.
Think I'll have enough strips? When I took this picture, I had already made 75 blocks.
This is what the blocks look like. There are 5 light strips and 6 dark strips. The blocks measure 6.5 in. if you sew them perfectly. Mine are not all perfect, so I'm trimming them all to 6.25 in. to match the smallest ones.
Here's the layout I decided on--Sunshine and Shadows. There is not much seam matching in this layout, and I've always wanted to make one like this.
This is a closeup. I will probably move these around a lot before I finally settle on which block goes where. Just looking at this photo makes me want to switch some of them. Right now I see a lot of pink in the blocks, which kind of surprised me.
I consulted a couple of books before deciding how to sew these. My method is a lot like how I sew string blocks, and is a fun way to work if you like scraps.
Okay, here we go.
Half Log Cabin Block Tutorial
You can sew strip sets if you want to have several blocks with the same centers. I didn't, so I cut squares. Press toward the darker square. Press after each addition.
Step 2: Add a dark strip to the side of this unit. Put the pieced unit face down on the dark strip, with the light square at the top, and sew. Press toward the new strip.
Trim the strip even with the pieced unit. I use (gasp) scissors and eyeball it. You could use a rotary cutter if you like. You will be doing this with each strip added from now on.
Step 3. Now add a light strip to the pieced section. Lay it out like this, put the pieced section down on top of the strip, and stitch. Press and trim.
You will be repeating these steps over and over. Be careful, and keep the seam ripper handy--it is very easy to get mixed up.
Step 4: Add another dark strip.
Here's how the block should look each time you add a dark strip. Notice where the first dark square is. (It's the one with the dots.)
Step 5: Adding a light strip. Notice where the beginning square is here? The blocks should always be in this position when adding a light strip.
Naturally, I'm chain sewing the blocks, but I like to have ten or so of them going at a time, at different stages. I don't want any of my blocks to be exactly the same, so I don't add them to the same strips of light and dark. I take the blocks to the iron after each round, and I add in new ones to replace ones I've finished.
When I trim a strip, if there is only enough left for a 1.5 in. square, I put those pieces in this little basket on the treadle cabinet. Then I can pull pieces from here to cut for the center squares. (If the trimmed piece is smaller than a 1.5 in. square, I actually throw it away!)
Here's our block, all finished. I have pressed it, and trimmed it to size.
And here's the back, with the seams all pressed toward each new strip as added.
You could just keep going, if you wanted larger blocks. I kind of like these little ones. I think I'll need at least 120 of them for a twin sized quilt.
In other news, UFO#4 is pin basted and ready to quilt. If I could just stop sewing these half log cabin blocks...
Spring is trying to break through today, and the dog and I need a walk.
Have a wonderful week!
Monday, January 26, 2015
Leftovers
The blocks in this quilt are made from leftovers from part 3 of the Grand Illusion Mystery Quilt by Bonnie Hunter.
We were supposed to make 120 units that look like this--one blue, 4 greens, 3 neutrals.
I kind of got stuck on this part. The piecing was easy, but I was making each part on a different people-powered machine, and for this one I chose my oldest treadle, a Singer model 12.
This is a picture I took while making these blocks. Bonnie's directions had us sew sets of 4 strips together and cut them into sections. It worked better for me to make 2-strip sets and cut pairs to sew together.
This machine was made in 1876, and is nicknamed Lorena. She needed a little more oil, and sewed just fine, but she was a little balky about winding bobbins. You use your left thumb or forefinger to apply tension when winding the bobbin, and your right hand to press the bobbin winder (that stickety-out thing on the right of the picture) against the hand wheel. If the machine isn't running very smoothly, the wheel won't turn freely.
So what to do with the leftovers? I had 60 sets made. So I turned them into 30 blocks, like this:
The squares in this block measure 1.5 in. finished, and the block itself finishes at 6 in. square.
According to Barbara Brackman's Encyclopedia of Pieced Quilt Patterns, this is a variation of block 1102a, which is called Mosaic #20.
By the way, this particular block is a leftover of the leftovers. The flag square has a tuck in it--oops! This may be destined to become a pot holder.
Lorena, the model 12 treadle, lives in my basement. About the time I was working on these blocks, we got a real cold snap, with lots of below zero temperatures. It was just too cold to work in the basement, so I brought my model 12 hand crank upstairs and finished the blocks on it. This is a real Frankenstein of a hand crank, with the parts of at least 3 machines. (I call her Frankencrankin.)
I made 20 more blocks, for a total of 50.
Here's how I set the blocks together.
It's a little wrinkled from being folded. I positioned the blocks with the blue corners touching.
I love this setting fabric! It comes from my favorite quilt shop in the world, J. J. Stitches in Sun Prairie, Wisconsin, and was designed by the shop owner, Julie Hendricksen.
Now I have to figure out the border, and then get going on the quilting. The quilt is a small twin size, so it should be too hard to quilt on my home machine.
One of the reasons I simply had to have my model 12 treadle was the folding top. Want to see?
Here's what she looks like, all closed up and locked (the key is in the lock here).When you unlock the top, the front folds back and the sides fold down.
The sides are ready to fold back, and the front is leaning against the wall here. It eventually folds completely down behind the machine. It locks against the other section so it stays in place.
And here's how it usually looks, with the top folded flat to become a sewing surface. Isn't this cool?
Sad to say, I don't use Lorena to sew very often. I can't buy new needles for her, although I have a small supply of new old stock. It's amazing how well she sews after nearly 140 years.
Good news for me--leftover lasagna and French bread for lunch!
What's under your needle this week?
Subscribe to:
Posts (Atom)


I